Do you have a question about the Isotherm Classic Compact 2503 and is the answer not in the manual?
Inspect contents for shipping damage and notify carrier immediately if any is found.
Turn off circuits, disconnect power, and follow ABYC standards for electrical installations.
List of tools and materials needed for installation, including drill bits, wire cutters, and suitable gauge wire.
Importance of proper installation, box insulation (R-15 to R-20), and sealing for efficient operation.
Plan tubing/wire runs, avoid dirt on couplings, ensure air circulation, use dedicated circuit breaker.
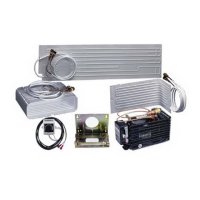
Mount compressor in well-ventilated area, use top/bottom vents (20-30 sq in) for heat convection.
Ensure minimal voltage loss, use dedicated circuit (15A fuse/breaker), proper wire gauge, and tinned cable.
Shore power can supply system via regulated battery charger (min 5 amps), connected to battery, not directly to unit.
Connect electronic unit directly to battery or main switch, use correct cable dimensions.
Mount in well-ventilated location, draw air from cool area, vent warm air out, keep within 6 ft of evaporator.
Mount horizontally/vertically near box top, consider tubing routing, drill 1.5" hole for lines, avoid sharp bends.
Install in dry area, ensure sensor tube is long enough, connect wiring to electronic unit, set knob to off.
Connect self-sealing quick couplings, keep them clean and dry, save caps for service.
Turn on power, compressor should start within 30s, fan starts later, evaporator frosts. Initial setting mid-range.
System protects compressor from overload, low voltage (below 10.3V), or overcharge, restarting at 11.5V.
| Brand | Isotherm |
|---|---|
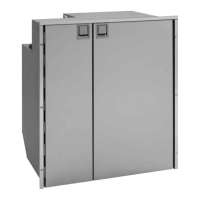
| Model | Classic Compact 2503 |
| Category | Refrigerator |
| Language | English |