Stitch'n Fold
STITCHING CLUTCH
The stitching heads are controled by a single revolu-
tion wrap spring clutch. This clutch must be adjusted
to stop the stitching heads in the proper position.
First disconnect electrical power. Then remove the
front cover and the right side cover. The clutch is
located inside the cabinet on the shaft toward the left
side, and it is bronze, black, brown, and pewter in
color.
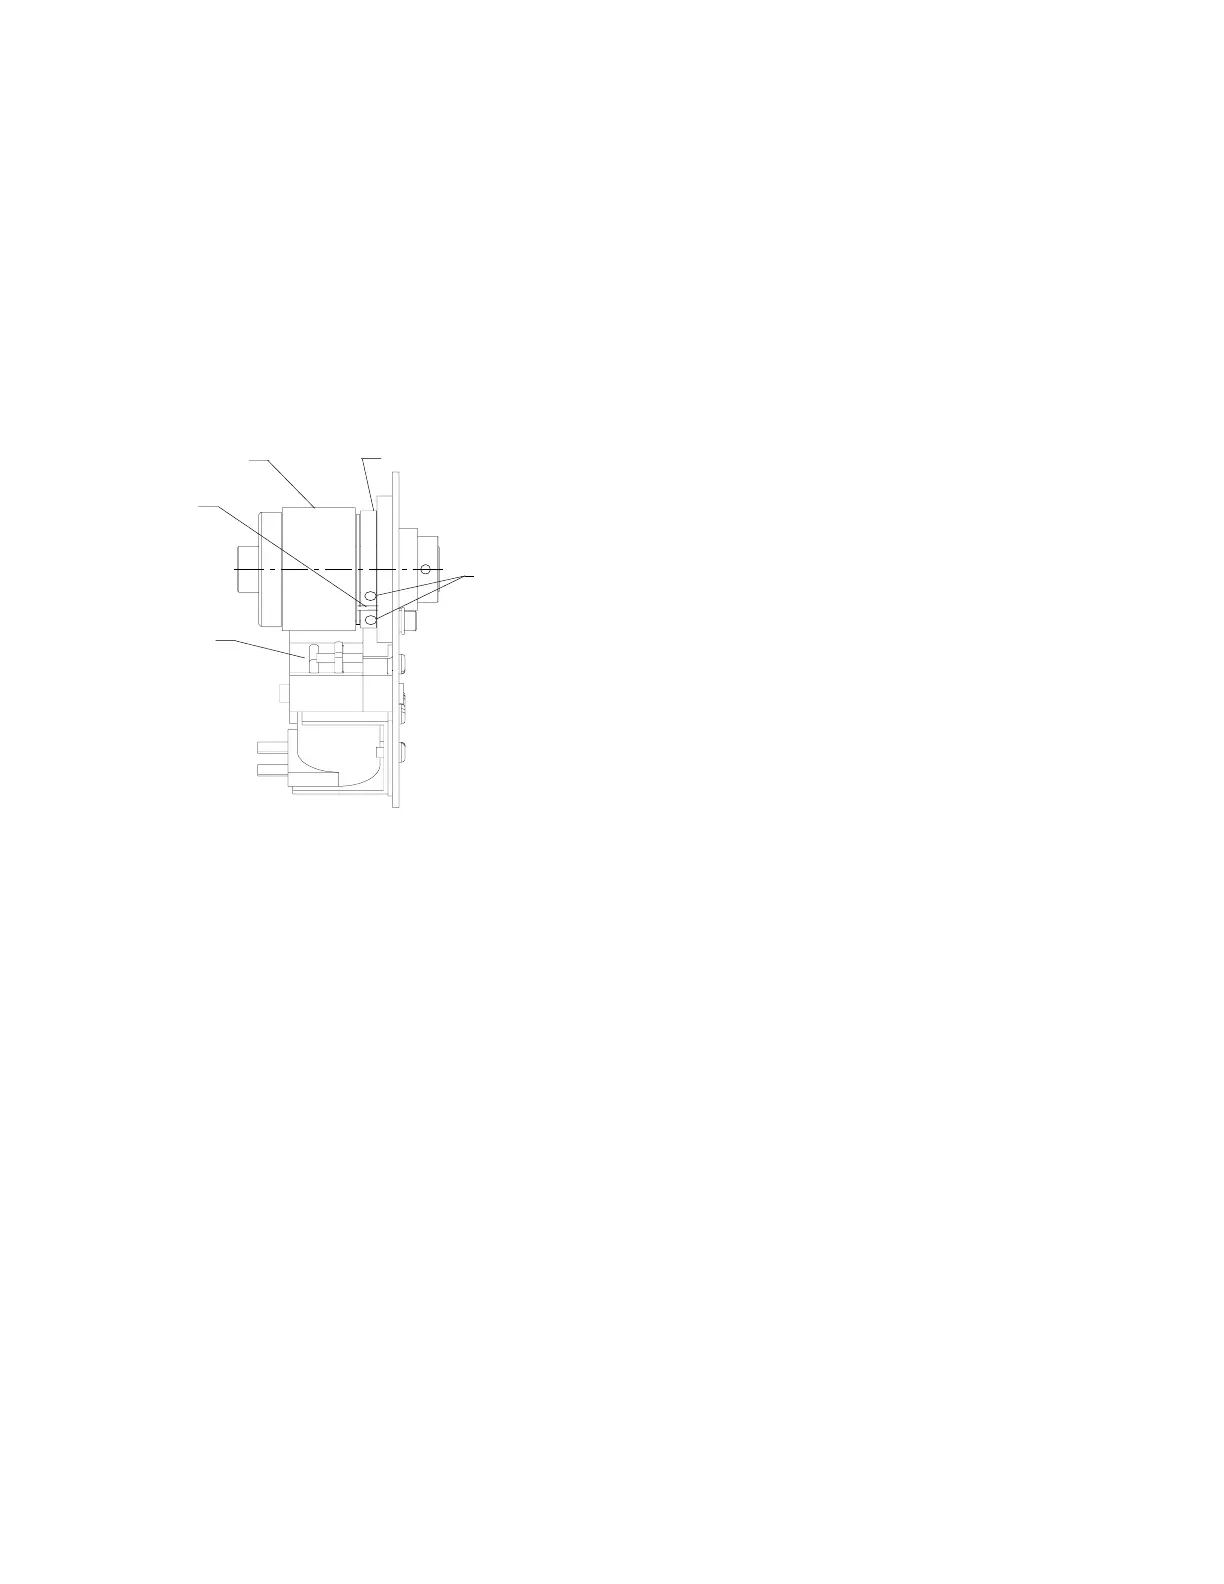
Stop Collar
Actuator
Pin
(far side)
Set Screws
(far side)
Adjusting Collar
Clutch In Neutral Position
Remove stitching wire from the stitching heads. Trip
the clutch by by pushing down the brown actuator.
On the right hand side of the machine, slowly turn the
large spoked wheel clockwise until the rst set screw
in the adjusting collar is facing forward. Use a 5/64
hex wrench to loosen the set screw. Continue to
turn the wheel until the second set screw is facing
forward; loosen the screw.
Turn the wheel until the stop on the stop collar hits
the actuator. Now turn the wheel until the proper
stopping position is reached. Watch the stitching
heads on the up stroke. When the bender bars
reach the top of the windows in the face plates, turn
the wheel slightly more. Be sure that both wire grips
are still open. This is the proper stopping position.
If you have gone too far, just continue to turn the
wheel until you return to the proper position.
Finally, while still in the proper stopping position, trip
the clutch and turn the wheel until one of the set
screws is facing forward. Carefully hold the adjust-
ing collar so that the stop collar pin is centered in the
opening i
n the adjusting collar. Tighten the set screw
securely. Turn the wheel and trip the clutch, if nec-
essary, until the second set screw can be tightened.
CAM for 3LS
The cam for 3LS, which signals the stitch gate to
operate, is to the right of the stitching clutch. To
assure proper stitch alignment, the stitching heads
should contact the work before the gate goes down.
To prevent repeat stitching, the gate must pull the
stitch start limit switch, 4LS, down away from the
work before the clutch completes a full cycle.
First, be sure the stitching clutch has been adjusted
properly. Then, trip the clutch and turn the spoked
wheel clockwise until the stitcher heads just reach
the clinchers. Loosen set screw on cam, and rotate
the cam until it is just about to trip the limit switch.
Tighten the cam in this position.
(RBM1916F Scene 1)
12