REPLACEMENT OF SHEAR PIN
ON STITCH CLUTCH
1. Unplug machine and remove front cover. The
clutch is located inside the cabinet on the shaft
toward the left side, and it is bronze, black, brown,
and pewter in color.
2. Remove the sheared pin and replace.
3. It might be necessary to adjust the clutch per the
instructions on page 12.
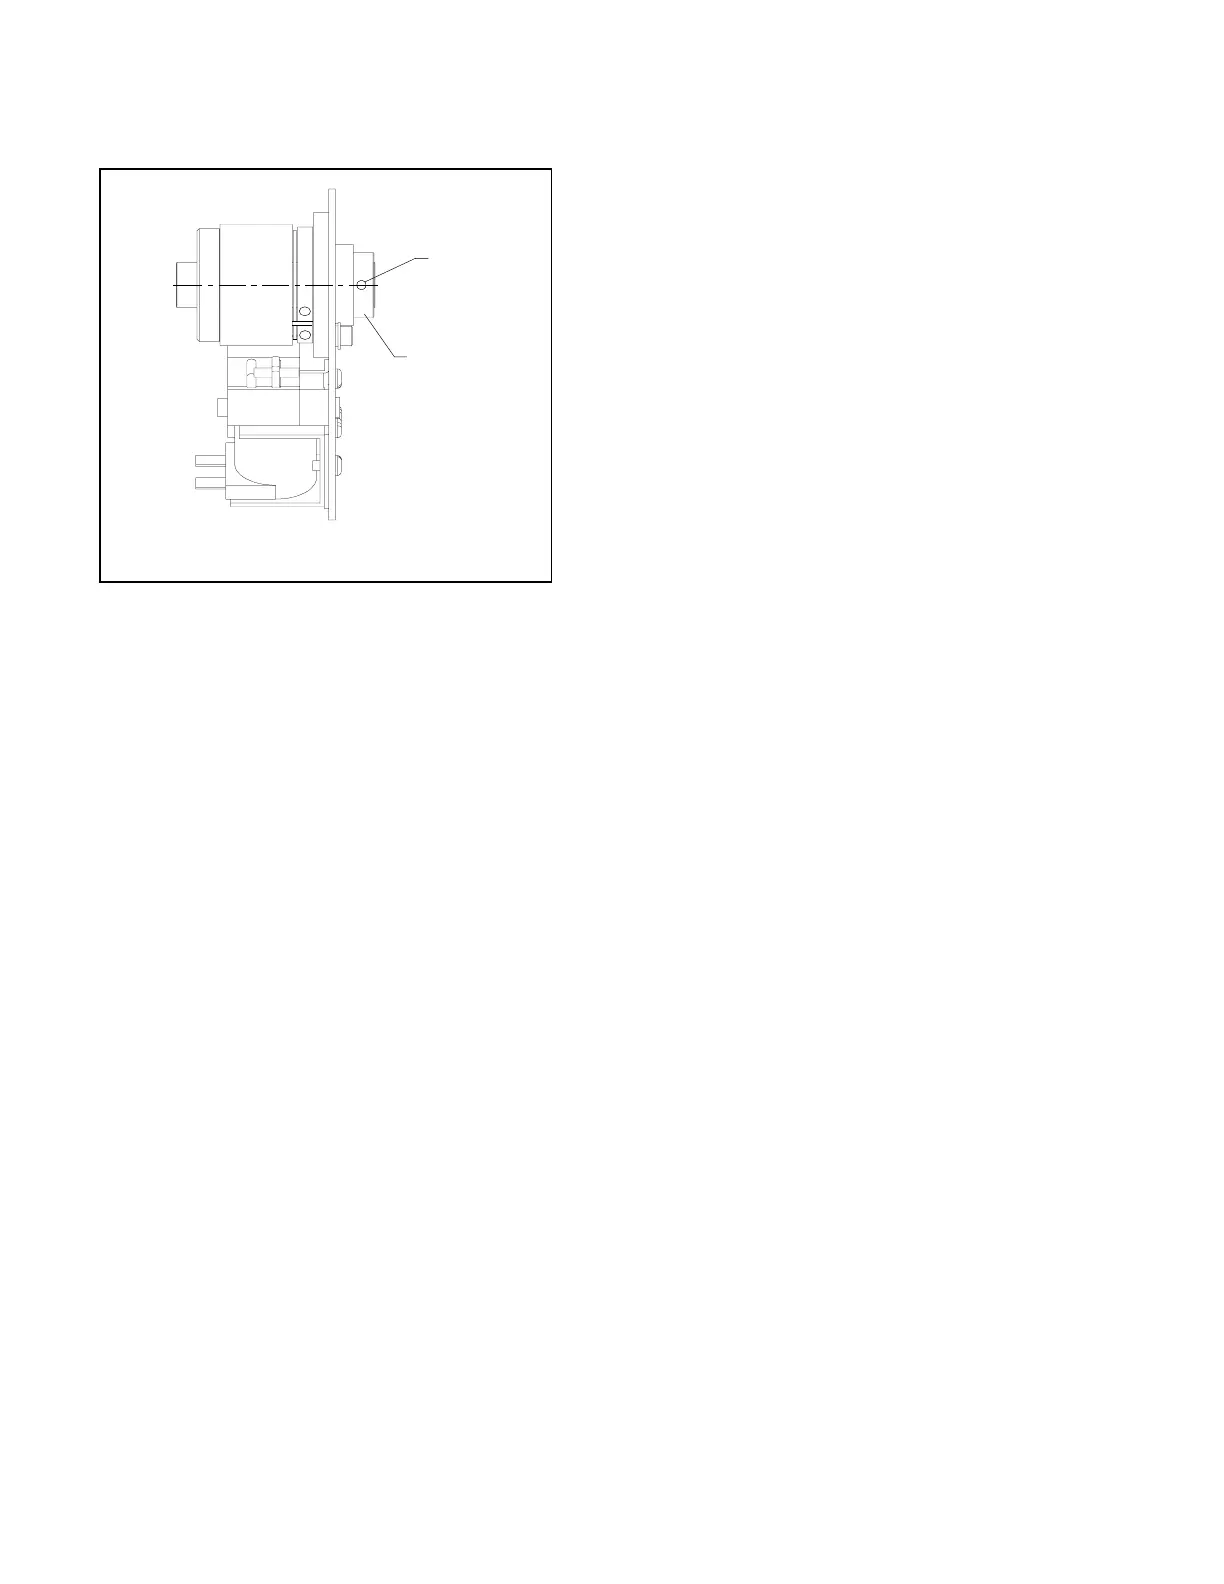
Stitcher Head Drive Clutch
Clutch Collar
Shear Pin
1. Unplug machine. Remove side covers and front
cover.
2. See exploded view of head drive shaft on page
22. Disconnect the pull rods from both head
drive cranks (#16). Remove the left side head
drive crank (#16) and the right side jog actuator
cam (#52) by driving out roll pin (#17).
3. Remove the bearing assembly (#18) on each side.
4. Mark the position of the side jog actuator cam
(#38), then loosen both set screws and slide it to
the left. If the unit has the optional activated
clinch feature, loosen the set screws on its
cam
and also slide it to the left.
5. Mark the position of the stitch gate switch cam
(#37), then loosen the set screw.
6. Remove screws (#29) from the switch and clutch
bracket (#28), and gently lay the bracket down.
There is no need to remove the switch wires.
7. Release the tension idlers on both drive pulley
belts. And slip the belts off the pulleys to the
left.
8. Move the head drive shaft (#15), and all the
components connected to it, to the right and
remove it.
10. Remove the pin (#32) that connects the clutch
collar to the shaft, and slide all components off
the shaft. Match the markings on the old shaft
to the new shaft.
11. Reassemble by reversing t
he disassembly proce-
dure using the new clutch coupling comonents.
REPLACEMENT OF STITCH
CLUTCH
(RBM1916F Scene 1)
13