5. Retighten set screw securely. Set screw head must
bepositioned facing motor covering seam (indentation).
(Positioning of this screw is critical to avoid misalignment and
subsequent diaphragm damage.) Upper
Housing, Check Valve
6. Reassemble upper housing (1) and slide clips (8)
7. Properly seat O-Ring in check valve assembly (2) and checkif
ferrules and screen are in place on upper housing (1)
8. Install check valve (2) into upper housing (1) and push in.
9. Assemble on to lower housing (4), align 4 screws on to
motorby rotating lower housing (4) if necessary to align feet.
10. Tighten screws evenly to 30 in. lbs. torque.Pressure Switch
1. Place switch against front of pump (9), insert screws and
takecare not to cross thread or strip out threads in housing.
2. Reconnect wires.
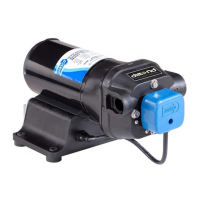
AUTOMATIC WATER SYSTEM PUMP SERVICE PARTS
1 Upper Housing With Clips
3 Diaphragm Assembly (includes screws)
6 Ports - 1/2 Barb (pair)
9 Pressure Switch Assembly
*Service Kit includes #2, #3, #8 and drive cam assembly.
ACCESSORIES QUICK CONNECT PORT SYSTEM
The above part numbers are packaged with 2 fittings per bag.
 Loading...