Do you have a question about the Jabra Pro 9470 Mono and is the answer not in the manual?
This document provides comprehensive instructions for connecting and configuring the Jabra Pro 9470 Mono headset with various Avaya phone models, including the 1408, 1416, 1608, 1616, 9404, 9408, 9504, 9508, 9608, 9610, 9611G, 9620, 9620C, 9620L, 9621G, 9630, 9630G, 9640C, 9640G, 9641G, 9650, 9650C, and 9670. The primary function of this setup is to enable seamless integration of the Jabra Pro 9470 Mono headset for hands-free communication with these Avaya desk phones, leveraging Electronic Hook Switch (EHS) functionality for remote call control.
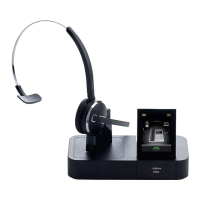
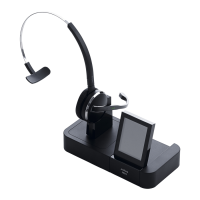
The Jabra Pro 9470 Mono, when paired with the Jabra Link 14201-20 EHS adapter, allows users to manage calls directly from their headset. This includes answering, ending, and muting calls without needing to physically interact with the desk phone. The EHS adapter facilitates the communication between the headset base and the Avaya phone, enabling features like remote call control and ring detection. The mono design of the headset ensures that users can remain aware of their surroundings while on a call. The system is designed to provide clear audio for both the user and the caller, enhancing productivity and comfort in a professional environment.
The connection process involves several steps to ensure proper functionality. First, the supplied RJ9 to RJ9 connection cable is used to link the "phone" socket on the Jabra PRO 94x0 base to the "phone" symbol socket on the EHS adapter. This establishes the primary communication channel for call audio. Next, a red-marked cable connects the "AUX" socket on the EHS adapter to the "AUX" socket on the Jabra PRO 94x0 base. This auxiliary connection is crucial for specific EHS functionalities, likely related to signaling or power. A white-marked cable, labeled "C," then connects the "Headset/handset" socket on the EHS adapter to the "headset" socket on the Avaya phone. This cable carries the headset audio to and from the phone. A special note is provided for Avaya 1408/1416 or 9404/9408 phone users, who should use a white-marked cable labeled "A" instead of "C," indicating a slight variation in wiring for these specific models. Finally, a ring sensor is connected to the EHS adapter and attached to the middle of the phone's loudspeaker. This sensor detects incoming call rings, allowing the headset to alert the user even when away from the desk.
Once the physical connections are made, the Jabra PRO 94x0 base's SmartSetup Wizard guides the user through the configuration. It is emphasized that the device will not be fully functional until all cables are correctly connected according to their colored markings. Within the wizard, users must select "Desk phone" under phone settings, then choose "Connect to a desk phone?" and proceed with a "Manual" setup. This manual setup allows for precise configuration tailored to the Avaya phone system.
A critical step in the manual setup is selecting the correct adapter type, which for this configuration is "DHSG." Following this, the phone set-up switch on the Jabra base must be positioned to "A." This switch often controls the electrical signaling for different phone systems, and setting it to "A" ensures compatibility with the Avaya phones. The microphone level setup is also part of the configuration process. The recommended microphone volume setting is 7 out of 13, which provides a good balance for clear voice transmission without being too loud or too soft.
The guided setup feature allows users to dial into a local Jabra Setup Server, which can automatically configure the audio path. This is a convenient option for streamlining the setup process. If the Jabra Setup Server is unavailable, users are advised to contact their local Jabra support team for assistance, ensuring that the audio path is correctly configured for optimal performance.
While the document primarily focuses on initial setup and configuration, several aspects imply ongoing maintenance or troubleshooting. The emphasis on correctly connecting cables according to their colored markings serves as a preventative measure against common setup errors that could lead to malfunction. The SmartSetup Wizard and the option for a guided setup via a Jabra Setup Server are tools that simplify initial configuration and can also be used for re-configuration or troubleshooting if issues arise. The recommendation for a specific microphone volume setting (7 out of 13) suggests a baseline for optimal audio quality, which users might adjust based on their environment or personal preference, implying a degree of user-level maintenance for sound clarity. The instruction to contact Jabra support if the Setup Server is unavailable highlights the availability of expert assistance for more complex issues, ensuring that users can maintain the functionality of their device. Regular checks of cable connections and occasional re-running of the setup wizard could be considered routine maintenance to ensure consistent performance. The robust design of the Jabra Pro 9470 Mono and its EHS adapter system is intended to provide reliable operation, minimizing the need for frequent intervention once properly configured.
| Wireless Technology | DECT |
|---|---|
| DECT security certified | Yes |
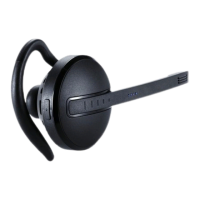
| Earpiece | Single earpiece |
| Type | Mono |
| Connectivity | DECT |
| Range | Up to 150 m |
| Charging Time | 2 Hours |
| Microphone | Noise-cancelling |
| Compatibility | Desk phone, softphone, mobile phone |