EasyManua.ls Logo

JABSCO 5850-0001 User Manual

JABSCO 5850-0001
2 pages
To Next Page IconTo Next Page
Page #1 background imageLoading...
Page #1 background image
Model 5850-0001
SELF-PRIMING PUMP
FEATURES
Body: Bronze
Impeller: Jabsco Neoprene Compound
Shaft: 316 Stainless Steel
Shaft Seal: Lip Type
Ports: 3/4" NPT
Weight: 6 lb (approx.)
APPLICATION
Marine Engine Cooling
FOR ENGINE MODELS
CHRIS CRAFT - M Series (131 to 158 HP)
PALMER - DH 120
KERMATH - Sea Rover
LATHROP - LH Master-LH6-LH - Atom
OSCO - Hercules Diesel 685
UNIVERSAL - Super 6-Model Z
HERCULES - JX
(and others)
OPERATING INSTRUCTIONS
Pump will self-prime at low or high speeds. Make sure
scoop and inlet line are clear and all connections airtight.
Do not run pump dry for more than 30 seconds. Lack of
water flow may damage impeller. To drain pump, loosen
end cover screws.
SERVICE INSTRUCTIONS
IMPELLER REPLACEMENT: Remove end cover and
gasket. Pull impeller out by grasping hub or blades with
pliers. Replace impeller, gasket and end cover. A light
coating of grease in impeller bore will aid priming on dry
start up. (Use correct Jabsco gasket, a thicker or thinner
gasket may cause impeller damage.) Standard gasket is
0.010" thick.
INSTALLATION INSTRUCTIONS
Engage shaft with drive tang, make sure flange seats
squarely on mounting surface and bolt to engine.
Connect inlet and outlet fittings using pipe compound to
seal threads.
MODEL 5850-0001
Question and Answer IconNeed help?

Do you have a question about the JABSCO 5850-0001 and is the answer not in the manual?

JABSCO 5850-0001 Specifications

General IconGeneral
BrandJABSCO
Model5850-0001
CategoryWater Pump
LanguageEnglish

Summary

Self-Priming Pump Features and Application

Pump Instructions

Installation Instructions

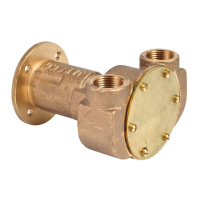
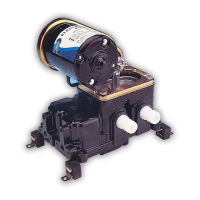
Engage shaft with drive tang, ensure flange seats squarely, and bolt to engine. Connect fittings using pipe compound.

Operating Instructions

Pump self-primes at low or high speeds. Ensure scoop/inlet line is clear and connections are airtight. Do not run dry >30s.

Impeller Replacement

Remove end cover and gasket. Replace impeller, gasket, and end cover. Light grease in impeller bore aids priming.

Dimensional Drawing

Exploded View and Parts List

Exploded View

Diagram illustrating pump components for repair and identification.

Major Repair Instructions

Detailed steps for disassembling and reassembling the pump, replacing worn parts.

Parts List

List of all pump components with part numbers and quantities.

Pump Flow Chart

Graphical representation of pump performance at various flow rates and pressures.

Related product manuals