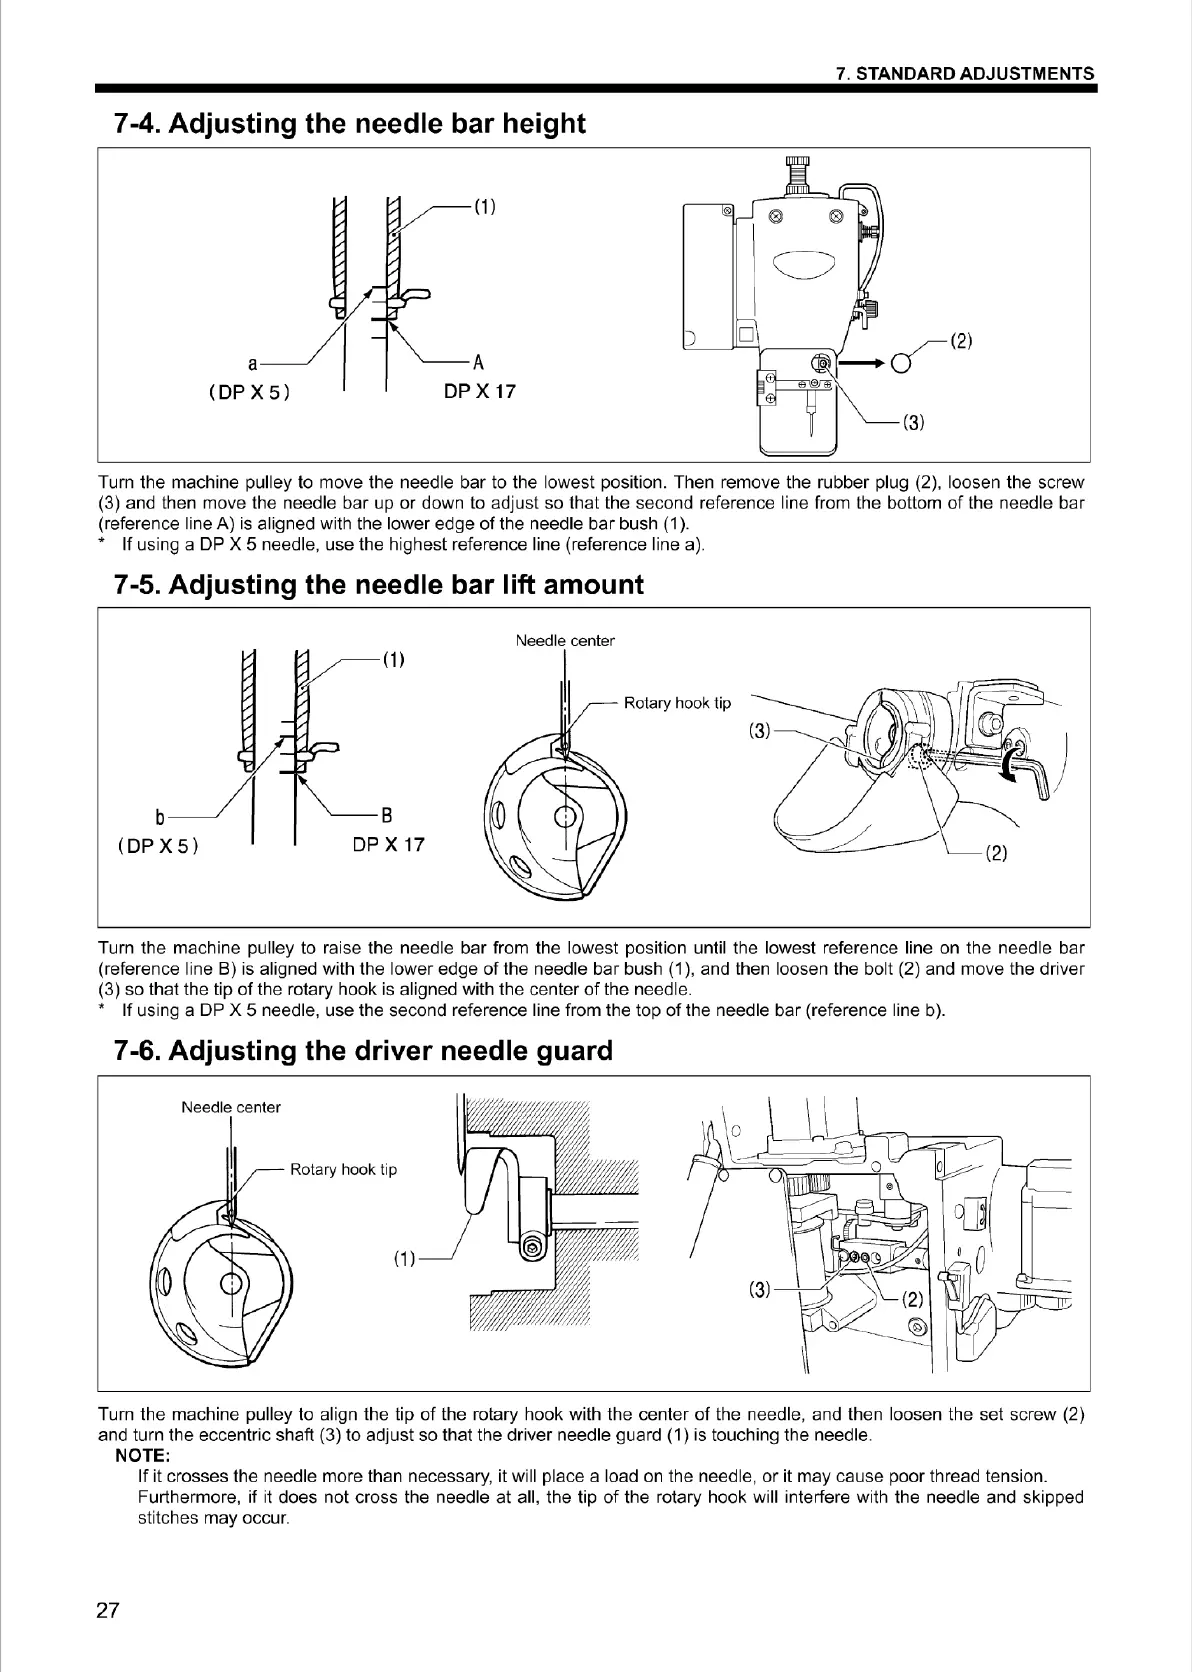
7-4. Adjusting the needle bar height
a
(DP X
5)
A
DP X 17
)
7. STANDARD ADJUSTMENTS
0
C)
D
Turn the machi
ne
pu
lley
to
move the needle bar to the lowest position. Then remove the rubber pl
ug
(2), loosen the screw
(3) and then move the needle bar
up
or down to adjust so that the second reference line from the bottom
of
the needle bar
(reference line A) is aligned with the lower edge
of
the needle bar bush
(1
).
• If using a
DP
X 5 needle, use the highest reference line (reference line a).
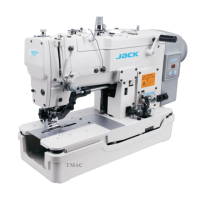
7-5. Adjusting the needle bar lift amount
b
( DP X
5)
B
DP X 17
Rotary hook tip
Turn the machine pulley to raise the needle bar from the lowest position until the lowest reference line on the needle bar
(reference line
B)
is aligned with the lower edge
of
the needle bar bush
(1
), and then loosen the bolt (2) and move the driver
(3) so that the tip
of
the rotary hook is aligned with the cent
er
of
the needle.
• If using a
DP
X 5 needle, use the second reference line from the top
of
the needle bar (reference line b).
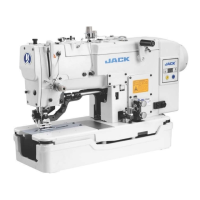
7-6. Adjusting the
dr
i
ver
needle guard
Rotary hook tip
(1)
Turn the machine pulley to align the tip
of
the rotary hook with the center
of
the needle, and then loosen the set screw (2)
and turn the eccentric shaft (3) to adjust so that the driver needle guard (1) is touching the needle.
NOTE:
27
If it crosses the needle more than necessary, it will place a load on the needle,
or
it may cause poor thread tension.
Furthermore,
if
it does not cross the needle at all, the tip
of
the rotary hook will interfere with the needle and skipped
stitches may occur.
From the library of Superior Sewing Machine & Supply LLC - www.supsew.com