7. STANDARD ADJUSTMENTS
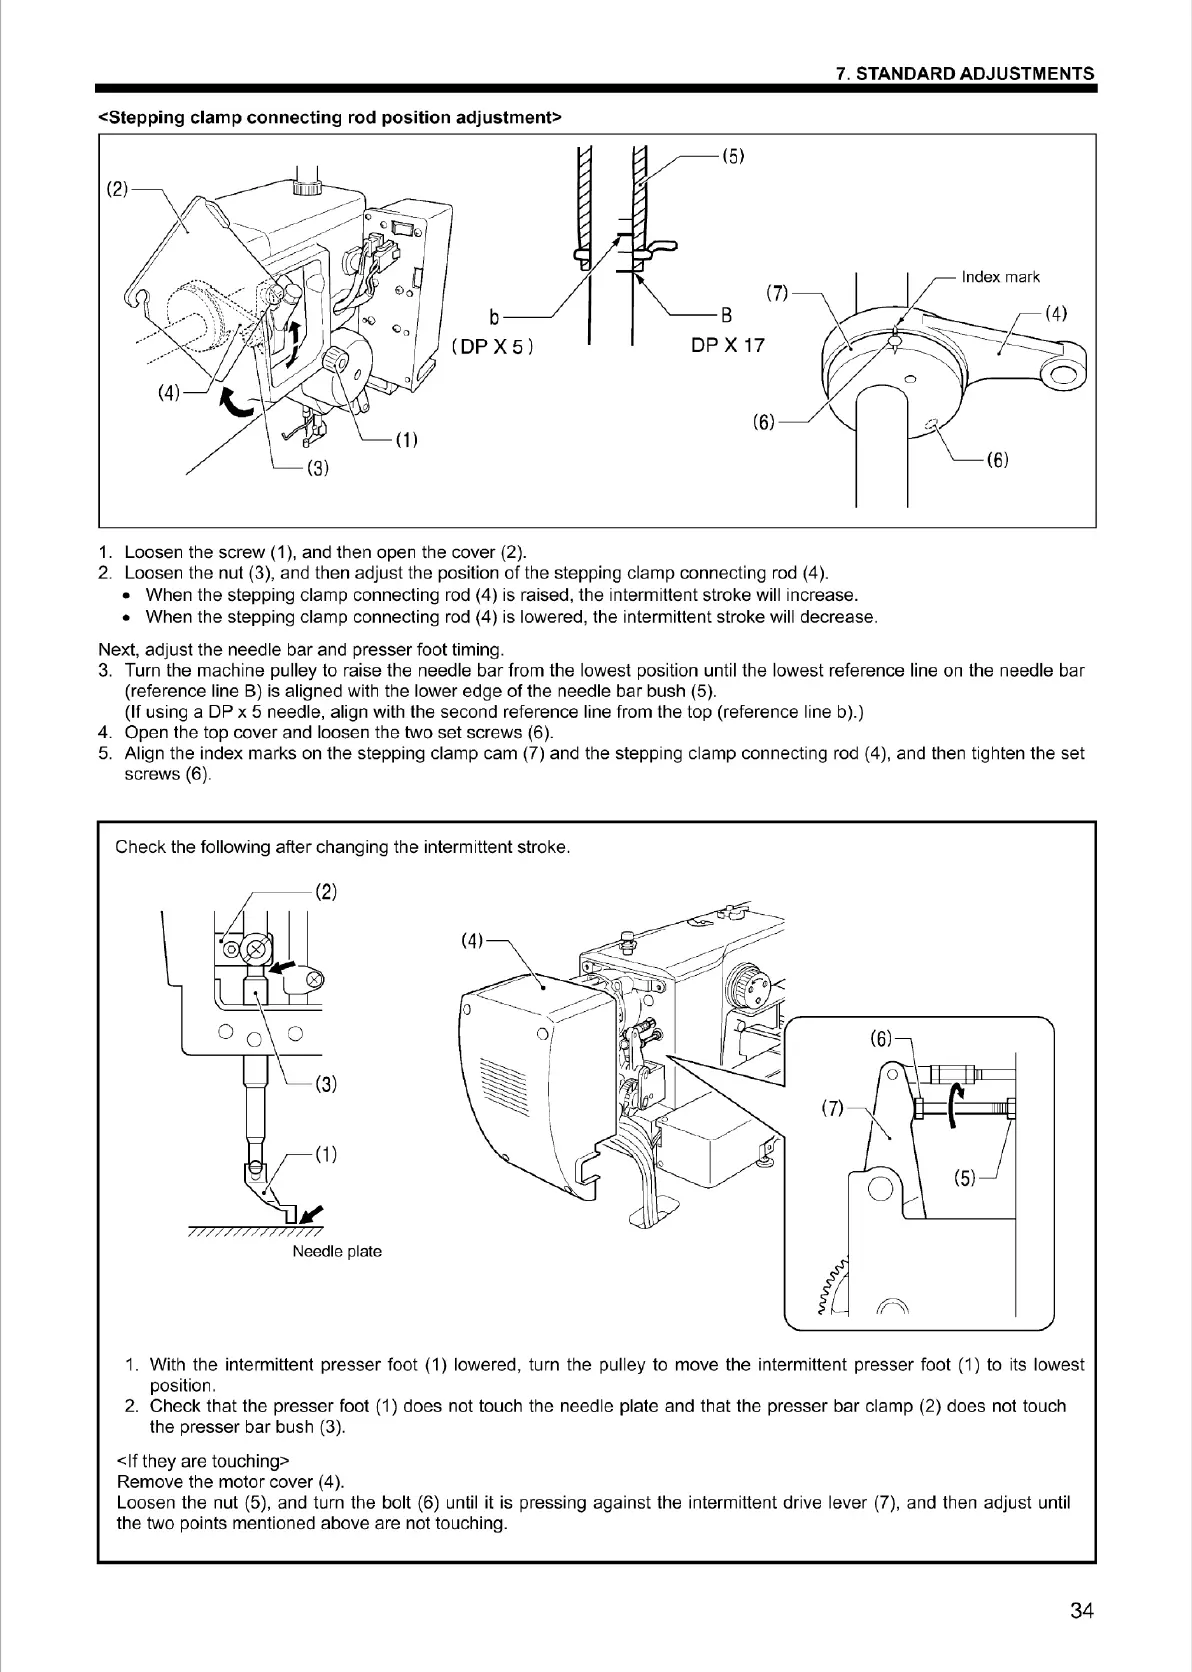
<Stepping clamp conn
ec
ting rod position adjustme
nt
>
:
~:::~,
-
::::
.
...-
-~-->
}
::
·
•
••
•·
·
··
··
- •
••
,...P
(4)
(1)
b
(
DP
X5)
1. Loosen the
screw
(1
), and then open
the
cover
(2).
2. Loosen the
nut
(3), and
the
n
adj
ust
the
position of t
he
steppi
ng
clamp
co
nnecting rod (4).
•
When
the
steppi
ng
clamp
co
nnecting rod (4)
is
raised,
the
intermittent s
tr
oke
will increase.
•
When
the steppi
ng
clamp
co
nnecting rod (4)
is
lowe
r
ed
, the i
nterm
ittent stroke will decrease.
Next, adjust
the
needle
bar
and presser
foot
timing.
3. Turn the
mach
i
ne
pulley
to
raise
the
needle
bar
from the l
owest
positi
on
until the
lowes
t reference line on
the
needle
bar
(reference li
ne
B) is aligned with
the
lower
edge
of
the
needle
bar
bush (5).
(If using a DP x 5 needle, align with the second reference line from
the
t
op
(reference line
b)
.)
4. Open t
he
top
cover
and
loosen the
two
set
sc
r
ews
(6).
5. Align
the
index
marks
on
the
stepping cl
amp
cam
(7) and the st
ep
ping
clamp
connecting rod (4), and then tighten
the
set
screws (6).
Ch
eck
the following after changing
the
int
ermi
tt
ent
stroke.
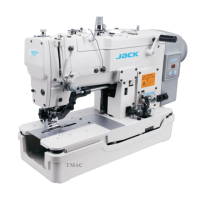
~(2)
~
0 ~
J\=(3)
(1)
JI'
//
/////
/
77
Needle plate
(7)
1.
With
the
intermittent
presser
foot (1) l
owe
r
ed
, turn
the
pu
ll
ey
to
move
the
intermittent
presser
foot
(1)
to
its l
owest
pos
it
io
n.
2.
Check
that
the
presser
foo
t (1) does
no
t touch
the
needle
plate and
tha
t
the
presser
bar
clamp
(2) does not touch
t
he
presser
bar
bush (3).
<If
t
hey
are
touching>
Rem
ove
t
he
mo
t
or
cover (4 ).
Loosen
the
nut (5),
and
turn the
bo
lt (6)
un
til
it
is
press
in
g against the intermittent
dr
ive
lever
(7),
and
then
ad
j
ust
unt
il
the two points mentioned
above
are
no
t t
ouc
hing.
34
From the library of Superior Sewing Machine & Supply LLC - www.supsew.com