50
J-300
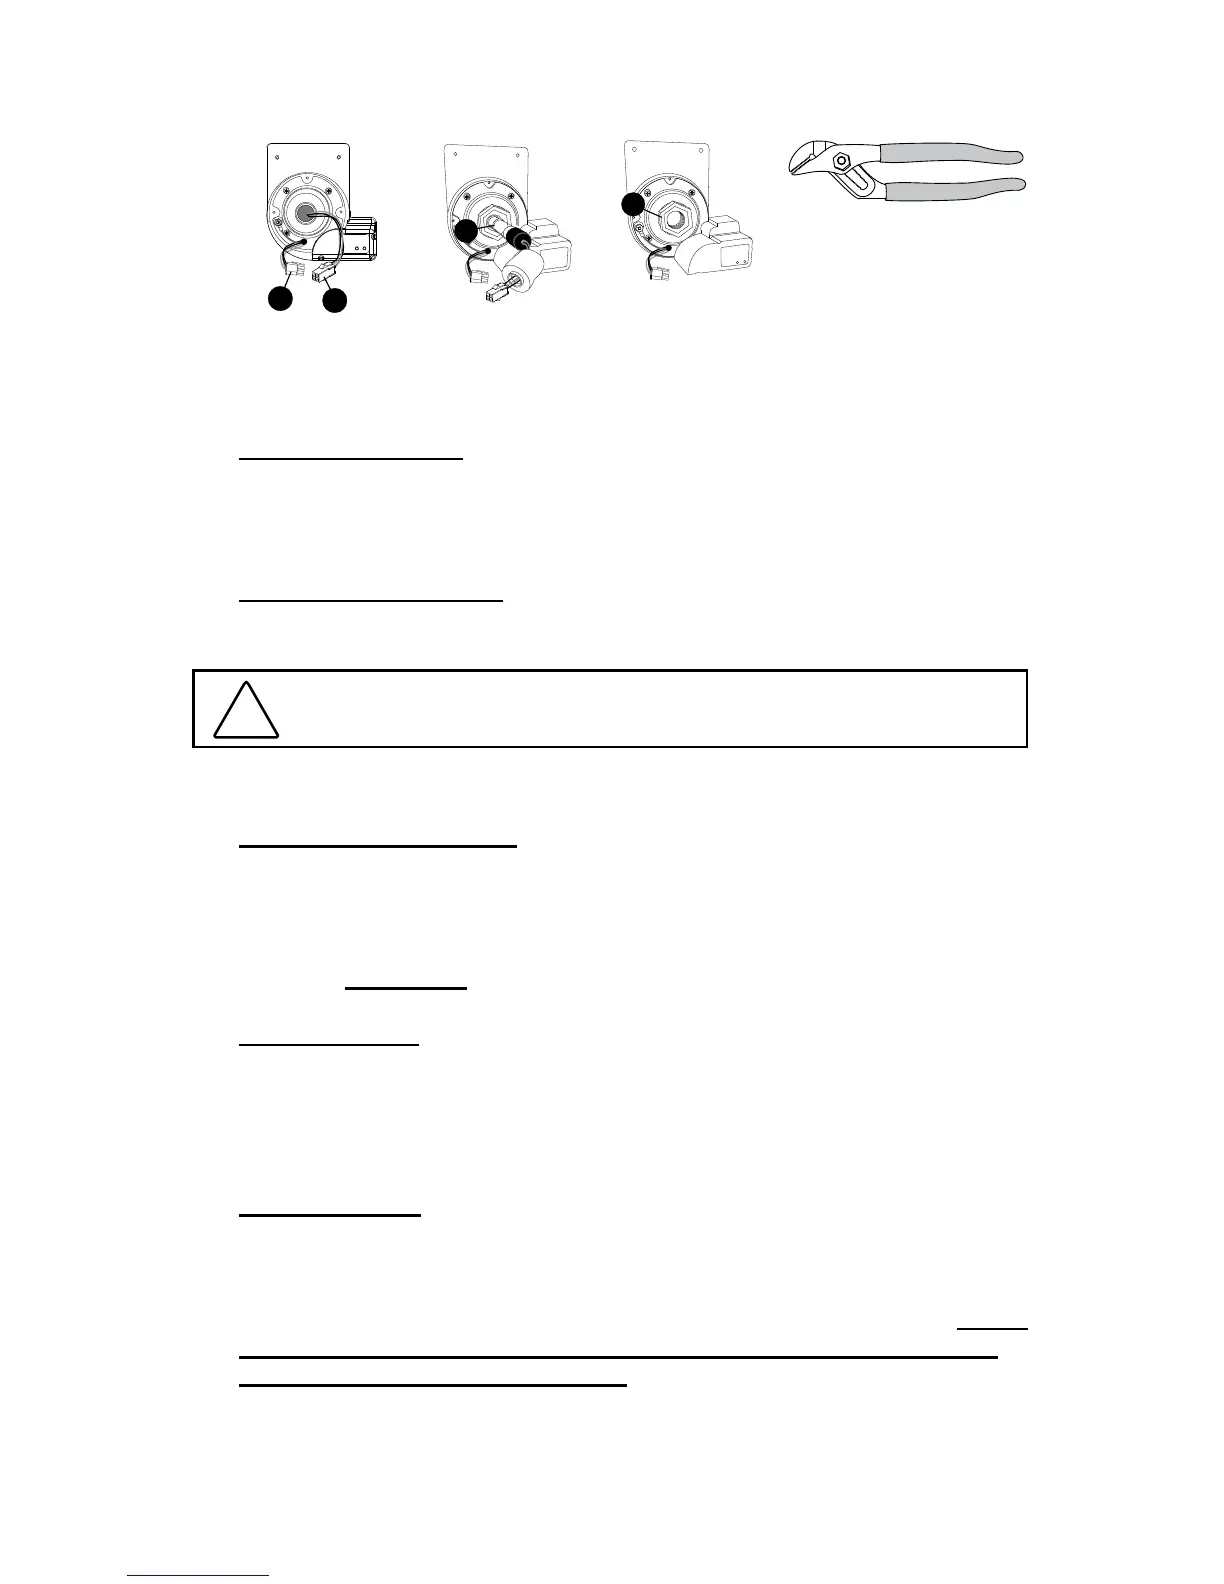
3. Disconnect UV bulb socket (6) from the power cord socket (4),
Figure 3.
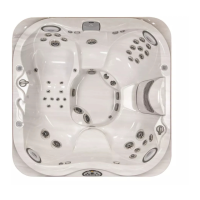
4. Slowly remove the UV bulb (7) out of the quartz tube, Figure 4.
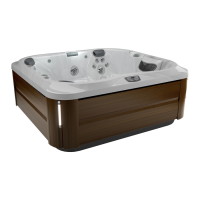
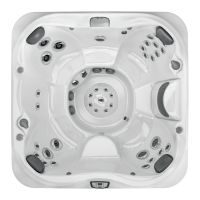
5. Remove the quartz seal compression nut (9) by turning it
counterclockwise, Figure 5. Use a pair of channel-lock pliers if
needed, Figure 6.
6. Now you are ready to clean or replace the quartz tube (8). For
cleaning the quartz tube, follow steps 7 and 8 then proceed from step 9.
For replacing quartz tube, skip steps 7 and 8 and proceed from step 9.
7. Cleaning quartz tube: Clean the quartz tube by wiping, until clear,
using a paper towel or a dry cotton cloth. If needed, a household tub
and shower lime removal product can be used.
WARNING: Do not use abrasive cleaners as they can
scratch the quartz tube surface.
!
8. Rinse the quartz tube with clean water to completely remove any
cleaning products that were used in step 7.
9. Replacing quartz tube: Remove the black o-ring from the quartz
tube and place it on the new tube. Place the new quartz tube (8) into
the water chamber (12) with the domed end rst making sure it is
inserted and seated inside the quartz end holder (11).
10. Reinstall and hand tighten the quartz seal compression nut (9) by
turning it clockwise.
11. Rell your spa.
12. System Test 1: Assure there is no water dripping from the seal
compression nut (9). If water is visible, STOP and tighten the
compression nut (9) using a pair of channel lock pliers to a maximum
of 1/4 turn. If that does not x the leak, then repeat quartz tube
maintenance process from step 1 through step 11. Make sure there
is no water leaking before proceeding to step 13.
13. System Test 2: Reconnect the CLEARRAY unit to the controller.
Turn breaker back ON. Turn on the pump to circulate the water
through the CLEARRAY System. Wait for 5 minutes and assure no
water is dripping. If water is visible, STOP, x the leak by repeating
quartz tube maintenance process from step 1 through step 12. Make
sure there is no water visible. Turn the pump and breaker OFF
BEFORE proceeding to step 14.
14. Reconnect the UV bulb socket (6) to the power cord socket (4) make
sure you use the latex glove provided when handling the UV bulb.
Figure 3
Figure 4
Figure 6
Figure 5
4
6
P
o
w
er
L
a
m
p
O
n
O
n
7
P
o
w
er
L
a
m
p
O
n
O
n
9