28
is installed where temperatures often drop below 0 °C because this
limits the “Smart Winter” anti-freeze protection (see related chapter).
Check of operation
First start-up
XRemove the thermal cover from the hot tub and remove the
front and side panels, if present (refer to the corresponding chapter).
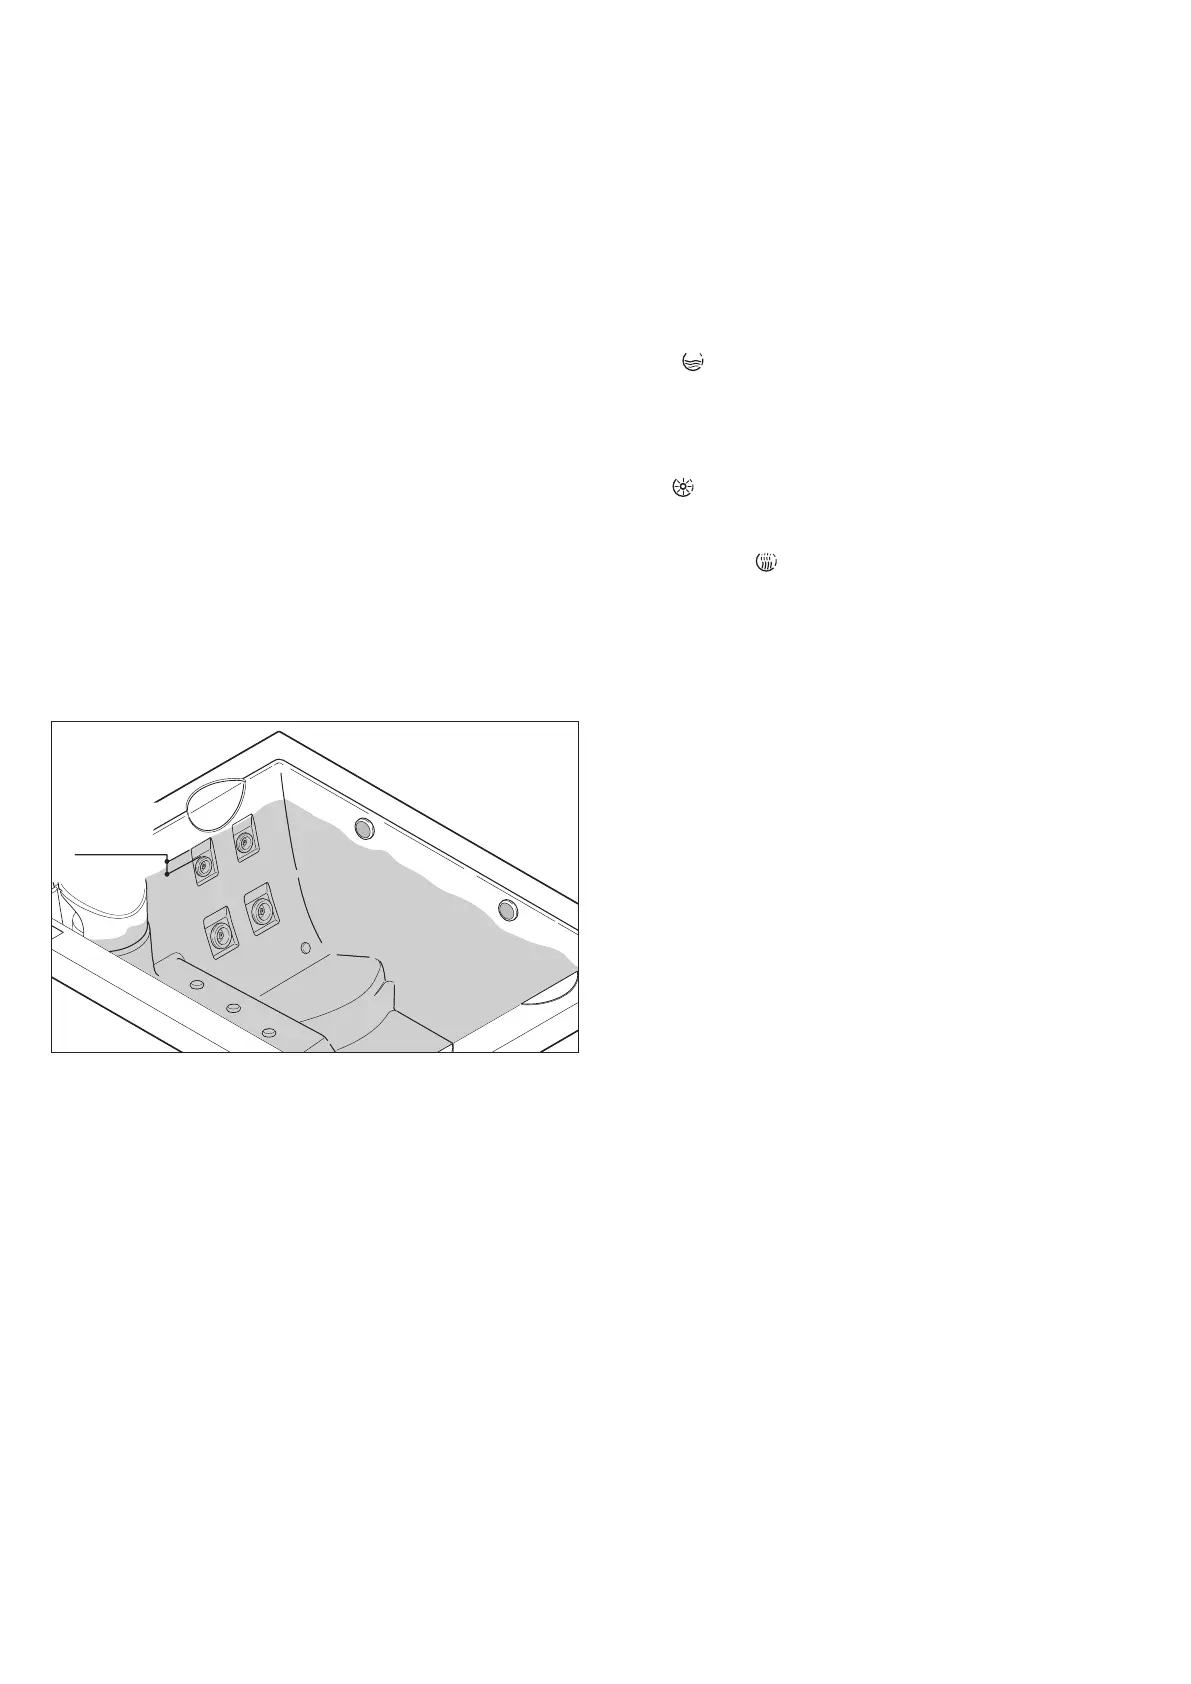
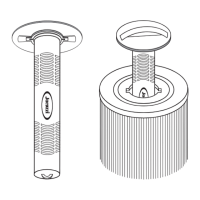
XCheck that the lter cartridge is present in its container and
that the various components are properly installed (see the chap-
ter on maintenance of the lter cartridge).
XCheck that the drain valve on the base (and the ball valves, if
installed) are closed (refer to the pre-installation instructions en-
closed with the product).
NOTE for models with an overow valve: the pipe that con-
nects the overow to the drain must always be left open (refer to
the pre-installation instructions).
XCheck that all the hydromassage intakes are open.
XFill the hot tub so that the highest nozzles (back) are covered.
4-5 cm
Filling will be performed as decided beforehand by the customer
(see pre-installation sheet, “Preparation for installation” chapter).
If you use the hose for garden work, let water run for a while
before lling the hot tub. This will eliminate stagnant water in
the hose along with any bacteria that may cause irritations.
XTurn on the all-pole circuit breaker located on the power sup-
ply line (see the chapter on connections and electrical safety).
Notes:
- When rst turned on, all of the numbers and LEDs on the control
panel will turn on. Following, the display will show the codes for the
software and rmware versions.
- In general, when the hot tub is lled for the rst time, the water tem-
perature is lower than the set point set by the factory 35 °C). For this rea-
son, the heater and the pump, at low speed, are turned on. In any case
the control panel will display the temperature of the water in the tub.
- If the message “FLO” appears on the display, the pressure switch/
ow switch of the heater may be faulty. Please see chapter “Abnor-
mal operating conditions - Alarm signals”.
XPress the TEST button of the dierential switch located up-
stream from the electrical system to which the hot tub is con-
nected. If it does not trip, it may be faulty or it may have tripped
due to problems in the electrical system of the building.
Disconnect the hot tub and do not use it until you have iden-
tied and eliminated the defect.
XCheck the operation of the hydromassage pumps using the
“Pump” key. The rst time the key is pressed the pump starts
at low speed; the second time it is pressed, high speed; the third
time, the pump turns o.
XCheck that the spotlights switch on and o using the key
“Light” .
XCheck that the blower (if included) switches on and o using
the key “Blower” .
XCheck that there are no leaks from the hydraulic connections
or other problems.
XCompletely disinfect the hot tub by carrying out “super-chlo-
rination” treatment.
Please refer to the Jacuzzi system water treatment guide
and relative catalogue for details on water quality mainte-
nance, the methods and warnings governing the use of rela-
tive chemical products.
XAfter a few hours, turn o the omnipolar switch.
XOpen the drain valve(s) and completely empty the hot tub.
XIf included, re-install the front and side panels.
CAUTION
Do not use the hot tub the rst time you start it as there
is a high concentration of chlorine in the water during
this phase. Immediately empty the bath.
Contact the local authorities for the standards govern-
ing the discharge of chemically treated water.
XClose the drain valve(s) and ll the hot tub again with fresh
water as previously explained.
XTurn the omnipolar switch back on and check that the hot
tub works correctly.
XCheck and as necessary modify the water ltering cycles
based on how you intend to use the hot tub.