GB
37
22. Cylinder Bracket (1×)
Installation
► Assembly – p. 4
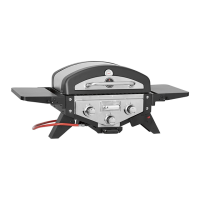
1. Locate the Grill Lid and Firebox Assembly, (2)
Side Supporting Legs, (4) spring washers
and (4) M6×12 bolts
► P. 4, item 1
– Attach (2) Side Supporting Legs to the Grill Lid
and Firebox Assembly using (4) spring washers
and (4) M6×12 bolts.
2. Locate the Rear Supporting Leg, (2) spring
washers and (2) M6×12 bolts
► P. 4, item 2
– Attach the Rear Supporting Leg to the Grill Lid
and Firebox Assembly using, (2) spring washers
and (2) M6×12 bolts.
3. Locate the Heat Indicator
► P. 4, item 3
– Remove the nut from the Heat Indicator first, then
attach the Heat Indicator to the Grill Lid using the
nut.
4. Locate the Lid Decorative Plate, Lid Handle
and (2) M6×20 bolts
► P. 5, item 4
– Attach the Lid Decorative Plate and Lid Handle to
the Grill Lid using (2) M6×20 bolts.
5. Locate the Grease Tray and Handle, (2) M6×12
bolts
► P. 5, item 5a
– Attach the Grease Tray Handle to the Grease
Tray using (2) M6×12 bolts.
► P. 5, item 5b
– Slide the Grease Tray Assembly into the bottom
of the Firebox.
6. Locate the Wood Chip Box Left & Right Rails, (4)
M5×10 bolts
► P. 5, item 6a
– Push the Wood Chip Box Left Rail into the rec-
tangular hole in the Front Panel of the Firebox.
► P. 5, item 6b
– Attach the bracket of the Wood Chip Box Left Rail
to the left side of front panel using (1) M5×10 bolt.
► P. 5, item 6c
– Attach the Wood Chip Box Left Rail to the Rear
Panel of the Firebox using (1) M5×10 bolt.
► P. 6, item 6d
– Attach the Wood Chip Box Right Rail to the Fire-
box.
7. Locate the Wood Chip Box, Wood Chip Box
Front Panel Assembly, Wood Chip Box Lid,
Wood Chip Box Handle, Wood Chip Box Lock,
Wood Chip Box Tent, (2) M6×12 bolts, (2)
M5×10 bolts and (2) M5 nuts
► P. 6, item 7a
– Attach the Wood Chip Box Handle and Wood
Chip Box Lock to the Front Panel Assembly
using (2) M6×12 bolts.
► P. 6, item 7b
– Attach the Wood Chip Box to the Front Panel
Assembly using (2) M5×10 bolts and (2) M5 nuts.
► P. 6, item 7c
– Insert the Wood Chip Box Lid into the slots in the
Front Panel Assembly.
► P. 6, item 7d
– Slide the Wood Chip Box Assembly into the Fire-
box.
► P. 6, item 7e
– Position the Wood Chip Box Tent onto the Wood
Chip Box Assembly. Set onto wood chip rails and
push back into place.
8. Locate the (2) Heat Tents
► P. 6, item 8a
– Install (1) Heat Tent by inserting the tabs through
the slots on the Rear Bracket on the Firebox.
► P. 6, item 8b
– Insert the other end of the Heat Tent with the
slots into Front Bracket on the Firebox. Push
Heat Tent back into position.
► P. 7, item 8c
– Attach another Heat Tent.
9. Locate the (2) Cooking Grids
► P. 7, item 9
– Place (2) Cooking Grids into the Firebox.
10. Locate the (1) Side Shelf Right Front/Left Rear
Bracket, (1) Side Shelf Left Front/Right Rear
Bracket and (4) M6×12 bolts
► P. 7, item 10
– Attach (1) Side Shelf Right Front/Left Rear
Bracket, (1) Side Shelf Left Front/Right Rear
Bracket to the right side of the Firebox using (4)
M6×12 bolts.
11. Locate the (1) Side Shelf and (2) M5×12 shoul-
der bolts
► P. 7, item 11
– Attach (1) Side Shelf to the Side Shelf Right
Front/Left Rear Bracket and Side Shelf Left
Front/Right Rear Bracket using (2) M5×12 shoul-
der bolts.
12. Locate the (1) Side Shelf Right Front/Left Rear
Bracket, (1) Side Shelf Left Front/Right Rear
Bracket, (1) Side Shelf, (2) M5×12 shoulder bolts
and (4) M6×12 bolts
► P. 7, item 12
– Attach the other Side Shelf Brackets and Side
Shelf to the left side of the Firebox using (4)
M6×12 bolts and (2) M5×12 shoulder bolts.
► P. 7, item 13
– Remove two bolts from bottom hinge, and install
the cylinder bracket with these two bolts.
► P. 8, item 14
– Loose the plastic bolts from the Cart Top Legs.
Fold the Side Supporting Legs and Rear Sup-
porting Leg, seat the Tabletop Grill Assembly
onto the Cart Legs.
► P. 8, item 15
– Tighten the plastic gear bolt on the Cart Legs.
DANGER! Risk of cuts! Metal parts may
have sharp edges. Take care during assem-
bly.
Gasgrill_405501_428949_428955_428951_428948.book Seite 37 Donnerstag, 5. Dezember 2019 11:19 11