CTI-CRYOGENICS
HELIX TECHNOLOGY CORPORATION
Appendix E
Establishing Gas Charge Pressure of
Multi-Cryocooler Installations
•
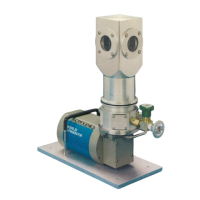
To establish the helium gas charge pressure of a
multiple cryocooler installation using interconnecting
lines longer than ten feet proceed as follows:
1.
Interconnect the Cryodyne cryocooler components
as described in Section 2.4.
2.
Attach a helium bottle, regulator, and charging
line to the compressor as described in Section 6.2.2,
under Adding Helium Gas, step 1 through 3.
3.
Turn on the system power ON/OFF switch. If
the remote energizing feature is installed (refer
to Appendix G) place the remote ON/OFF switches
to on so the cold heads will run.
4.
Note the helium pressure gauge reading immediately
after start-up it should read 50-100 psig (345-690
kPa).
5.
If necessary add helium gas, refer to Section 6.2.2,
or reduce the helium gas pressure as described in
Section 2.4.
6.
Allow the cold heads to operate until a cooldown
temperature of 20K or less is reached. Adjust the
helium pressure if necessary as described in step 5
until the helium pressure gauge reads 80-100 psig
(550-690 kPa) while the compressor is operating.
7.
Shut off the compressor and cold heads. Allow the
system to reach ambient temperature, this usually
takes approximately four to five hours.
Note:
Record the compressor static pressure in
your operating log. This is the static pressure
for your particular installation and should be
used for checking compressor performance
or when troubleshooting the installation.
8.
Ensure that the helium charge valve on the com-
pressor is tightly closed. Then shut off the helium
pressure regulator or the helium bottle. Remove
the charging line from the male flare fitting and
reinstall the flare cap.
•
P/N 8040272
E-1
 Loading...