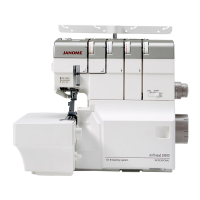
Do you have a question about the Janome AirThread 2000D Professional and is the answer not in the manual?
Specification for right needle to plate distance: 11.6mm – 12.2mm.
Raising needle bar, placing step gauge under needle for height check.
Using a driver to align the threader shaft with the needle bar screw.
Loosening screw to adjust needle bar, avoid rotation.
Specification for presser foot to needle plate distance: 5.2mm – 5.8mm.
Raising presser foot, inserting step gauge, then lowering.
Loosening screw to adjust presser bar, avoid rotation.
Specification for feed dog height: 0.9mm-1.1mm from needle plate.
Adjusting sub feed dog using 3.0mm screw after removing needle plate.
Adjusting front feed dog using 2.0mm screw and wrench.
Disconnecting pipes by pushing rubber tube with tweezers.
Positioning and removing the lower looper.
Installing looper, connecting pipes, and positioning rubber tube.
Positioning the gauge on the looper shaft for alignment.
Adjusting looper height to 65.7mm, avoiding overtightening.
Inserting clamp and spacer, securing with thumb screw.
Removing spacer and turning handwheel to align clamp.
Verification point: lower looper tip entering right needle.
Adjusting lower looper arm position and checking clearance.
Specification for needle to rear guard clearance: 0.05-0.25mm.
Adjusting rear needle guard clearance using 2.5mm screws.
Specification for needle to front guard clearance: 0-0.05mm.
Installing and adjusting front needle guard, checking for interference.
Disconnecting upper looper pipes using tweezers.
Connecting pipes and positioning rubber tube for upper looper.
Temporarily tightening screw, checking for interference.
Using gauge to align upper looper tip with guide line and tighten.
Adjusting upper shaft height using 2.5mm screws for 1.2mm clearance.
Adjusting clearance between upper looper tip and lower looper back.
Adjusting upper looper position for 8.0mm clearance.
Adjusting upper looper timing by moving the cam.
Adjusting chaining finger position using 1.5mm screws.
Replacing lower knife by removing and tightening screws.
Adjusting upper knife height by loosening hexagon bolt.
Adjusting upper knife timing by rotating cam.
Identifying and correcting loose left needle tension.
Identifying and correcting loose right needle tension.
Correcting upper/lower looper tension issues.
Adjusting threader plate position and shaft for needle alignment.
Warning against oil/grease in air threading holes to prevent clogging.
Potential causes for thread issues: lint, misalignment, or stuck pipes.
Critical importance of precisely aligning air pipes for threading success.
Adjusting pipe alignment by loosening and tightening screws.
Adjusting the safety switch for the presser foot lifter.
Adjusting safety switches for the front and side looper cover doors.
| Number of Threads | 2/3/4 |
|---|---|
| Air Threading System | Yes |
| Differential Feed | Yes |
| Maximum Sewing Speed | 1300 stitches per minute |
| Adjustable Cutting Width | Yes |
| Built-in Needle Threader | Yes |
| Tension Release Lever | Yes |
| Needle System | HAx1SP |
| Needles | 2 |
| Built-in Rolled Hem | Yes |
| Free Arm | No |
| Type | Overlocker |
| Stitch Options | Overlock, Rolled Hem, Flatlock |
| Stitch Width | 5 to 9 mm |
| Stitch Length | 1 - 4 mm |
| Differential Feed Ratio | 0.5 to 2.0 |
| Presser Foot | Standard |
| Dimensions | 320mm x 240mm x 290mm |
