INSTALLATION
1. Finish Frame
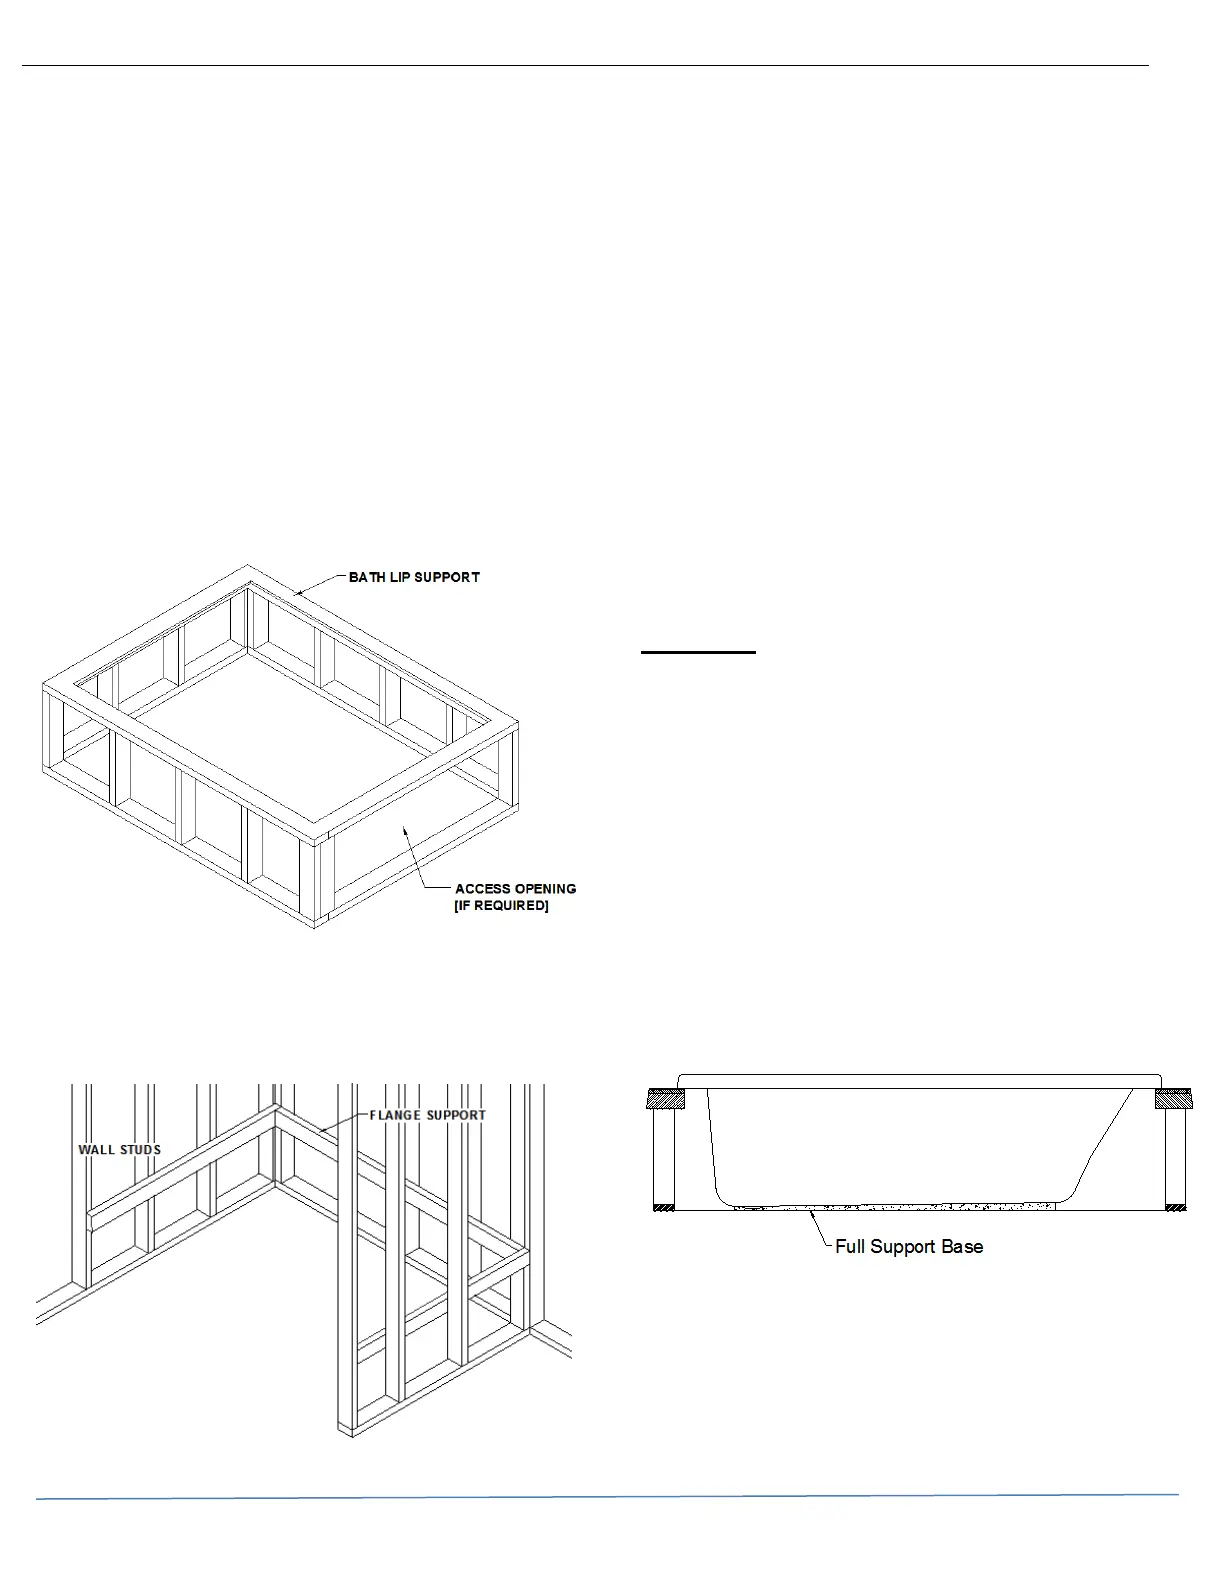
A finish frame under the shell rim should always be
constructed to support the bath deck and ensure
proper drainage toward the bath well. This frame is not
intended to support the full bath weight. See Figures 1
and 2. Allow ample clearance for any equipment that
may installed on the bath.
CAUTION: Ambient temperature under the bath where
equipment is installed must not exceed 122°F (50°C).
Drop In Framing
The drop in opening should approximately one (1) inch
[2.5cm] less than the outer dimensions of the bath.
Full size templates are included with the bath
packaging for oval tubs.
Figure 1
Alcove Framing
For 3-wall alcove installations, install a 1”x 2” ledger
strip to support the tile lip flange. See the Integral Tile
Lip Alcove Installation section for further instructions.
Figure 2
2. AirMasseur
®
Ventilation (AM baths)
A minimum ventilation opening of 2” x 4” [5x10cm] for
the AirMasseur blower is required. It should be
designed to draw in indoor ambient air at a minimum of
72°F [22°C].
3. Drain and Overflow
Install the drain and overflow assembly to the bath shell
according to the instructions provided with the drain and
position the bath in the area of intended installation.
Finish plumbing rough-in of drain and overflow
assembly. At this time, considerations should be made
for the position and mounting of the faucet set, as well
as all related plumbing.
4. Packing Board Removal
The bath is equipped with separate bath equipment
support bases which are joined for shipment with
packing boards. Before installing the bath, detach the
packing board from the bath and from underneath the
equipment.
WARNING: Any modification to the equipment is
not recommended and will void the Manufacturer’s
warranty.
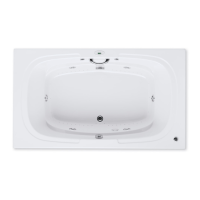
5. Level Installation
The bath must be installed level to ensure proper
draining. To verify, use a level on top of the deck on
both ends and front of the bath. Jason baths are
designed to be supported at the base of the bath. If the
floor is smooth and level, the bath’s Level Form™ Base
will provide proper drainage and support (see Figure 3).
Mortar is required when the subfloor is not smooth and
level or when additional sound insulation is desired.
Note: Do not use isolation pads or a sand bed to install
or level the bath.
Figure 3