Do you have a question about the JASON Hydrotherapy Integrity and is the answer not in the manual?
Inspect the unit for damage before accepting and installing. Report any issues immediately.
All acrylic surface damage warranty claims must be made prior to installation.
Ensure adequate space is provided for service access to bath equipment and connections.
Use unit as intended, supervise children, and avoid unauthorized attachments.
Understand hyperthermia symptoms and risks, especially with alcohol or medication.
Enter/exit slowly, ensure suction cover is on, and maintain water level above jets.
Manual overview, initial cleaning, and general operating notes for the bath.
Details MicroSilk hydrotherapy benefits, unit operation, and port usage.
Explains AirMasseur blower, speed control, and automatic purge for massage.
Describes Whirlpool jets, pump, and controls for relaxation and tension relief.
Prevent mold and mildew by ensuring proper bathroom ventilation and preventing leaks.
Instructions for cleaning acrylic bath surfaces and maintaining their finish.
Procedure for flushing and sanitizing the bath and plumbing system regularly.
Guidance on seeking qualified technicians for repairs and preparing for service calls.
Construct frame for bath deck support and proper drainage. Consider clearances for equipment.
Requirements for AirMasseur blower ventilation and ambient air temperature for optimal heating.
Install drain and overflow assembly and rough-in plumbing for faucets.
Ensure bath is level for drainage and support. Use mortar if subfloor is uneven.
Install ledger strips to support tile lip flange in alcove installations.
Protect the acrylic bath surface from damage using suitable materials during installation.
Recommended procedure to water test the bath and plumbing for leaks before final installation.
Instructions for remotely mounting the AirMasseur blower for optimal placement and access.
Field installation steps for the Whirlpool pump assembly if shipped separately.
Connect to a dedicated 120V GFCI circuit. Ensure GFCI is accessible for testing and not interrupted.
Proper grounding is required. Avoid altering factory wiring and route away from heat sources.
Connect the MicroSilk unit to the air switch control box and dedicated GFCI circuit.
Connect the AirMasseur unit to the air switch control box and dedicated GFCI circuit.
Connect the Whirlpool system to dedicated GFCI circuits for the pump and optional heater.
Diagnoses and resolves issues like no power, unexpected shutoffs, and repeated breaker trips.
Addresses specific MicroSilk pump problems like clogged air intake or leaks.
Explains blower operation during purge cycles and normal functionality.
Resolves issues with whirlpool jets not working or pump leaks.
Instructions for registering the product warranty online for service and support.
Details the warranty period, coverage, exclusions, and limitations for defective merchandise.
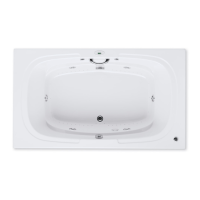
| Shape | Rectangular |
|---|---|
| Installation Type | Drop-in |
| Material | Acrylic |
| Color | White |
| Warranty | Limited Lifetime |
| Dimensions | 60 x 32 x 20 inches |