Table of Contents Front and Rear Panel
Front and Rear Panel. .............................................................................. 1
Remote Control. .......................................................................................2
Connecting to a Television. ........................................................................ 3
Connecting to a DVD Recorder or VCR. ..................................................... 3
Connecting to an Audio System. ................................................................ 4
First Time Installation. .......................................................................... 4-5
Menu settings. ...................................................................................... 5-9
Electronic Program Guide (EPG). ............................................................. 6
USB Personal Video Recorder (PVR). ................................................... 9-11
Troubleshooting...................................................................................... 12
Technical Specifications. ........................................................................12
Using the XC4929 in New Zealand…………………………………………… …13
Frequently Asked Questions………………………………………………………14
Remote Control Quick Guide………………………………………………………15
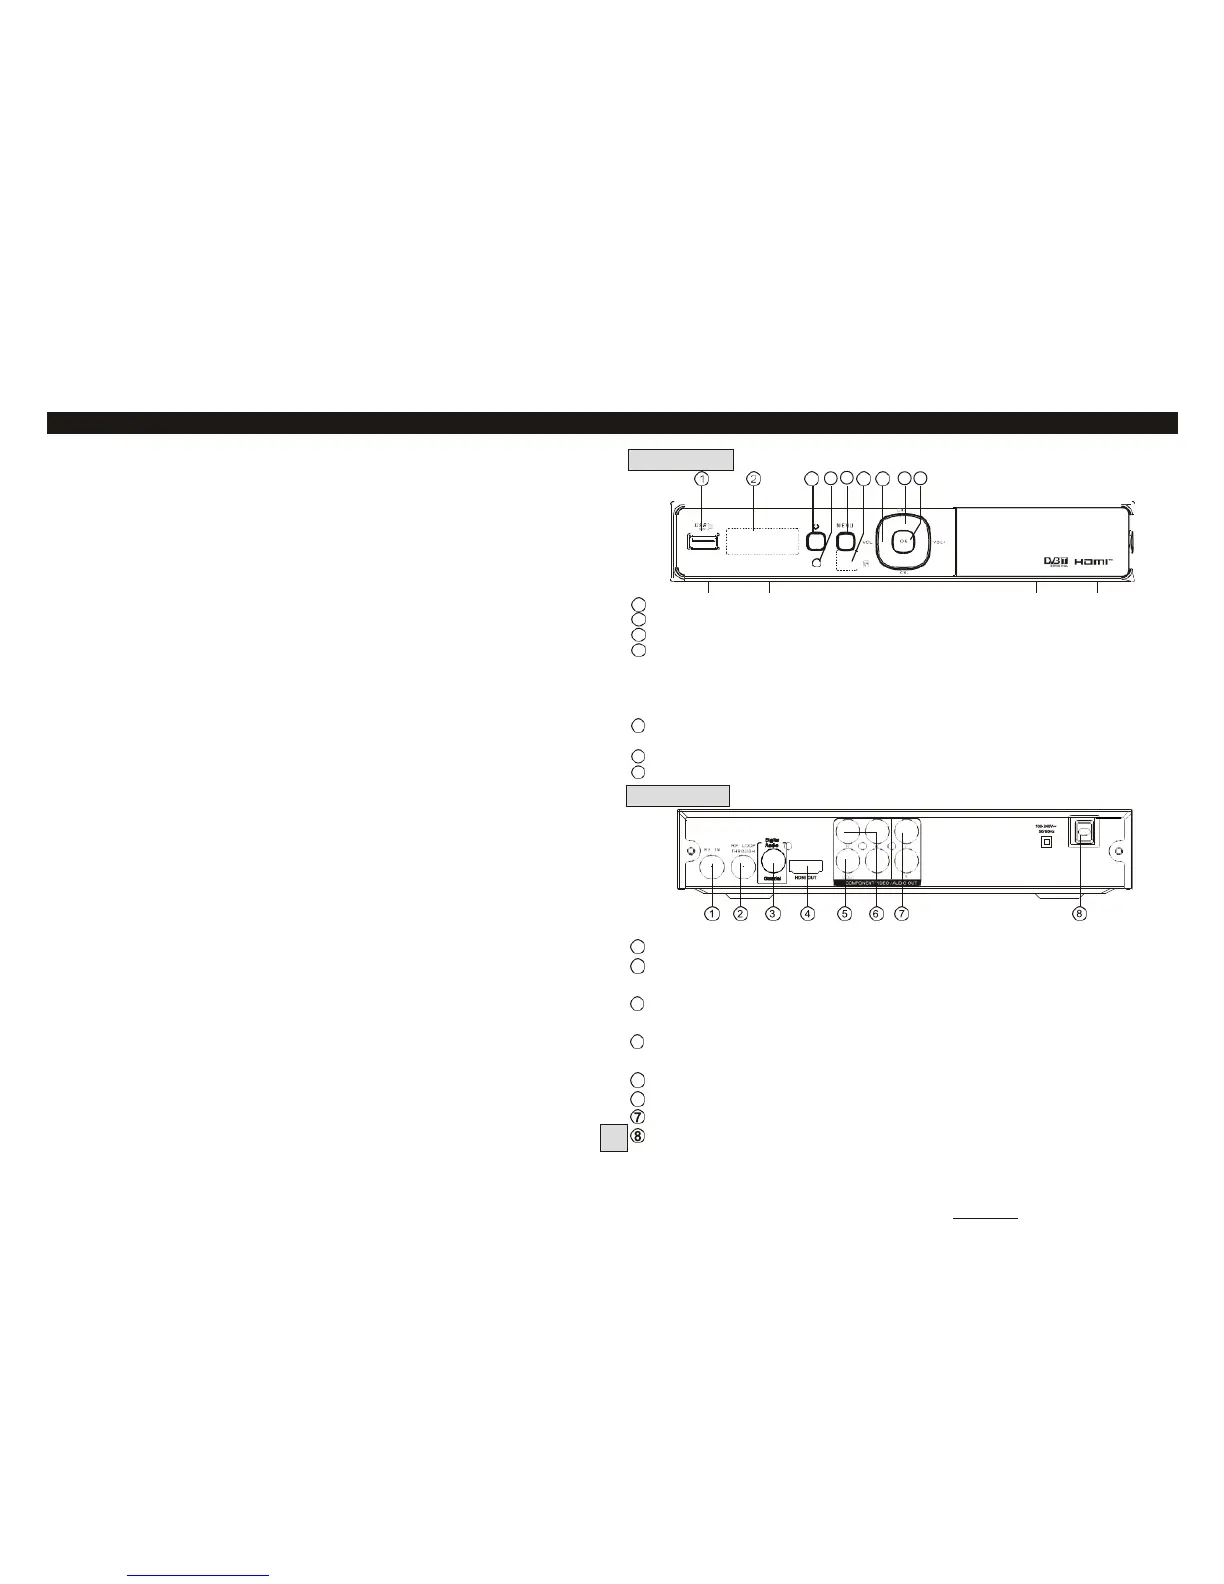
1
USB: Data input from USB storage devices.
2
LED DISPLAY WINDOW: Used to display the channel number.
3
STANDBY: used to switch the set top box between On and Standby modes.
4
STANDBY INDICATOR: Green in normal operation, turns to red in standby
mode.
5
MENU: Turns on the Main Menu.
6
REMOTE CONTROL SENSOR: Used to receive the infra-red signal from the
remote control (Make sure this is not blocked by cables).
7
VOLUME+/-: Used to increase/decrease the volume without using the
Remote control.
8
CHANNEL +/-: Used to change channels without using the remote control.
9
OK: Confirms an entry or selection.
1
RF IN: Connect to your TV antenna.
2
RF LOOP THROUGH: Feeds auxiliary TV antenna signal to your TV
(Allows you to watch one channel while recording another)
3
COAXIAL: Connects to the Coaxial digital audio socket on a surround
sound system.
4
HDMI: High Definition Multimedia Interface: Connects high definition
audio and video to an HDMI equipped device (eg. flat screen TV).
5
VIDEO: (Yellow socket) Composite video signal for older model TVs
6
COMPONENT VIDEO OUT: Y, Cr, Cb analog outputs for older model TVs
AUDIO L/R: Analog Audio L/R signals for older model TVs.
MAINS CABLE: This is used to connect to the 240V mains power supply.