75 - 5
Assembly JS200/JS240
Clean each part in a suitable solvent and dry using
compressed air.
Inspect all parts and replace as required.
Care must be taken not to let dust or dirt adhere to parts after
cleaning and that parts do not become dented, scratched or
damaged.
Fit new 'O'-rings, and seals when assembling together with a
new back up ring.
Take care to install the back up ring in the proper position.
Apply grease and or hydraulic oil to all new oil seals and 'O'-
rings, and clean hydraulic fluid to all sliding parts before
installation.
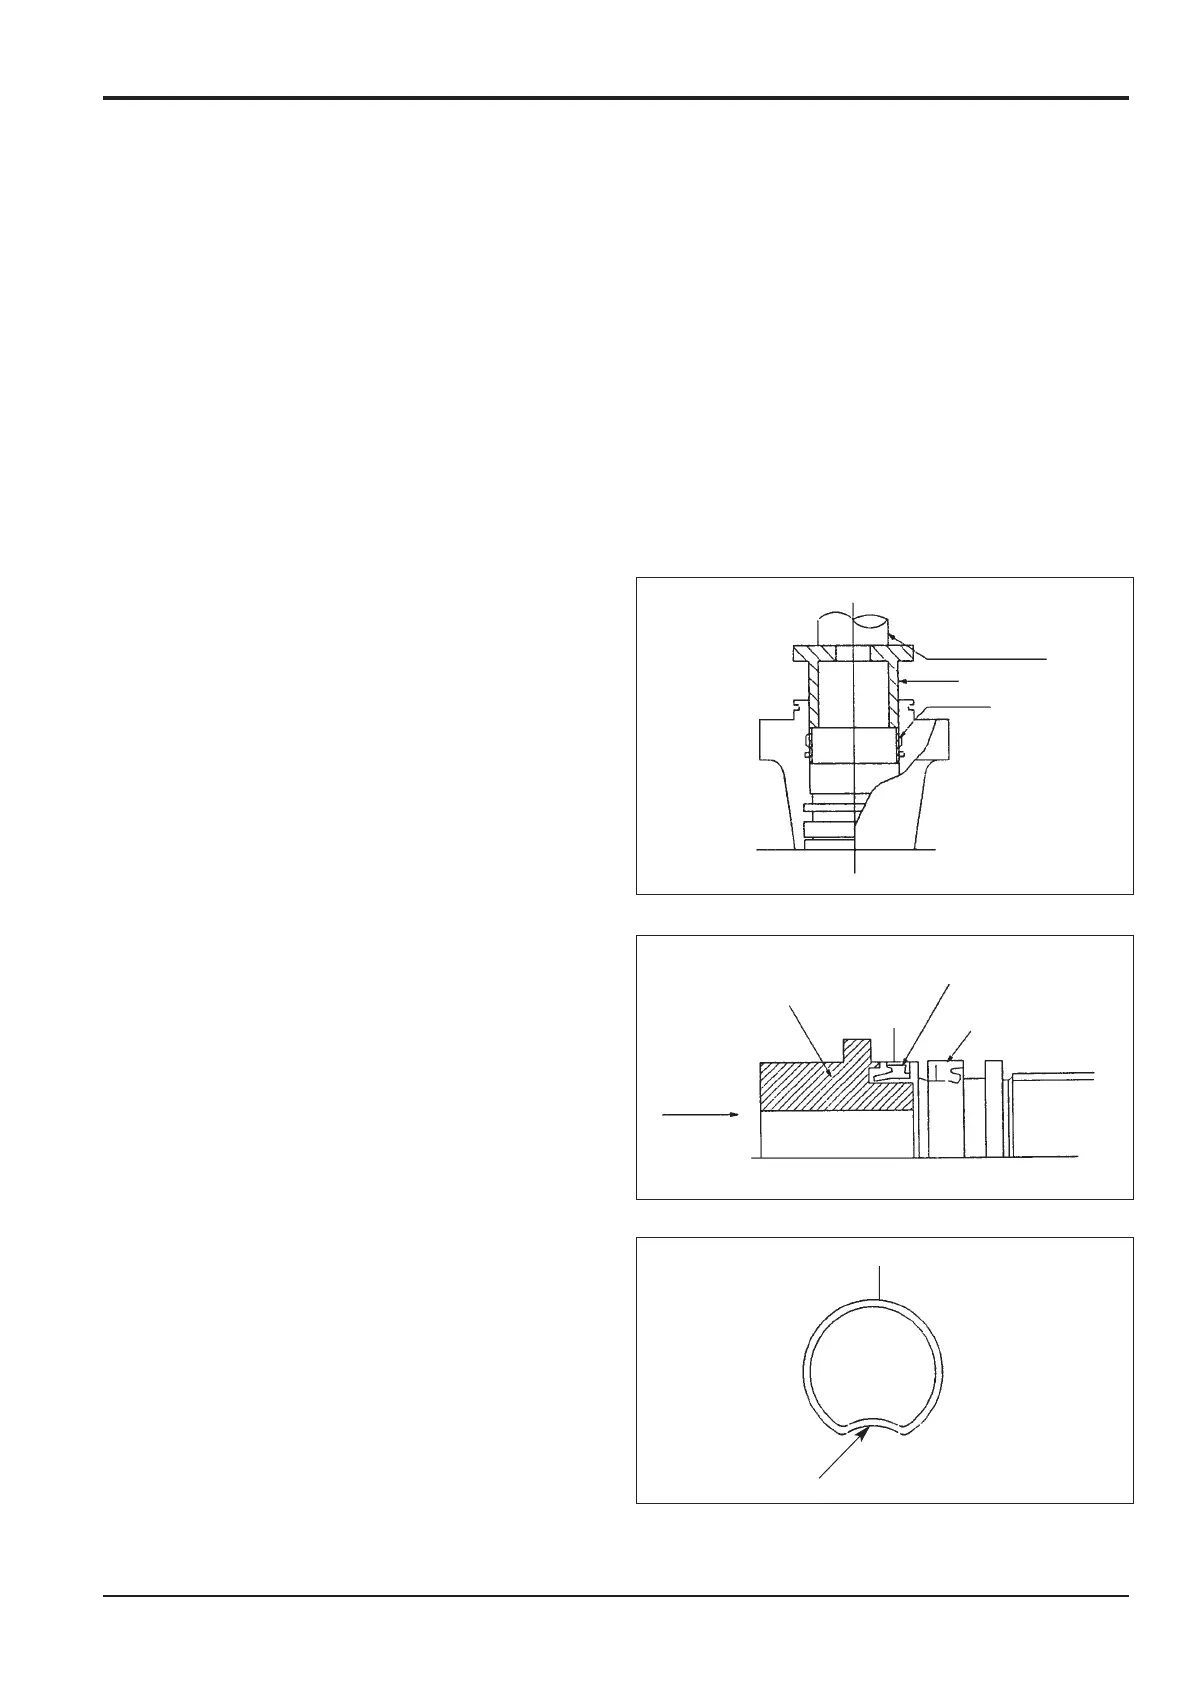
1. Cylinder head assembly.
a. Assemble the Du bushing A using a jig B and
press C.
b. Assemble the wiper ring D using a jig E and press C.
c. Assemble the back up ring F and U-ring G.
2. Buffer ring assembly.
Note: After installing the square ring K in the groove, bend
the buffer ring F into a U-shape (J) and set it in the groove H,
then press on the outer circumference of the ring to fit it into
place. Bending the ring in too small a radius causes wrinkles
which remain in the ring after installation. Keep the bending
radius at 6 mm or greater. Make sure there are no wrinkles in
the ring after installation.
Section E
Hydraulics
9803/6400
Section E
75 - 5
Issue 1
Hydraulic Rams
C
B
A
E
D
H
C
F
J

 Loading...