75 - 6
Assembly JS200/JS240 (continued)
Note: Be careful to install the seal in the proper direction.
Installing it backwards causes extremely high pressure to
build up between it and the U-ring and could cause
deformation of the cylinder head.
a. Install the snap ring M to prevent the Du bushing A
from coming off.
3. Piston Assembly.
a. Place the piston N on the press and using the jig P
as shown, install the seal ring Q (pre-assemble the
'O'-ring R and one back up ring S beforehand).
b. After attaching the seal ring Q and one more back up
ring T, correct the seal ring Q with the corrective jig U
so that it does not remain extended.
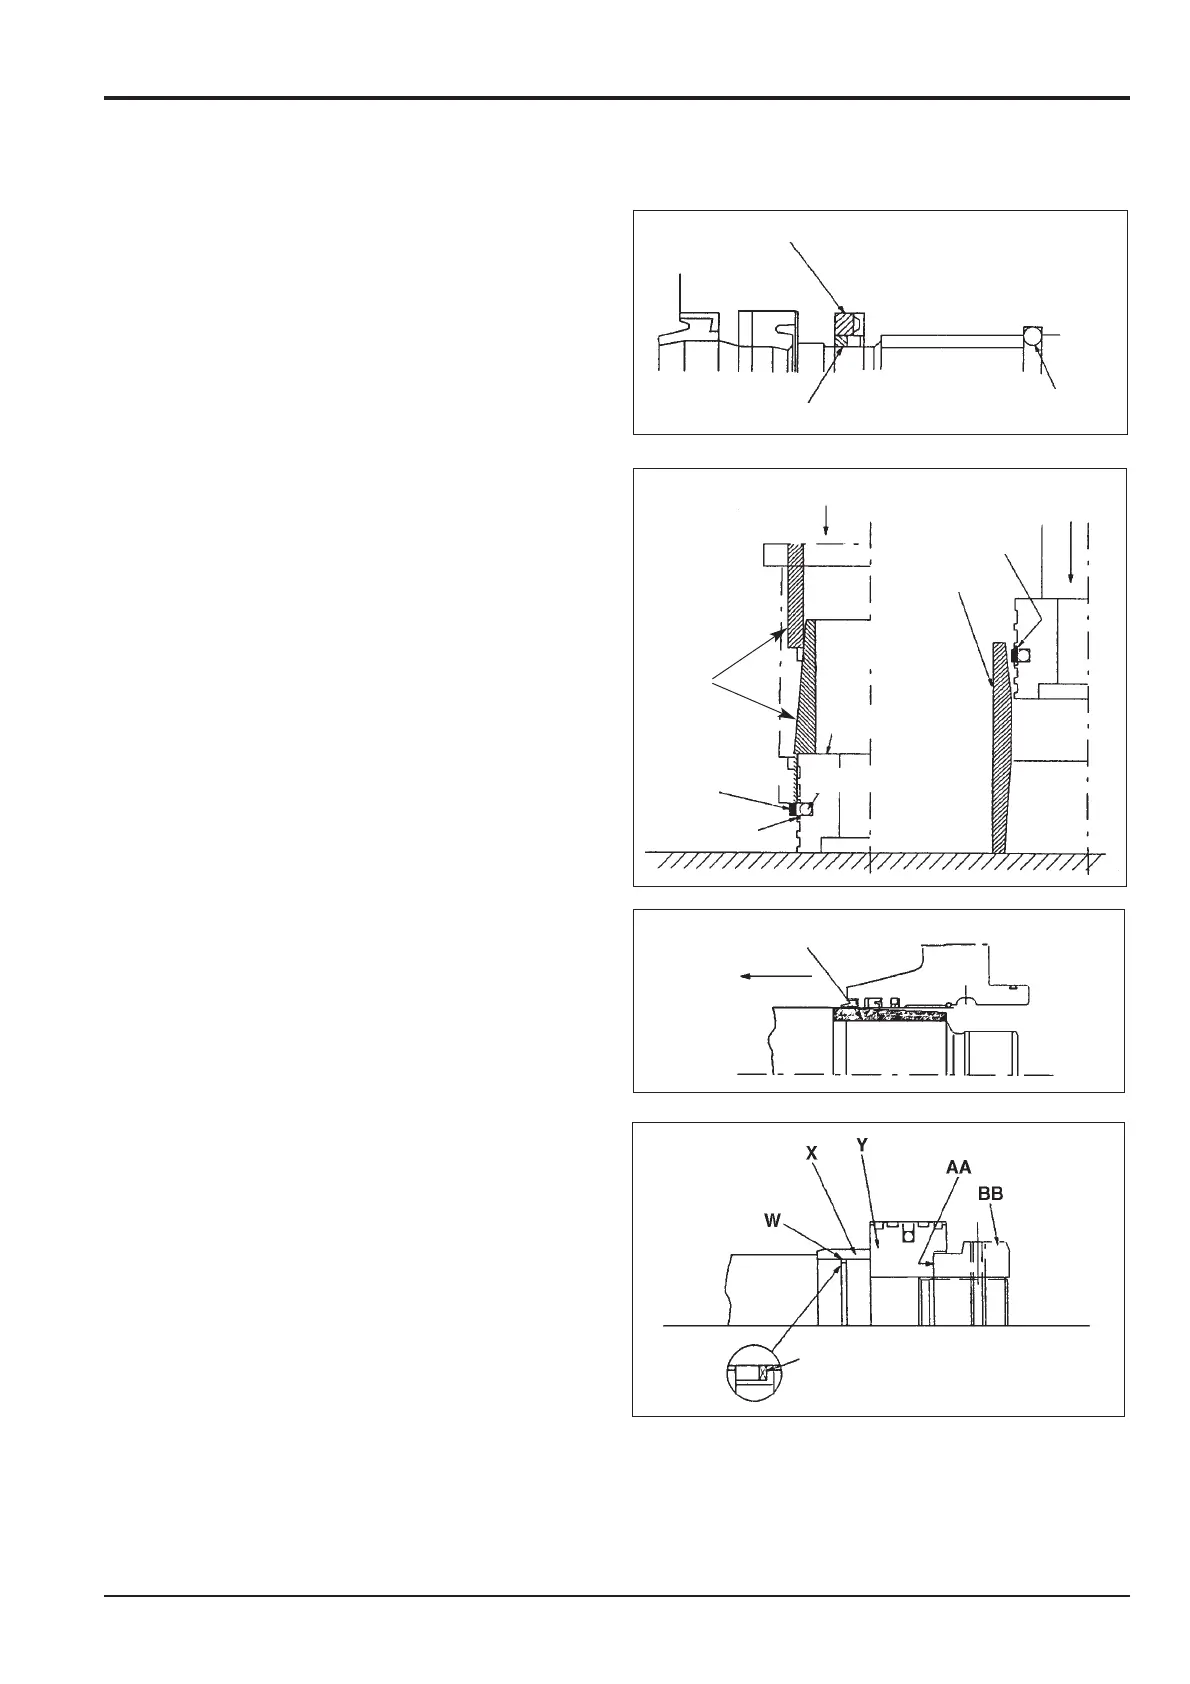
4. Piston Rod Assembly.
a. Secure the piston rod.
b. Fit the cylinder head onto the piston rod using
assembly jig V.
Note: Do not get the wiper ring D and the O-ring H, caught
on the stepped portion.
c. Fit the cushion seal W, cushion bearing X and piston
Y in place.
Note: The cushion seal W is unnecessary for the bucket
cylinder.
Where there is a cushion at the retraction side (end of
piston rod), assemble the cushion bearing as detailed in
paragraph 5 before fitting the piston Y.
d. Insert a shim AA and tighten the piston nut BB to the
specified torque.
Note: Face the cushion seal slit W towards the piston side.
Section E
Hydraulics
9803/6400
Section E
75 - 6
Issue 1
Hydraulic Rams
M
V
K
F
Q
R
S
U
T
N
P
W