© 2017 JCM Global Corporation 11 Part No. 960-000194R_Rev. A
GEN5™ Printer
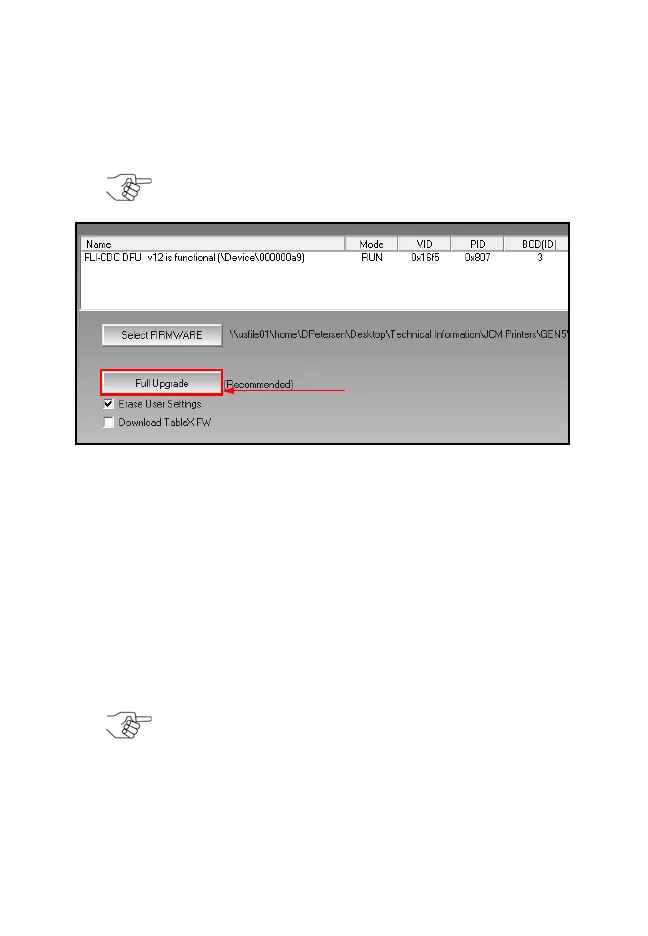
7. Make sure the Erase User Settings check box is selected.
Then click the Full Upgrade button (Figure 8 a).
8. Press the FEED button twice to print a Configuration Ticket.
9. Verify that the Firmware version printed on the Configura-
tion Ticket matches the version downloaded to the Printer.
U
PDATING
GEN5 F
IRMWARE
WITH
THE
B
LUE
W
AVE
™
DX T
OOL
To update firmware on the GEN5 Printer using the BlueWaveDX
Tool, perform the following steps:
1. Create a folder in the root directory of the SD Card, named:
GEN5 System.
2. Place the Firmware file for the GEN5 Printer into this new
folder.
3. Apply power to the GEN5 Printer.
4. Connect a Standard USB Cable between the BlueWaveDX
Tool and the GEN5 Printer USB Download Port.
5. Apply Power to the BlueWaveDX Tool.
NOTE: When the ***Printer Successfully Updated***
text line appears, the update is complete.
Figure 8 Select the Full Upgrade Button
NOTE: Multiple versions of Firmware can be stored in
the GEN5 System folder.
GEN5_FlipBookRevA_v15.fm Page 11 Friday, June 30, 2017 9:20 AM
 Loading...