EasyManua.ls Logo

Jeep UNIVERSAL CJ-2A - Page 159

Jeep UNIVERSAL CJ-2A
281 pages
Print Icon
To Next Page IconTo Next Page
To Previous Page IconTo Previous Page
Loading...
J
CLUTCH
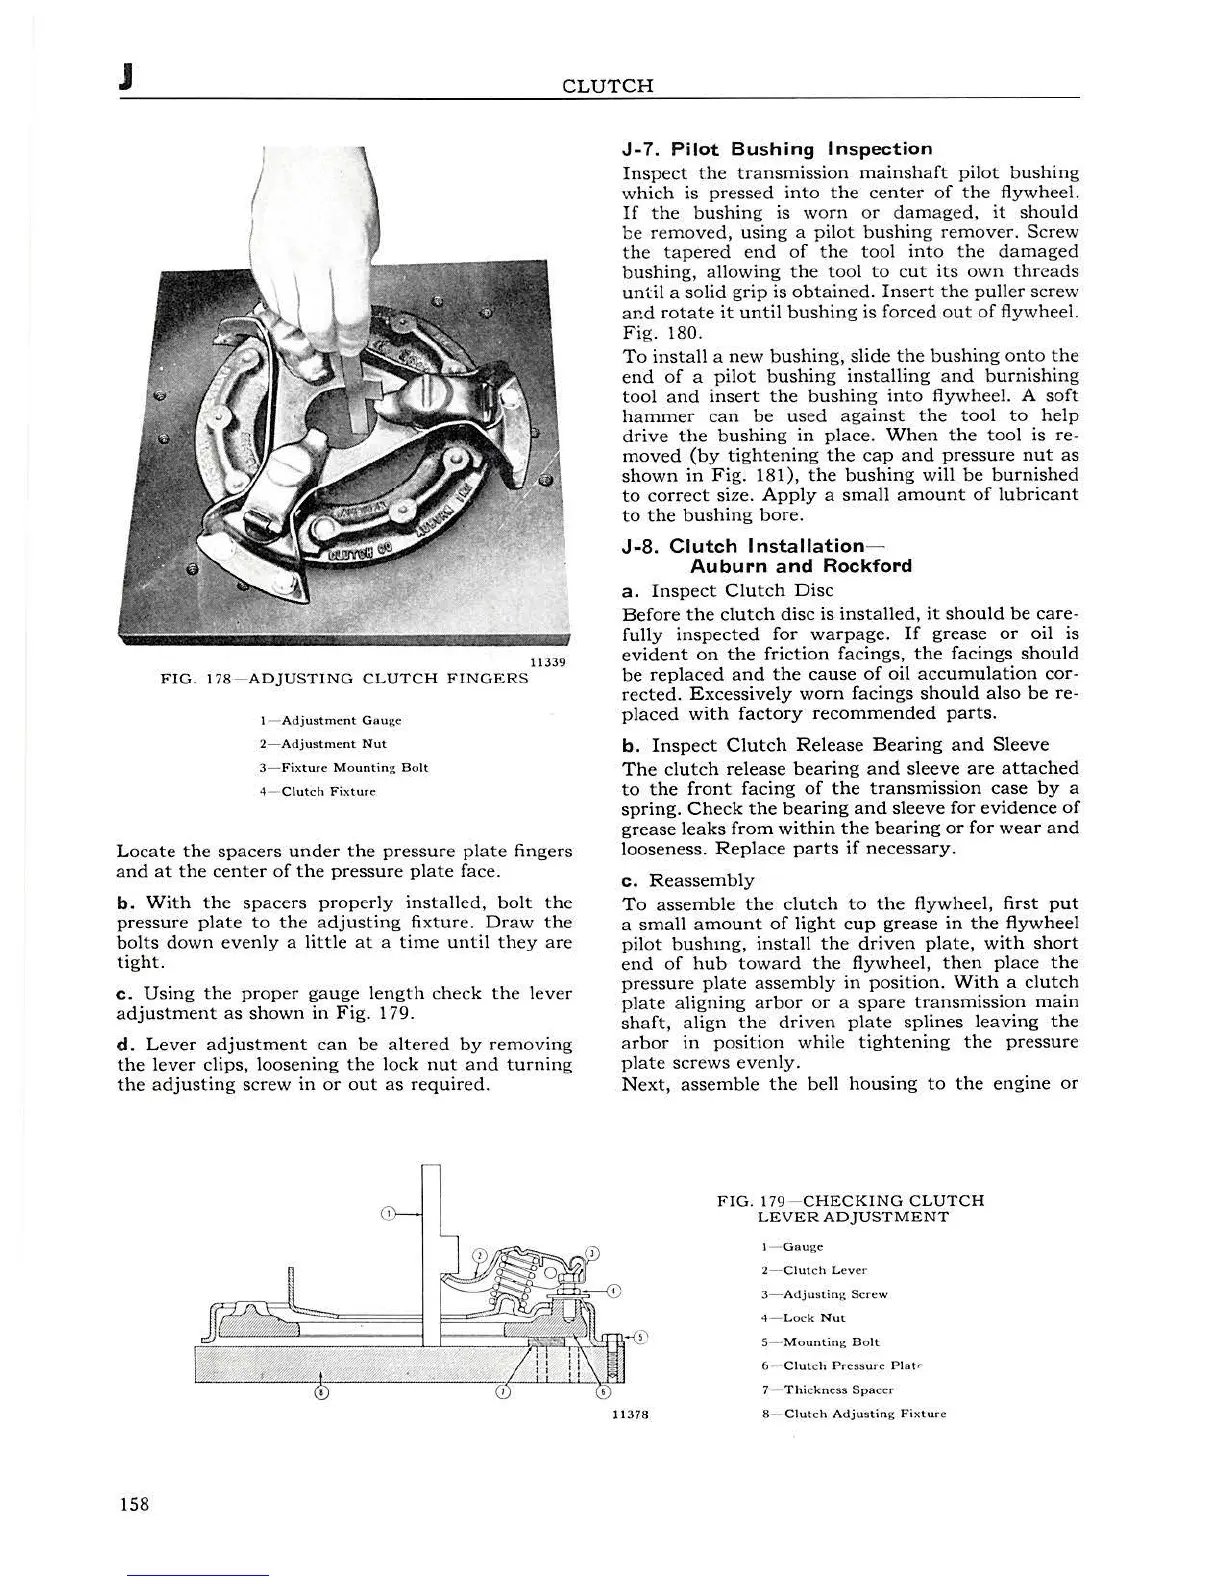
11339
FIG.
178
-
ADJUST
I
NG
CLUTCH
FINGERS
! -
Adjustment
Gauge
2-
Adjustment
Nut
3-
Fixturc
Mountin
g
Bolt
4-
Clutch
Fi
xture
Locate
the
spacers
under
the
pressur
e
plate
fingers
and
at
the
center
of
the
pressure
plate
face.
b.
With
the
spacers
properly
installed,
bolt
the
pressure
plate
to
the
adjust
i
ng
fixture.
Draw
the
bolts
down
even
ly a
litt
le
at
a
time
until
t
hey
are
tight
.
c .
Using
the
proper
gauge
l
ength
chec
k
the
lev
er
ad
j
ustment
as
shown
in
Fig.
179.
d.
Lever
adj
u
stment
can
be
altered
by
removing
the
lever
cli
ps
,
loosening
t
he
lock
nut
and
turning
the
adjusting
screw
in
or
out
as
required.
158
J-
7. Pi
lot
Bu
sh ing
In
s
pection
Inspect
the
transmission
mainshaf
t
pilot
bushing
which
is p
ressed
into
the
center
of
the
flywheel.
If
the
bushing
is
worn
or
da
mag
ed,
it
should
be
removed,
using
a
pi
l
ot
bushing
remover
.
Screw
the
tap
ered
end
of
the
tool
int
o t
he
damaged
b
ushing,
a
llowing
t
he
tool
to
cut
its
own
threads
until
a solid
grip
is
obtain
ed
.
Insert
the
puller
screw
ar.d
rotate
it
until
bushing
is
forced
out
of
flywheel.
Fi
g. 180.
To
install
a
new
bushing,
slide
the
bushing
onto
the
end
of
a pil
ot
bushing
installing
and
burnishing
tool
and
insert
the
bushing
into
flywh
ee
l. A
soft
hammer
can
be
used
against
the
tool
to
help
drive
the
bushing
in
place.
Wh
en t
he
t
ool
is
re-
moved
(by
tight
e
ning
the
cap
and
pressure
nut
as
shown
in
Fig.
181
),
the
bushing
will
be
burnished
to
correct
size.
Apply
a
small
amount
of
l
ubricant
to
the
bushing
bore.
J-
8.
Clutch
In
sta
ll
a
ti
on-
Auburn
a
nd
Rockford
a .
Inspect
Clutch
Disc
Before
the
clutch
disc
is
installed,
it
should
be
care
-
fully
inspected
for
warpage.
If
grea
se
or
oil
is
evident
on
the
friction
facings,
the
facings
should
be
replaced
and
the
cause
of
oil
accumulation
cor
-
rected
.
Excessively
worn
facings
should
also
be
re-
pl
aced
with
factory
recommended
parts.
b.
Inspect
Clutch
Release
Bearing
and
Sleeve
The
clutch
release
bear
i
ng
and
sleeve
are
attached
to
the
front
facing
of
the
transmission
case
by a
spring.
Check
the
bearing
and
s
leeve
f
or
evidence
of
grease
leaks
from
within
the
bearing
or
for
wea
r
and
looseness
.
Replace
parts
if
necessary
.
c.
Reassembly
To
assemb
le
the
clutch
to
the
flywheel,
first
put
a
small
amount
of
light
cup
gr
ease
in
the
flywheel
pilot
bushmg,
install
the
driven
plate,
with
short
end
of
hub
toward
the
flywheel,
then
place
the
pressure
pl
ate
assembly
in
position
.
With
a clu
tch
plate
ali
gning
arbor
or
a
spare
transm
i
ssion
main
shaft,
align
the
driven
plate
splines
leaving
the
arbor
in
position
whi
le
tightening
the
pressure
plate
sc
re
ws
evenly.
Next,
assemb
le
the
bell
housing
to
the
engine
or
11
378
FIG
. I 79 -
CHECKING
CLUTCH
LEVER
ADJUSTMENT
1-
Gau
ge
2-
Clut
ch
Leve
r
3- A
djustin
g
Screw
4-
Lock
Nut
5-
Mounting
Bolt
6-
Clut
ch
Pressure
Plat
'
7-
Thickness
Spac
er
8-
Clutch
Adju
st
in
g
Fixture