EasyManua.ls Logo

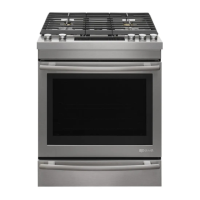
Jenn-Air JDS9860AAB User Manual

Jenn-Air JDS9860AAB
62 pages
To Next Page IconTo Next Page
Page #1 background imageLoading...
Page #1 background image
16026016
March 2005
©2005 Maytag Services
This Base Manual covers general information
Refer to individual Technical Sheet
for information on specific models
This manual includes, but is
not limited to the following:
Service
This manual is to be used by qualified appliance
technicians only. Maytag does not assume any
responsibility for property damage or personal
injury for improper service procedures done by
an unqualified person.
JDS8850AAB/Q/S/W
JDS8850ACS/W
JDS9860AAB/P/W
JDS9860ACB/P/W
Dual Fuel
Slide-In
Range

Table of Contents

Other manuals for Jenn-Air JDS9860AAB

Questions and Answers:

Jenn-Air JDS9860AAB Specifications

General IconGeneral
BrandJenn-Air
ModelJDS9860AAB
CategoryRanges
LanguageEnglish

Summary

Dual Fuel Slide-In Range

Important Information

Safety Warnings and Symbols

Essential safety precautions, warnings for users and servicers, and recognition of safety symbols.

Important Safety Information

Appliance Operation and Handling Safety

Covers anti-tip bracket installation, avoiding injury, electrical safety, and general appliance usage precautions.

Important Safety Information

Surface Cooking and Servicing Safety

Guidelines for surface unit usage, preventing fires, and safe servicing practices for the range.

Important Safety Information

Oven, Gas, and Component Safety

Precautions for oven use, gas connection, extension cords, and specific component safety.

Important Safety Information

Ventilation, Fire Safety, and Product Devices

Covers ventilation hoods, fire procedures, general precautions, and essential product safety devices.

Product Safety Devices

Details on safety devices like pressure regulators and grounded frames, ensuring proper function.

General Information

Cooking Nomenclature

Explanation of model number coding for brand, fuel, product type, color, and listing.

General Information

Specifications and Model Information

Information on oven placement, air vents, model number location, and identification procedures.

Service and Support

Details on obtaining service, parts, accessories, and extended service plans.

Range Description

Troubleshooting Procedures

Troubleshooting Chart

Lists common problems, possible causes, and suggested corrections for burner and oven issues.

Troubleshooting Procedures

Fault Code Chart

Describes fault codes generated by the electronic control, their meaning, and components to check.

Troubleshooting Procedures

Oven Sensor and Meat Probe Charts

Provides resistance values for oven sensors and meat probes at various temperatures.

Testing Procedures

Component Testing Procedures

Detailed steps and expected results for testing various range components like elements and switches.

Testing Procedures

Oven Control Testing Procedures

Instructions for changing factory default settings and testing oven control functions.

Testing Procedures

Control Panel Assembly Testing

Resistance testing procedures for the control panel pads and their connections.

Testing Procedures

Relay Logic

Chart indicating relay operation for different cooking modes (bake, broil, convection, etc.).

Testing Procedures

Quick Test Mode Procedures

Step-by-step guide to enter and perform the Electronic Oven Control quick test.

Testing Procedures

Description of Fault Codes

Explanation of fault codes (F0-0 to F9-3) and the corresponding components to troubleshoot.

Disassembly Procedures

Range Removal and Gas System Components

Steps for removing the range and disassembling gas system parts like manifold and regulator.

Burner and Ignition System Components

Procedures for disassembling top burners, spark modules, and burner switches.

Disassembly Procedures

Main Top and Control Panel Assembly

Instructions for removing the main top, control panel, and electronic control unit.

Internal Oven Components

Steps for accessing and removing bottom access panel, indicator lights, and oven cavity components.

Disassembly Procedures

Oven Sensor and Heating Elements

Procedures for removing oven sensor, bake element, broil element, and related components.

Airflow and Trim Components

Details on disassembling downdraft blower, front side trim, and oven light socket.

Disassembly Procedures

Lighting, Venting, and Safety Components

Steps for removing oven light switch, vent/smoke eliminator, and hi-limit thermostat.

Door and Latch Components

Instructions for disassembling the oven door latch and convection fan assembly.

Disassembly Procedures

Oven Door Assembly and Disassembly

Detailed steps for removing, disassembling, and reassembling the oven door.

Appendix A

Installation Instructions (Model JDS8850A**)

Installation Drawings and Clearances

Diagrams illustrating required clearances for range installation within cabinets.

Installation Instructions (Model JDS8850A**)

Anti-Tip Device Installation

Instructions and warnings for properly installing the anti-tip device to prevent range tip-over.

Installation Instructions (Model JDS8850A**)

Anti-Tip Bracket Installation Steps

Detailed steps for securing the anti-tip bracket to wood or concrete surfaces.

Installation Instructions (Model JDS8850A**)

Connecting to Electric Supply

Requirements for electric supply, house wiring, and connecting the range to the power source.

Installation Instructions (Model JDS8850A**)

Wire Service Cord and Conduit Installation

Guides for installing 3-wire and 4-wire service cords, including conversion steps.

3-Wire to 4-Wire Service Conversion

Specific instructions for converting a 3-wire service cord setup to a 4-wire setup.

Installation Instructions (Model JDS8850A**)

Connecting to Gas Supply

Procedures for connecting the range to the gas supply, including valve installation and leak testing.

Installation Instructions (Model JDS9860A**)

Cabinet Opening and Clearance Requirements

Details on cabinet dimensions, cut-outs, and clearances for installing the range.

Installation Instructions (Model JDS9860A**)

Anti-Tip Device Installation Steps

Step-by-step guide for locating and installing the anti-tip bracket for range safety.

Installation Instructions (Model JDS9860A**)

Connecting to Electric Supply

Guidelines for electrical connections, house wiring, and range power supply requirements.

Installation Instructions (Model JDS9860A**)

Wire Service Cord and Conduit Installation

Instructions for 3-wire and 4-wire service cord or conduit installation and conversion.

3-Wire to 4-Wire Service Conversion

Procedure for converting the range's electrical connection from 3-wire to 4-wire service.

Installation Instructions (Model JDS9860A**)

Downdraft Installation Instructions

Steps for installing the downdraft ventilation system, including vent routing and blower attachment.

Installation Instructions (Model JDS9860A**)

Blower and Range Installation

Connecting the blower and installing the range, including flex duct and operational checks.

Installation Instructions (Model JDS9860A**)

Gas Supply Connection and Pressure Testing

Procedures for connecting the gas supply, installing shutoff valves, and pressure testing.

Appendix B

Use Information (Model JDS8850A**)

Control Pad Operation

Explanation of how to operate the control panel, including pad functions and display feedback.

Setting Control Functions

Introduction to setting basic oven functions like clock and timers.

Clock Pad

Instructions for setting the time of day, including 12/24 hour format.

Timer Pads

Guide for using Timer 1 and Timer 2 for timed cooking or countdown alerts.

Use Information (Model JDS8850A**)

Primary Oven Function Pads

Details on using Cancel, Auto Set, Bake, and Convect Bake/Roast pads for cooking.

Use Information (Model JDS8850A**)

Broil, Timing, and Preheat Functions

Instructions for broiling, setting cook/stop times, and using quick preheat.

Use Information (Model JDS8850A**)

Specialty Functions: Keep Warm, Probe, Proofing

Guide for using keep warm, meat probe, and bread proofing functions for optimal results.

Use Information (Model JDS8850A**)

Control Options Overview

Overview of customizable control options like timer signals, lock, sound level, and clock format.

End-of-Timer Signal

Settings for timer reminder chimes, including number and frequency of beeps.

Control Lock

How to activate and deactivate the control lock for safety and cleaning.

Oven Temperature Adjustment

Procedure to calibrate oven temperature by +/- 35°F to match cooking needs.

Use Information (Model JDS8850A**)

Additional Control Settings

Covers sound level, clock format, scroll speed, temperature units, language, default reset, and display options.

Use Information (Model JDS8850A**)

Broil and Convection Cooking

Guidelines for broiling, convection baking, roasting, and general baking tips.

Use Information (Model JDS8850A**)

Clock Controlled Cooking and Quick Preheat

Instructions for delayed cooking, cook time settings, and using the quick preheat function.

Use Information (Model JDS8850A**)

Specialty Functions: Keep Warm, Probe, Proofing

Guide for using keep warm, meat probe, and bread proofing functions for optimal results.

Use Information (Model JDS8850A**)

Control Options Details

Detailed explanations for various control options like timer signals, lock, sound level, and clock format.

Care Information

Self-Cleaning Cycle Procedures

Steps for setting immediate and delayed self-clean cycles, cancellation, and cleaning notes.

Care Information

Cleaning Procedures for Components

Instructions for cleaning the access panel, control area, knobs, cooktop, and oven interiors.

Door Handle and Oven Racks Cleaning

Guidelines for cleaning door handles, plastic finishes, and oven racks.

Care Information

Burner Assembly and Stainless Steel Cleaning

Procedures for cleaning gas burner assemblies, stainless steel surfaces, and grill components.

Grease Cup and Grill Burner Maintenance

Instructions for cleaning the grease cup and grill burner, ensuring proper operation.

Appendix C

LP Conversion Instructions

Gas Conversion and Regulator Adjustment

Steps for converting the range from natural gas to LP gas, including regulator and orifice adjustments.

LP Conversion Instructions

Orifice Conversion Procedures

Detailed steps for converting burner orifices and air shutters between natural gas and LP gas.

LP Conversion Instructions

Burner Heads, Bases, and Servicing Information

Instructions for cleaning burner heads/bases and general information on service parts.

Related product manuals