Installation and operation of the Mynx
c) Fixing the flue length.
Refer to section 3)b)ii) on page 4 for the
details on the position of the flue
termination point.
The top section of the flue can be slid up
or down to achieve the desired flue length.
When the desired length has been
reached, secure the 2 sections using at
least 3 self-drilling screws. Ensure that the
following is complied with:
• The 2 flue sections must overlap by
at least 120mm
• It must be fastened with at least 3
screws.
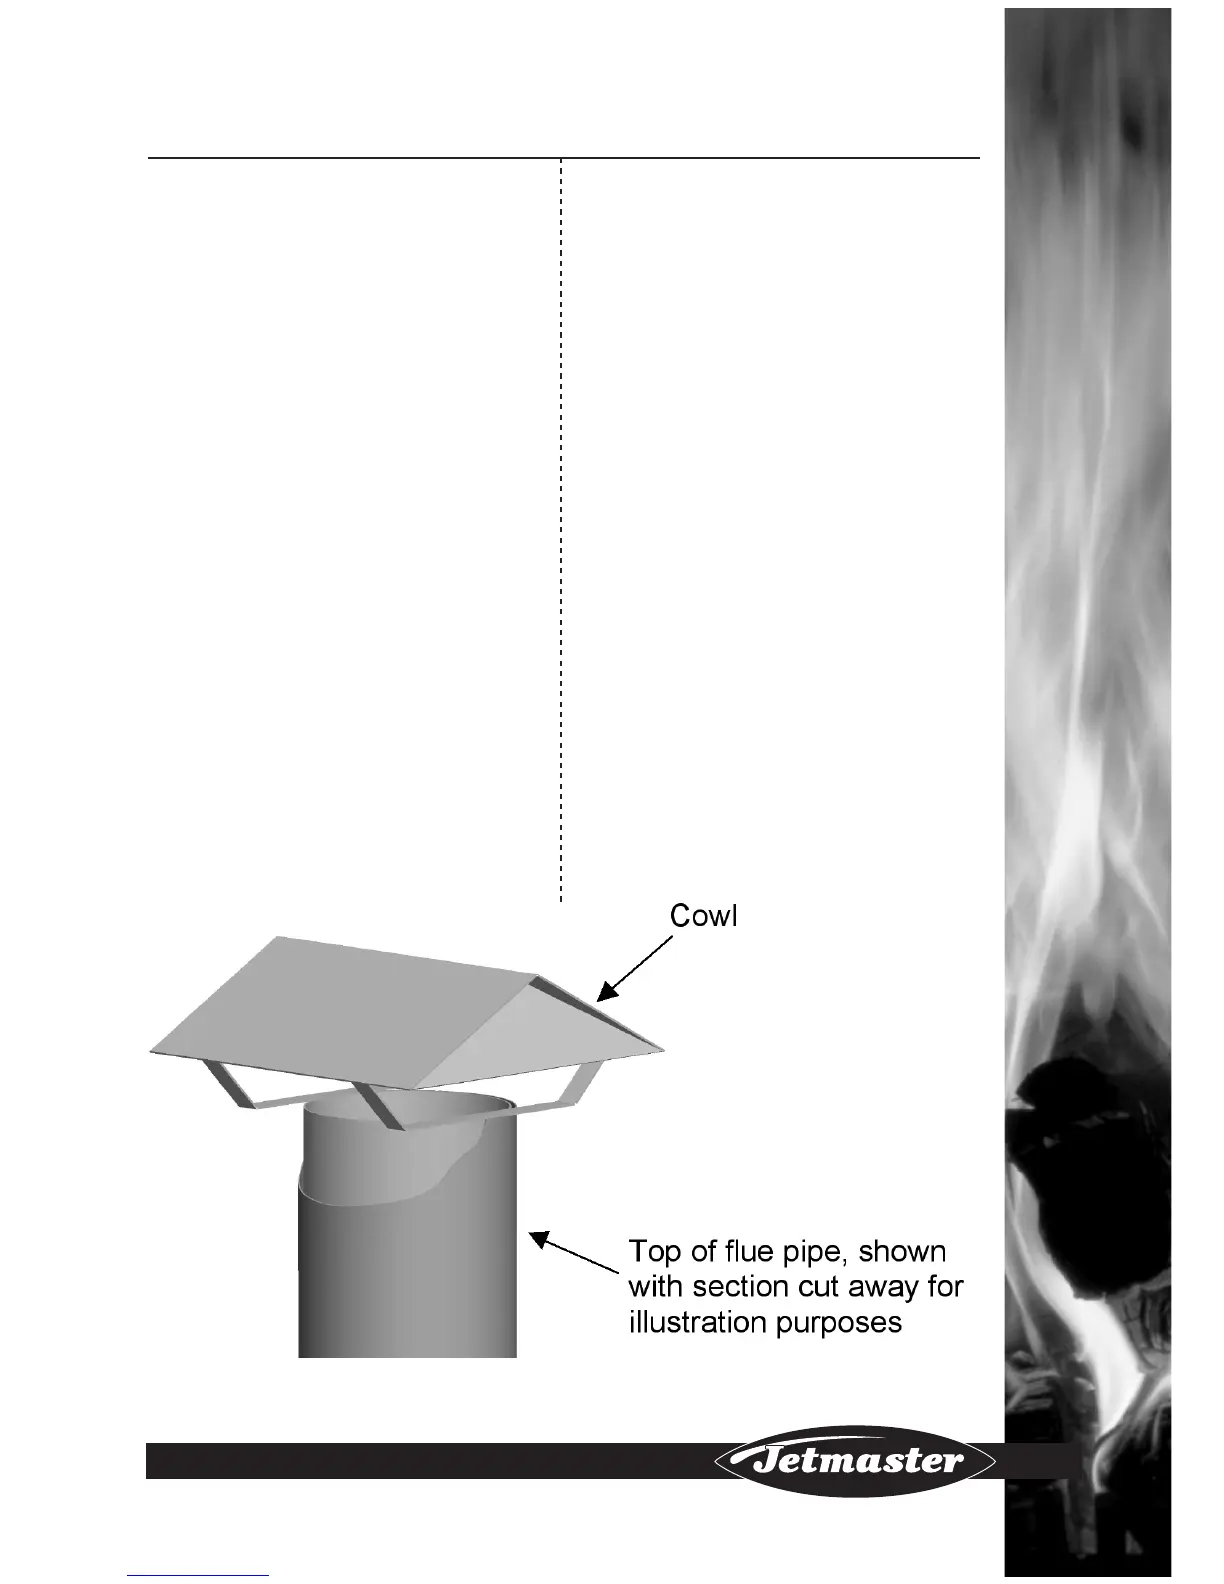
d) Fitting the cowl.
NOTE: Before fitting the cowl, it is important
to ensure that the flue has been set to the
correct height.
Slide the cowl base into the top of the
flue pipe.
Secure the cowl base onto the flue pipe
with at least 1 self-drilling screw.
e) The flue pipe must now be
sealed on top of the roof.
NOTE: Before fitting the flashing, it is important
to verify the final flue height. It is normally
easiest to first fit the flashing and fix the flue
height last. In some cases it might be easies
to first fix the flue height, before fitting the
flashing. (E.g. if the joint between the last 2
flue sections would be on the same level as
the flashing)