EasyManua.ls Logo

JL Audio RD400/4 User Manual

JL Audio RD400/4
20 pages
To Next Page IconTo Next Page
Page #1 background imageLoading...
Page #1 background image
Thank you for purchasing a JL Audio amplifier for
your automotive sound system.
Your amplifier has been designed and manufactured to exacting
standards in order to ensure years of musical enjoyment in your vehicle.
For maximum performance, we highly recommend that you have
your new amplifier installed by an authorized JL Audio dealer. Your
authorized dealer has the training, expertise and installation equipment
to ensure optimum performance from this product. Should you
decide to install the amplifier yourself, please take the time
to read this manual thoroughly to familiarize yourself
with its installation requirements and setup procedures.
If you have any questions regarding the instructions in this
manual or any aspect of your amplifier’s operation, please contact your
authorized JL Audio dealer for assistance. If you need further assistance,
please call the JL Audio Technical Support Department
at (954) 443–1100 during business hours.
OWNER’S MANUAL
400W 4-Channel Amplier
Question and Answer IconNeed help?

Do you have a question about the JL Audio RD400/4 and is the answer not in the manual?

JL Audio RD400/4 Specifications

General IconGeneral
BrandJL Audio
ModelRD400/4
CategoryCar Amplifier
LanguageEnglish

Summary

Protect Your Hearing

Installation Applications

Planning Your Installation

Safety Considerations

Install in a dry, ventilated area and secure the unit safely.

Stupid Mistakes to Avoid

Warnings about drilling, wiring, routing, and mounting locations.

Typical Installation Sequence

Power Connections

Ground Connection

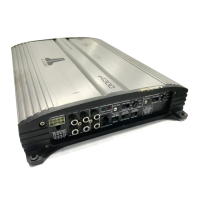
How to make a proper ground connection for optimal performance.

Wire Type and Vehicle Grounding

Use OFC wire; upgrade vehicle ground wires for high amp systems.

Turn-On Options

Input Section

Input Sensitivity Controls

Input Sensitivity Adjustment

Adjusting sensitivity for maximum clean output using clipping LEDs.

Filter Controls

Speaker Outputs

Bridging Considerations

System Configurations

Multi-Amplifier Systems

Servicing Your JL Audio Amplifier

Appendix A: Input Sensitivity Level Setting

The Seven-Step Procedure

Detailed steps to properly set input sensitivity for maximum output.

Appendix B: RD400/4 Specifications

Appendix C: Troubleshooting

Input Sensitivity Setting

Guide to setting input sensitivity for optimal low-distortion output.

No Power Diagnosis

Steps to diagnose and fix an amplifier that fails to power on.

No Output Diagnosis

Steps to check signal and output when the amplifier turns on but produces no sound.

Related product manuals