11
R200 ASSEMBLY
The rower has been assembled and tested at the factory, so you shouldn’t have any
problems putting all the parts together. Components are designed to fit together, and
only basic tools are required for the assembly process. Inside the box you will find a Tools
Pack (Hex Allen Key, Spanner, Washers and Bolts). See previous page.
To assemble your JLL R200 please follow these easy steps:
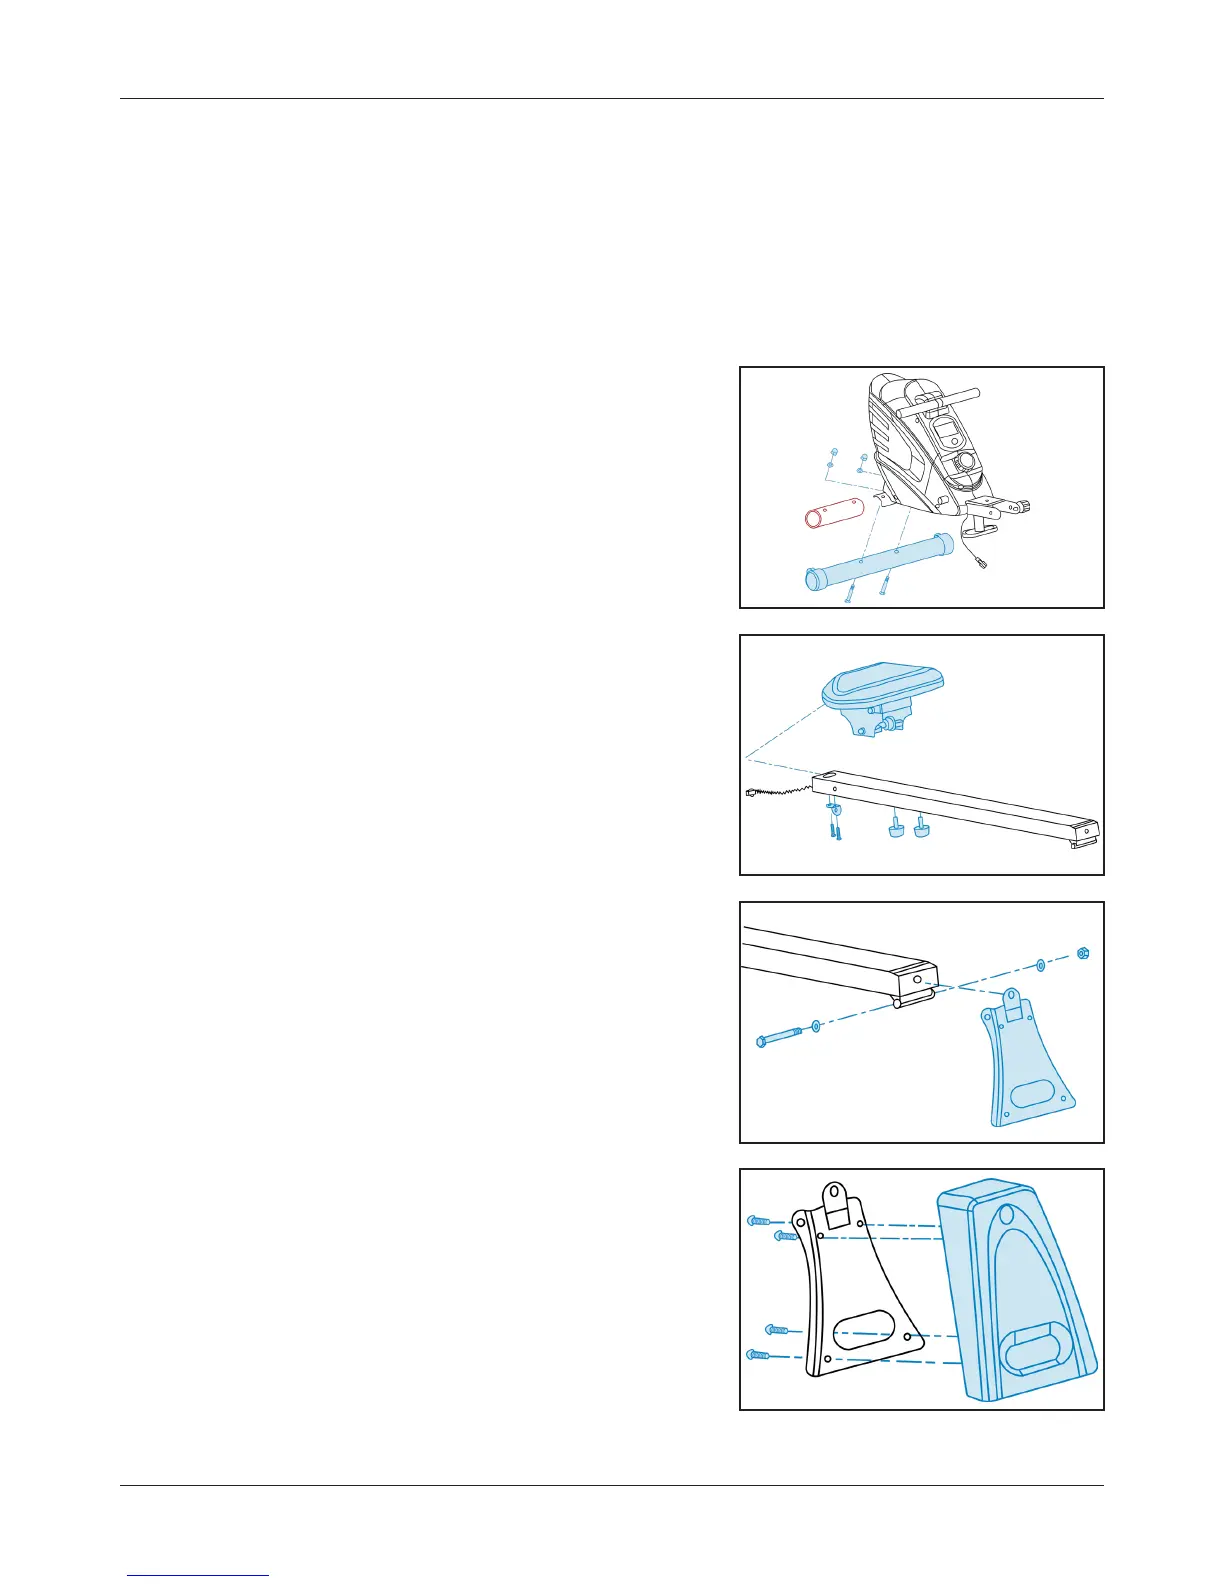
STEP 1
Remove the cardboard tube from the rear of the
base and reattach the stabilizer using the two M8
carriage bolts, D8 arc washers and M8 cap nuts.
Tighten using the multi-tool.
STEP 2
Remove the two cushions, plate and two M6 screws
from the slideway.
Slide the saddle onto the slideway and reattach the
cushions and plate.
STEP 3
Attach the stand rail to the front of the slideway
using an M10 hexagon bolt, two D10 flat washers
and M10 nylon nut.
Tighten using the spanner.
STEP 4
Place the protective guard over the stand rail and
secure it in place using the four screws.
The screws will come attached in the back of the
protective guard.