7
Joerns Liing and Repositioning
Model HML400, C-HLA, C-HLA-2, C-HLA-2T
© 2015 Joerns Healthcare • IM-459001 RevC • 15-2003
Inspection of Hydraulic Pump Stud
Tools required: 5mm hex wrench, 9/16" combination
wrench
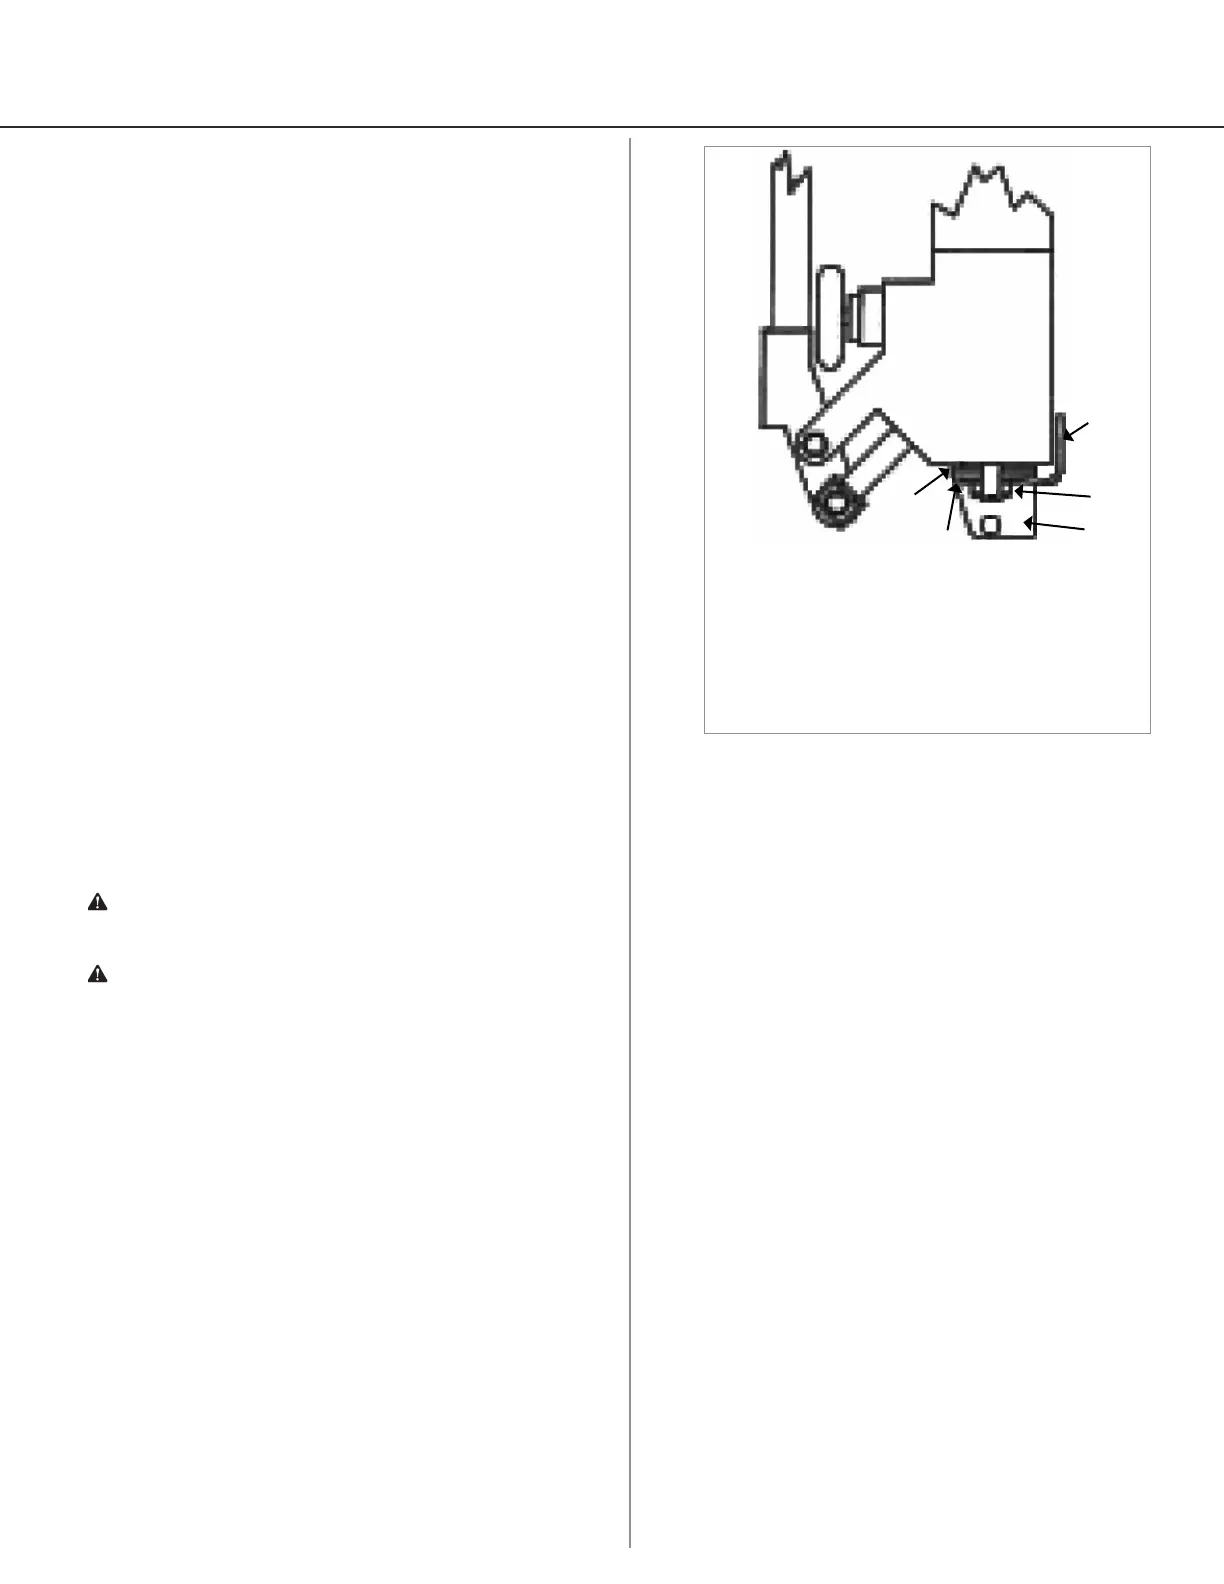
1. Observe orientation of “U” bracket (3) and rotation
limit bracket (4) prior to removing pump from lift.
2. Remove hydraulic pump from lifter by removing
bolts at mast and boom attaching points. Place on
suitable work surface.
3. Loosen nut (2) by three turns at base of pump
using the 9/16" combination wrench. If the stud
turns while loosening, use the 5mm hex wrench to
prevent it from turning.
4. Check tightness of stud using the 5mm hex wrench.
Firmly tighten the stud by turning in a clockwise
direction when viewed from the bottom.
5. Verify all components 1, 2, 3, 4, and 5 are correctly
assembled (Figure 9).
6. Tighten nut (2) until it lightly contacts the nylon
washer (1). Loosen the nut by 1/2 turn so that the
pump rotates freely in “U” bracket (3). Check that
the stud is still tight using the 5mm hex wrench.
7. Reassemble the pump to lift (reverse of step
2). Tighten nuts until contact is made with “U”
brackets of mast and boom. Then loose by 1/2
turn. Pump should be free to rotate. Verify that
“U” bracket (3) and rotation limit bracket (4) are
correctly oriented to mast per diagram.
8. Check for free rotation of pump after assembly.
Caution: The pump should rotate freely prior to lifting
a patient.
Caution: Place the pump handle in a comfortable
position prior to lifting a patient. Do not attempt to
rotate the pump while lifting a patient.
Figure 9
1. Washer, Nylon 7/8" O.D
2. Nut, Hex, Locking
3. “U” Bracket
4. Bracket, Rotation limit
5. Washer, nylon, 2" O.D.
1
5
4
2
3