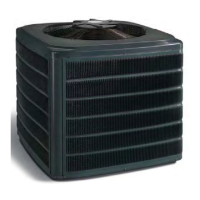
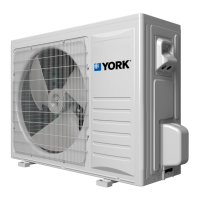
Ground installation
The unit may be installed at ground level on a solid
base that will not shift or settle, causing strain on the
refrigerant lines and possible leaks. The unit must
be installed in as level a position as possible while
maintaining the clearances shown in Figure 1 and Figure
2.
Normal operating sound levels may be objectionable if
the unit is placed directly under windows of certain rooms
such as a bedroom or study.
Condensate drains from beneath the coil of the outdoor
unit during the defrost cycle. Normally this condensate
may be allowed to drain directly on the ground.
WARNING
The outdoor unit must not be installed in an area
where mud or ice could cause personal injury.
Remember that condensate will drip from the unit
coil during heat and defrost cycles and that this
condensate will freeze when the temperature of the
outdoor air is below 32°F.
Elevate the unit sufficiently to prevent any blockage of the
air entrances by snow in areas where snow accumulates.
Check with the local weather bureau for the expected
snow accumulation in your area.
Isolate the unit from rain gutters to avoid any possible
wash out of the foundation.
Roof installation
When installing units on a roof, the structure must
be capable of supporting the total weight of the unit,
including a pad, lintels, and rails, which must be used to
minimize the transmission of sound or vibration into the
conditioned space.
Wall mount installation
Care must be taken to mount the outdoor unit on a solid
base that is sloped to shed water, secure from settlement,
and is isolated from the structural foundation or walls to
prevent sound and vibration transmission into the living
space.
On occasion, site conditions may require direct wall
mounted brackets to be used to locate and support the
outdoor unit. In these applications, care must be taken to
address unit base pan support, structural integrity, safe
access and serviceability, as well as the possible sound
and vibration transmission into the structure. These
applications are best served by a correctly engineered
solution.
Placing the unit
NOTICE
Heat pumps defrost periodically resulting in water
drainage. The unit must not be located where
water drainage may freeze and create a hazardous
condition, such as sidewalks and steps.
1. Provide a base in the pre-determined location.
2. Remove the shipping carton and inspect for
possible damage.
3. Ensure that compressor tie-down bolts remain
tightened.
4. Position the unit on the base provided.
Liquid line filter-drier
The filter-drier is packaged and shipped along with the
outdoor unit. Locate the filter-drier outside the unit
next to the service valves or at the indoor coil before the
metering device.
CAUTION
Filter-drier is required to be installed in liquid line. The
recommended location is at the indoor coil before the
refrigerant metering device. It can be installed at the
outdoor unit if desired.
CAUTION
Using a granular type drier may result in damage to
the equipment.
CAUTION
Filter-drier must be wrapped in wet rag while brazing.
NOTICE
Replacements for the liquid line drier must be bi-flow
and an approved replacement from Source 1.
Installation Manual: R-410A Outdoor Split-System Heat Pump - YH2F, THF2, RHP150 Series8
Johnson Controls Ducted Systems
 Loading...