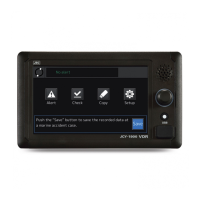
1. Operation
22
8) If the blackout is restored in less than 2 hours, the Recording Control Unit returns to
normal operation automatically.
4. To adjust the brightness of LEDs:
1) Press the DIMMER SWITCH to adjust the brightness of the LEDs.
2) Press the switch again then the LEDs become darker. The brightness changes
cyclically.
3) Even at the darkest brightness, the LED is still on.
5. To check the version of the software
1) Press the ENTER SWITCH on the
Operation Panel Unit.
2) The operation mode is changed to the Software version display mode.
3) The ERROR CODE LEDs show the software version number.
4) When the software version is shown, the ALARM DETAIL LED is blinking.
5) When the ENTER SWITCH is pressed at this stage, the operation mode is returned to
the Normal mode.
6) Even when the ENTER SWITCH is not pressed, the operation mode is returned to the
Normal mode in five minutes.
Table 8: ERROR code table of the Operation Panel Unit (1/3)
ALARM DETAIL
SYSYTEM CODE
CATEGORY
CONTENTS
0 0
Initial error
There is a discrepancy in the configuration data between the
Protective Capsule Unit and the Recording Control Unit.
0 1
System
Initial Heading Angle Unregistered
The initial value of HEADING is not established.
Input the angle.
1 0
Blackout alarm
The Power Supply Unit is in operation using the backup
Battery.
1 1
PSU FAN alarm
Either of two fans inside the Power Supply Unit is out of order.
1 2
PSU
PSU connection alarm
The cable between the Power Supply Unit and the Mother Board
is disconnected.
2 0
Capsule LAN error
The Recording Control Unit does not communicate with the
Protective Capsule Unit via LAN.
2 1
Bit Error Rate error
The Protective Capsule Unit sensed higher BER than 10
-8
during the readout check of the recorded data.
2 2
Capsule
Recording stop alarm
S-VDR stops recording data as the REC STOP SWITCH on the
Recording Control Unit has been pressed.
 Loading...