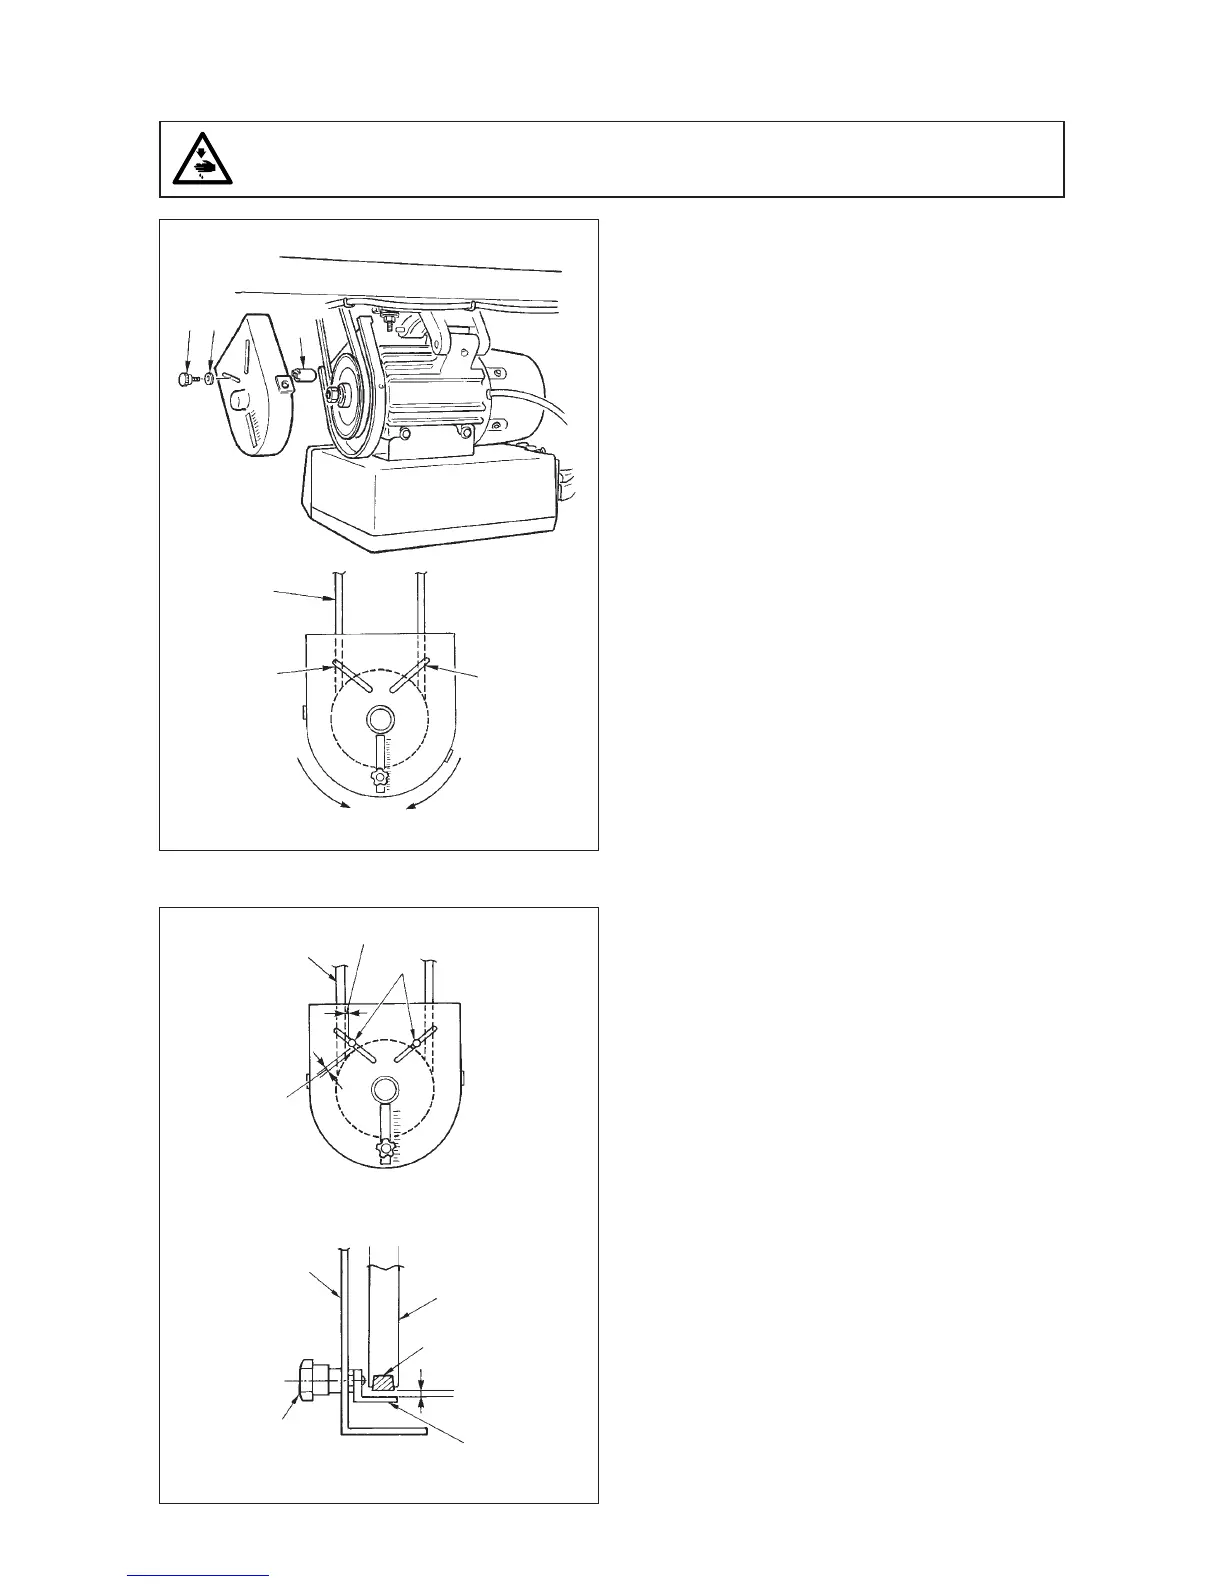
− 3 −
A
B
Belt
1
2
3
4
5
1
1) Attaching hole for the protecting pin
To attach protecting pin 1, select either attaching
hole A or attaching hole B in the motor pulley cover
in accordance with the direction of rotation of the
sewing machine and attach the pin in the selected
hole using screw 2 and washer 3 supplied with
the unit.
a) If the motor shaft rotates in direction A in the
figure on the above:
/ Attach protecting pin 1 in attaching hole A .
b) If the motor shaft rotates in direction B in the
figure on the above:
/ Attach protecting pin 1 in attaching hole B .
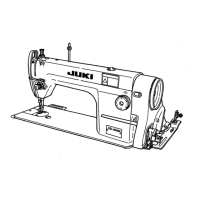
2) Adjustment for the protecting pin and the belt slip-
off preventing bracket
Adjust the position of protecting pin 1 and belt slip-
off preventing bracket 4 in accordance with the
figure on the left.
a) Adjusting the protecting pin
Loosen screw 2 and adjust so that protecting
pin 1 is positioned at the location indicated in
the figure on the left.
b) Adjusting belt slip-off preventing bracket
Loosen screw 5 and adjust so that belt slip-
off preventing bracket 4 is positioned at the
location indicated in the figure on the left.
If protecting pin 1 is not properly adjusted, it
is possible that your fingers may be caught in
the clearance provided between the pulley and
the belt resulting in injury. If belt slip-off
preventing bracket 4 is not properly adjusted,
it is possible to allow the belt to slip off causing
safety hazard.
3) After the adjustment, tighten screws 2 and 5 so
as to secure protecting pin 1 and belt slip-off
preventing bracket 4 to prevent these components
to fluctuate because of vibration.
4) Before starting the operation of the sewing
machine, ascertain that protecting pin 1 and belt
slip-off preventing bracket 4 do not come in contact
with the pulley and the belt.
5. Installation and adjustment for the protecting pin and the belt slip-off preventing bracket
WARNING :
To protect against possible personal injury due to abrupt start of the machine, be sure to start the
following work after turning the power off and ascertaining that the motor is at rest.
4 mm or less
Belt
4 mm or less
Adjusting position for protecting pin
Pulley
cover
Motor
pulley
Belt
3 mm or less
Adjusting position for belt slip-off preventing braket
Attaching
hole A
Attaching
hole B