– 8 –
Press
the
switch.
Press the
switch.
■
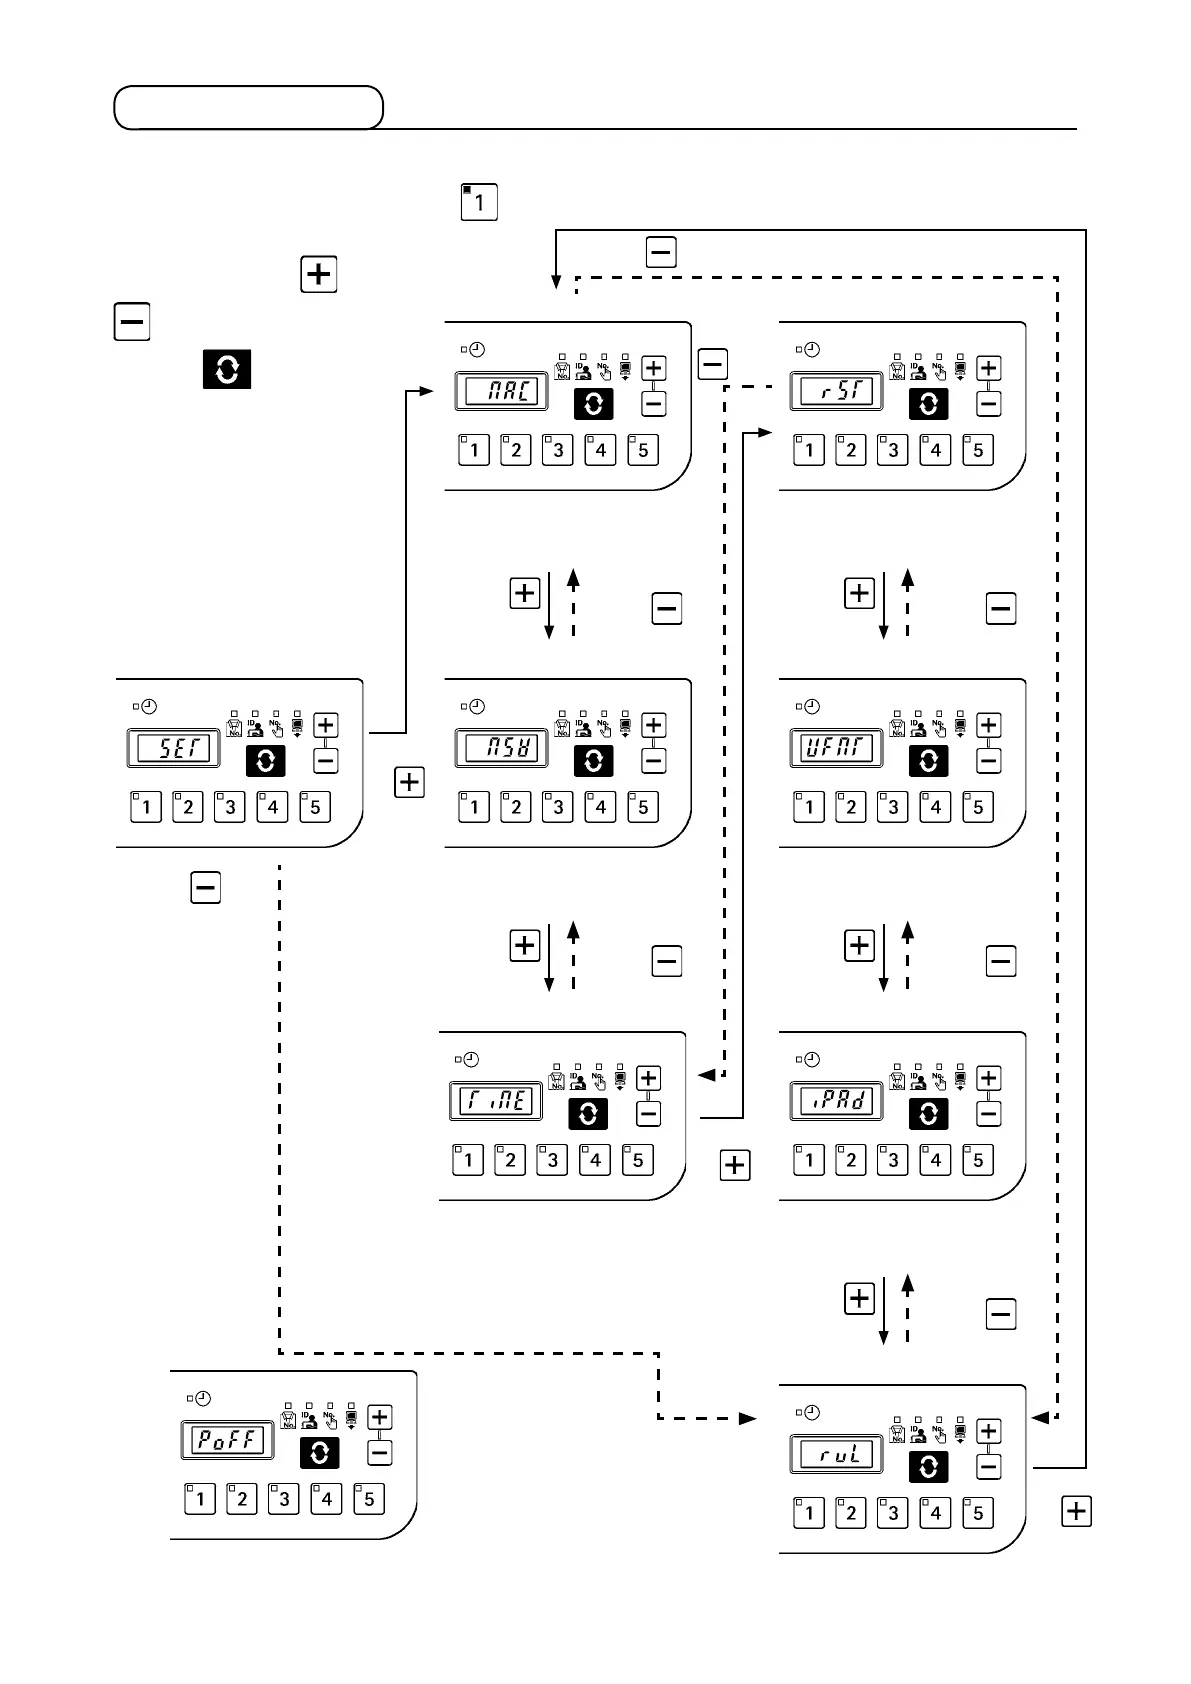
MAC address check screen
MAC address assigned for each
system can be checked.
→
See
“5-2. (2) MAC address check screen.”
■
Initialization screen
Panel data initialization is execut-
ed.
→
See
“5-2. (5) Initialization
screen.”
Press the
switch.
Press the
switch.
Press the
switch.
Press the
switch.
■
Setup screen
■
Memory switch setup screen
The memory switch No. is set up.
→
See
“5-2. (3) Memory switch
setup screen.”
■
USB format screen
The medium connected to USB is
formatted.
→
See
“5-2. (6) USB
format screen.”
Press the
switch.
Press the
switch.
Press the
switch.
Press the
switch.
■
Clock setup screen
The clock is set up.
→
See
“5-2.
(4) Clock setup screen.”
■
IP address check screen
The procedure to obtain the IP
address is selected.
→
See
“5-2.
(7) I
P address setup screen.”
Press the
switch.
Press the
switch.
* If this screen appears, turn the power
OFF and re-turn it ON.
■
Version check screen
The panel version is checked.
→
See
“5-2. (8) Version check screen.
”
5-2. Setup mode
(1) Setup mode screen
When the power supply is turned on with switch pressed, the system starts up in setup mode.
In setup mode, the setting item
is selected by using
and
switches and conrmed by
using the
switch. When
confirmed, the corresponding
setup screen will be displayed.
After the completion of the set-
ting procedure, turn the power
OFF and re-turn it ON.
Press the switch.
Press
the
switch.
Press the
switch.
Press
the
switch.