$
. MAINTENANCE
1. Removing the rear cover
WARNING :
To prevent personal injuries caused by electric shock hazards or abrupt start of the sewing machine,
remove the cover after turning OFF the power switch and a lapse of 5 minutes or more.
To prevent
personal injuries, when a fuse has blown out, be sure to replace it with a new one with the same
capacity after turning OFF the power switch and removing the cause of the blown-out of the fuse.
1) Press the OFF button of the power switch to turn
OFF the power after conrming that the sewing
machine has stopped.
2) Draw out the power cord coming from the power
plug socket after conrming that the power switch
is turned OFF. Perform the work of step 3) after
conrming that the power has been cut and it has
passed for 5 minutes or more.
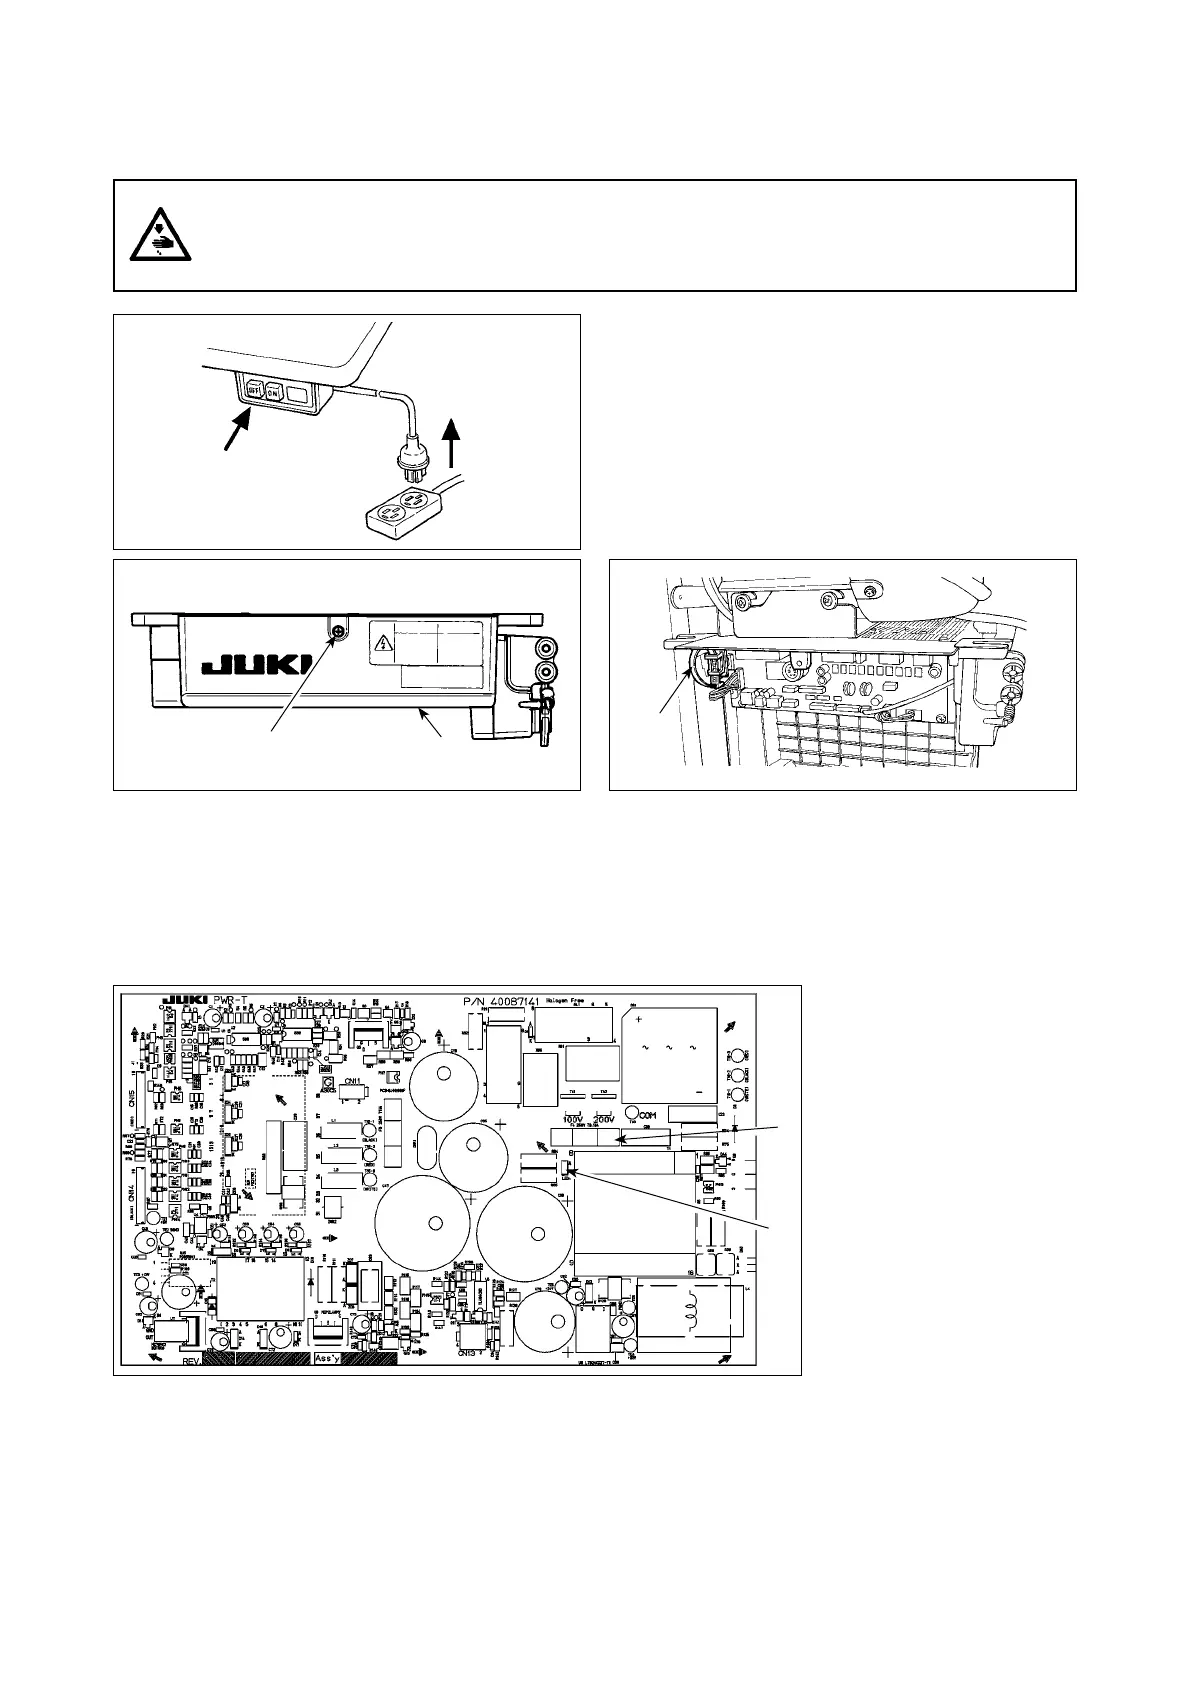
2. Replacing the fuse
(Caution) The illustration below shows the PWR-T PCB. The type of PCB differs by destination.
1) Remove all the cables
which are connected to
the control box.
2) Remove the connecting
rod.
3) Remove the control box
from the table stand.
4) Holding the glass sec-
tion of fuse
1
, remove
the fuse.
(Caution) There is a risk of electrical shock when removing the fuse. Be sure to remove the fuse after
LED
2
has totally gone out.
5) Be sure to use a fuse with the designated capacity.
1
: 3.15 A/250 V Time-lag fuse (Power circuit protective fuse)
Part number: KF000000080
6) Install the control box on the table stand. (Refer to
"
@
. SET-UP" p. 1
.)
7) Connect all the cables to the control box. (Refer to
"
@
-7. Connecting the cords" p. 5
.)
8) Fit the connecting rod back in place. (Refer to
"
@
-8. Attaching the connecting rod" p. 13
.)
3) Loosen setscrew
2
in cover
1
. Open cover
1
.
4) To close cover
1
, re-tighten setscrew
2
while
paying attention to the orientation of cable clip
band
3
mounted on the side face of the box.
3
1
2
1
2