You can install the EX3400 switch on a desk or table, on a wall, or in a two-post or four-post rack. The accessory kit that
ships in the box has the brackets you need to install the EX3400 switch in a two-post rack. In this guide, we walk you
through how to do that.
NOTE: If you want to mount the switch on a wall or in a four-post rack, you’ll need to order a wall mount or
rack mount kit. The four-post rack mount kit also has brackets for mounting the EX3400 switch in a recessed
position in the rack.
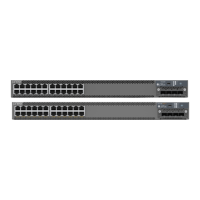
What’s in the Box?
•
EX3400 switch
•
An AC power cord appropriate for your geographical location
•
Two mounting brackets and eight mounting screws
•
An Ethernet cable with RJ-45 connectors attached and an RJ-45 to DB-9 serial port adapter
•
Power cord retainer clip
What Else Do I Need?
You’ll also need:
•
Someone to help you secure the switch to the rack
•
Mounting screws to secure the EX3400 to the rack
•
A number two Phillips (+) screwdriver
•
A serial-to-USB adapter (if your laptop doesn’t have a serial port)
Install the EX3400 in a Two-Post Rack
1. Review General Safety Guidelines and Warnings
2. Attach the mounting brackets to the sides of the EX3400 switch using the eight screws that came in the box and the
screwdriver.
3