How to Set Up Your SRX300 Services Gateway
5
Log In to J-Web
1. Access the J-Web interface using the URL http://192.168.x.1, where x is the
port number to which you are connected on the services gateway. The
recommended browser is Mozilla Firefox version 23.x or later.
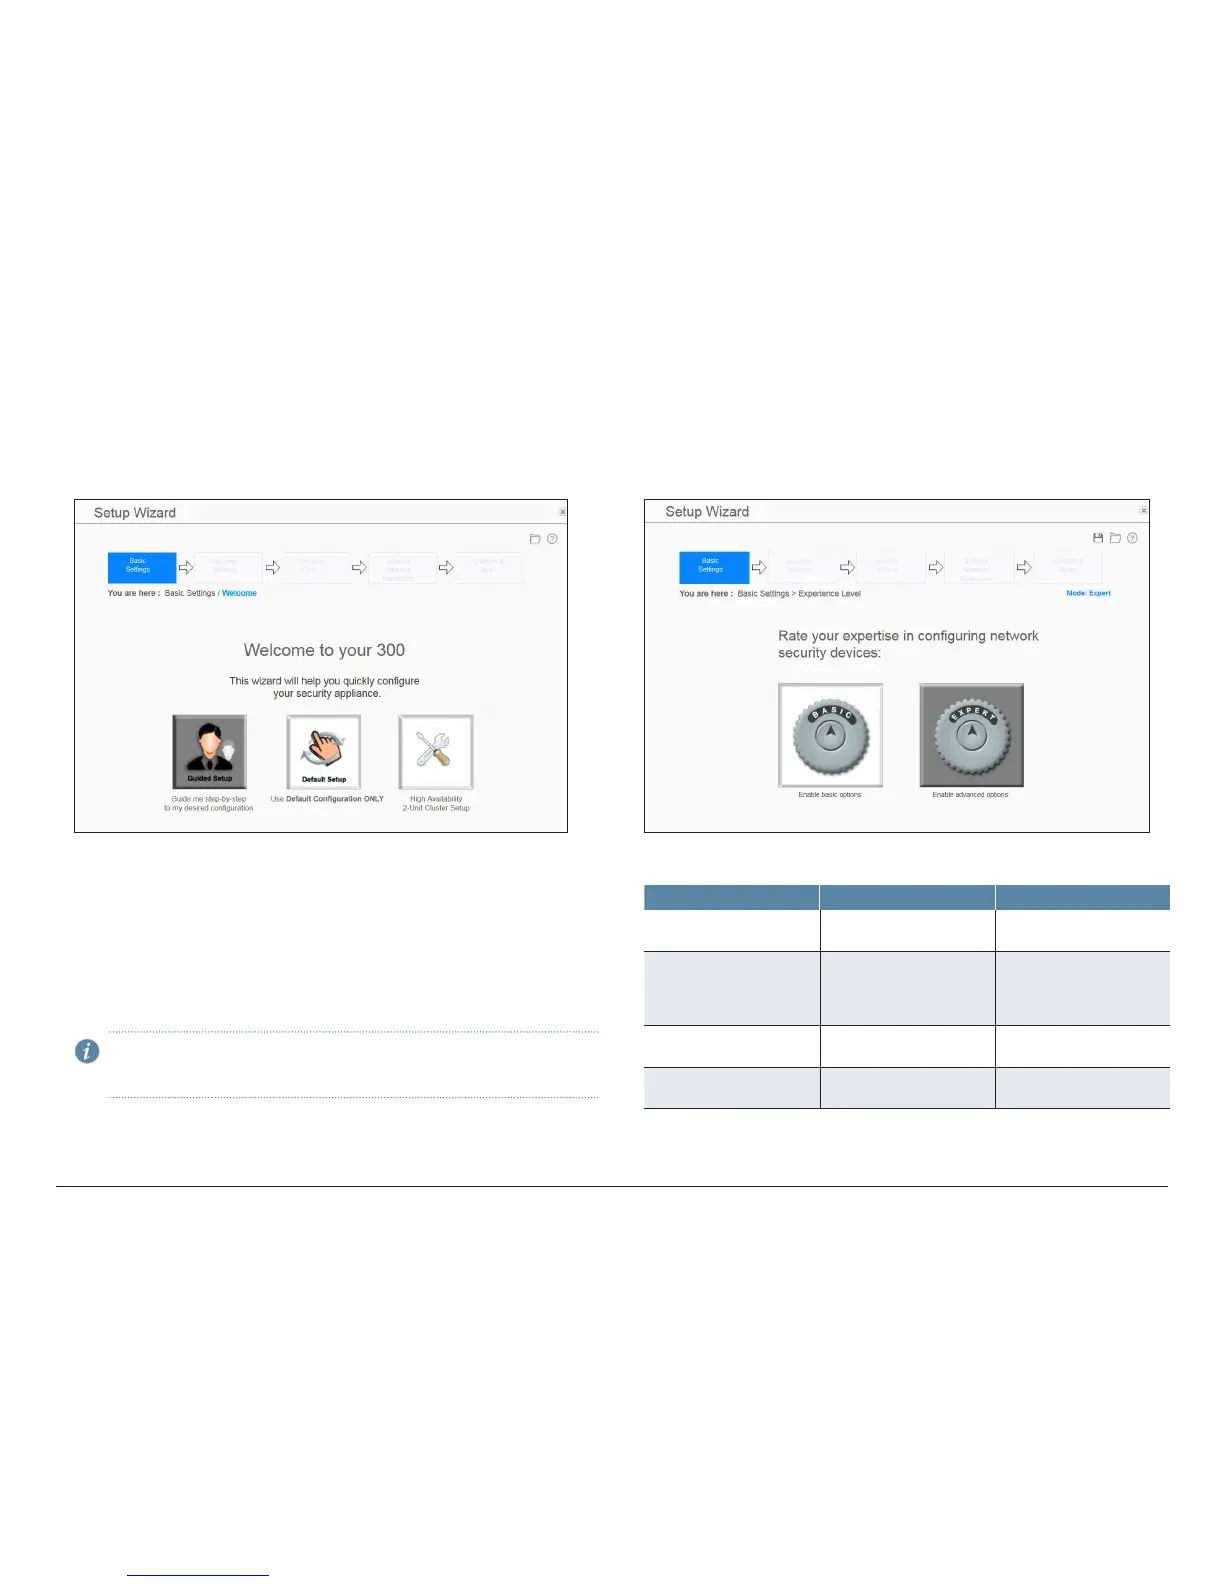
2. Select one of the following setup modes:
• Guided Setup (uses a static IP address)—Allows you to set up the device in
a custom security configuration. You can select either the Basic
or the Expert option.
• Default Setup (uses a dynamic IP address)—Allows you to quickly set up
the device with the default configuration. Any additional configuration can
be done after the wizard setup is completed.
• High Availability—Allows you to set up a chassis cluster with a default basic
configuration.
NOTE: The initial configuration requires only the device name and root
password. You can skip all the other steps and go directly to the Confirm
& Apply page to apply the configuration.
Configure the Device Using the Guided Setup Mode
1. Connect port 0/0 to the ISP device to obtain a static IP address. Ensure that
the cable connecting the ISP-supplied device to the SRX Series device is
firmly seated.
2. Select the expertise level as Basic or Expert.
The following table compares the Basic and Expert levels:
Options Basic Expert
Number of internal zones
allowed
3 ≥ 3
Internet zone configuration
options
• Static IP
• Dynamic IP
• Static IP
• Static pool
• Dynamic IP
Internal zone service
configuration
Allowed Allowed
Internal destination NAT
configuration
Not allowed Allowed

 Loading...


