Install the Device in a Rack
Before you begin the installation, review General Safety Guidelines and Warnings. Make sure you have someone available
to help you do the installation. You will need to provide your own rack mount screws and a number two Phillips (+)
screwdriver.
1. Wrap and fasten one end of the electrostatic discharge (ESD) grounding strap around your bare wrist, and connect the
other end to a site ESD point.
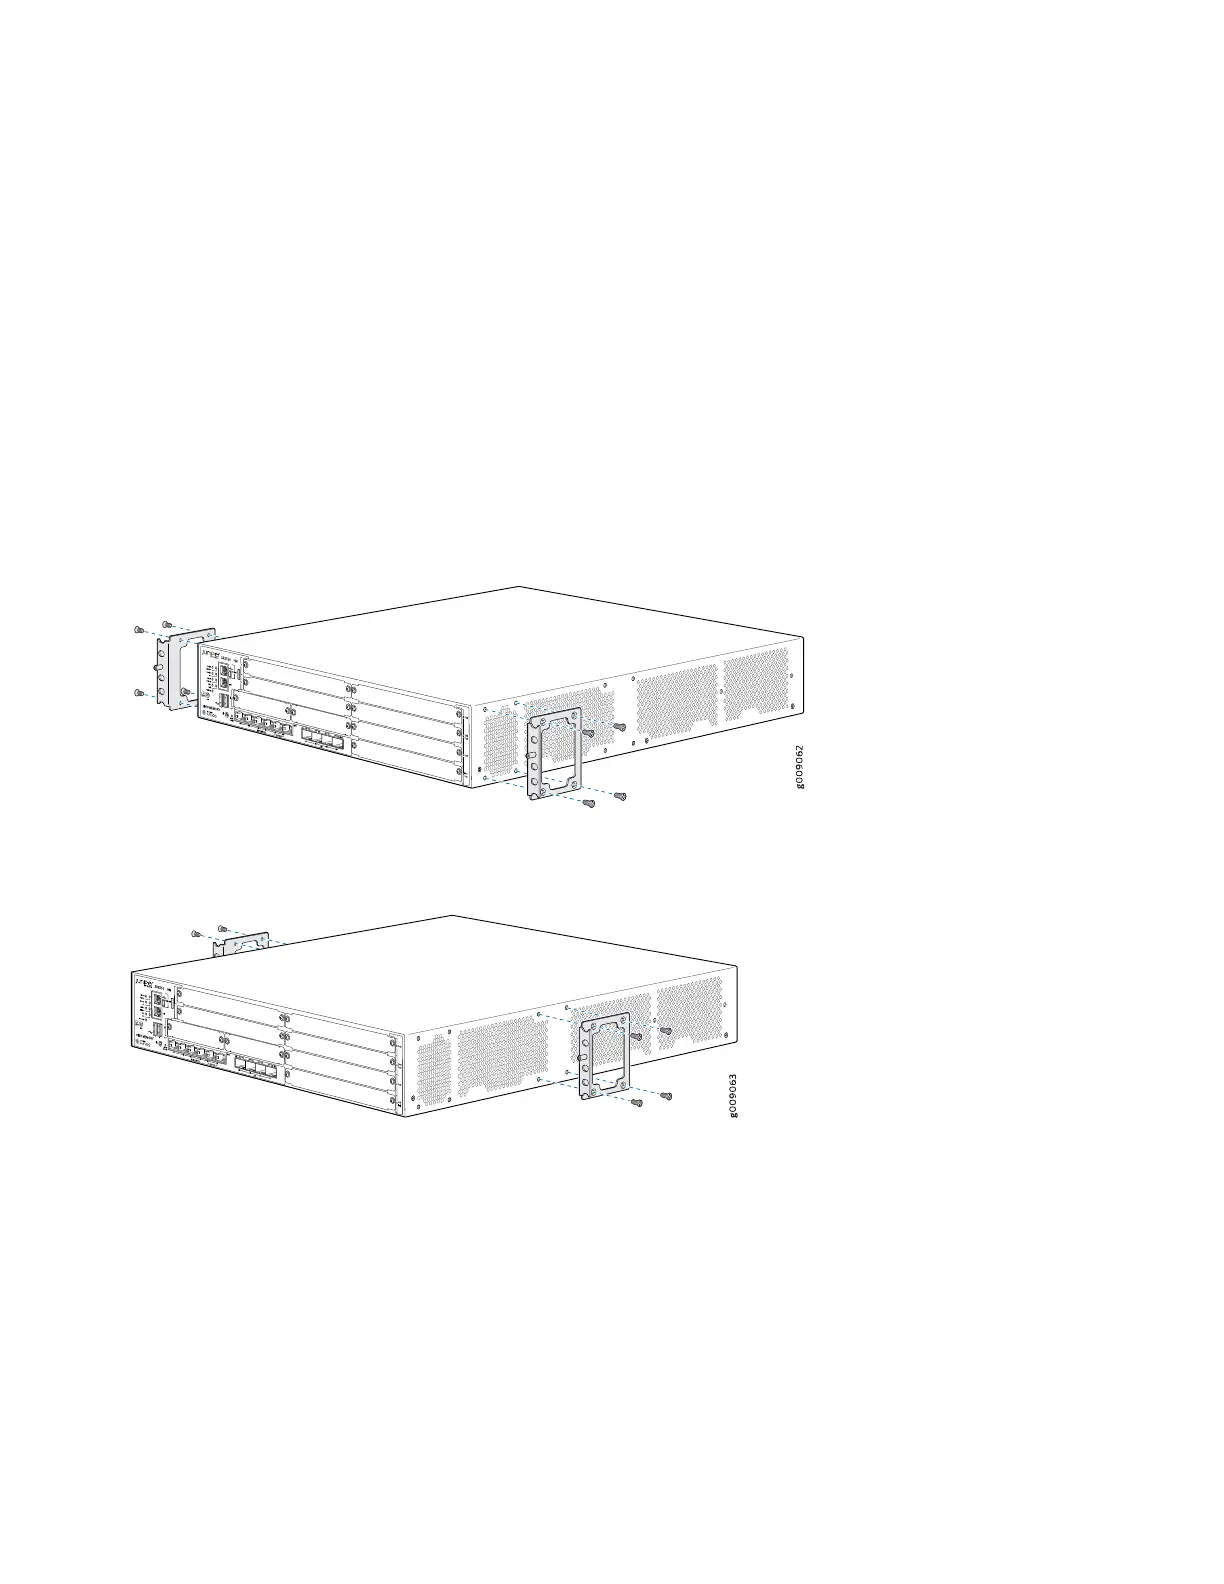
2. Position a mounting bracket on each side of the chassis. Use a number two Phillips (+) screwdriver to install the screws
that secure the mounting brackets to the chassis. Use either the front mount position or the center mount position.
Figure 3: Securing the Mounting Brackets (Front-Mount)
Figure 4: Securing the Mounting Brackets (Center-Mount)
3. Lift the device and position it in the rack. Line up the bottom hole in each mounting bracket with a hole in each mounting
rail, making sure the device is level.
4. While you are holding the device in place, have a second person insert and tighten the rack mount screws to secure
the mounting brackets to the rack. Make sure to tighten the screws in the two bottom holes first and then tighten the
screws in the two top holes next.
5