6.1. Ordinary maintenance
• Installation and maintenance must be operated only by qualified personnel wearing the proper clothes and the necessary tools as well as
protection devices.
• Use suitable protection equipment (gloves, protection glasses, boots...)
• In the following table summarizes the main controls to be performed and the frequency of intervention.
Operating condition Maintenance Area Check 8
H
50
H
500
H
1000H
OPERATING
Vacuum line
Check safety valve (non-return valve)
Operating pressure
Transmission / Pump
Rotation speed
Sound pressure level (also HDR motor)
STANDSTILL
Vacuum line
Suctions filters
4-way changeover valve: check and lubricate
Pump
Sintered filter cleaning
Check vanes wear
Change oil in the gear box, if the pomp is provided with it (*)
Pump’s inner washing (**)
Overall
Greasing
Check cardan shaft drive
Chack transmission pulley
(*) The first oil change must be done inside 500 hours operation. Following
changes every 5000 hours or 12 months. In order to choose the most suitable oil, see
paragraph 2.5.
(**) After operation in dusty environments, after accidental sucking of liquids
inside the pump or before a long inoperativity period it is recommended to wash the
pump inside according to the procedure described at paragraph 5.2.
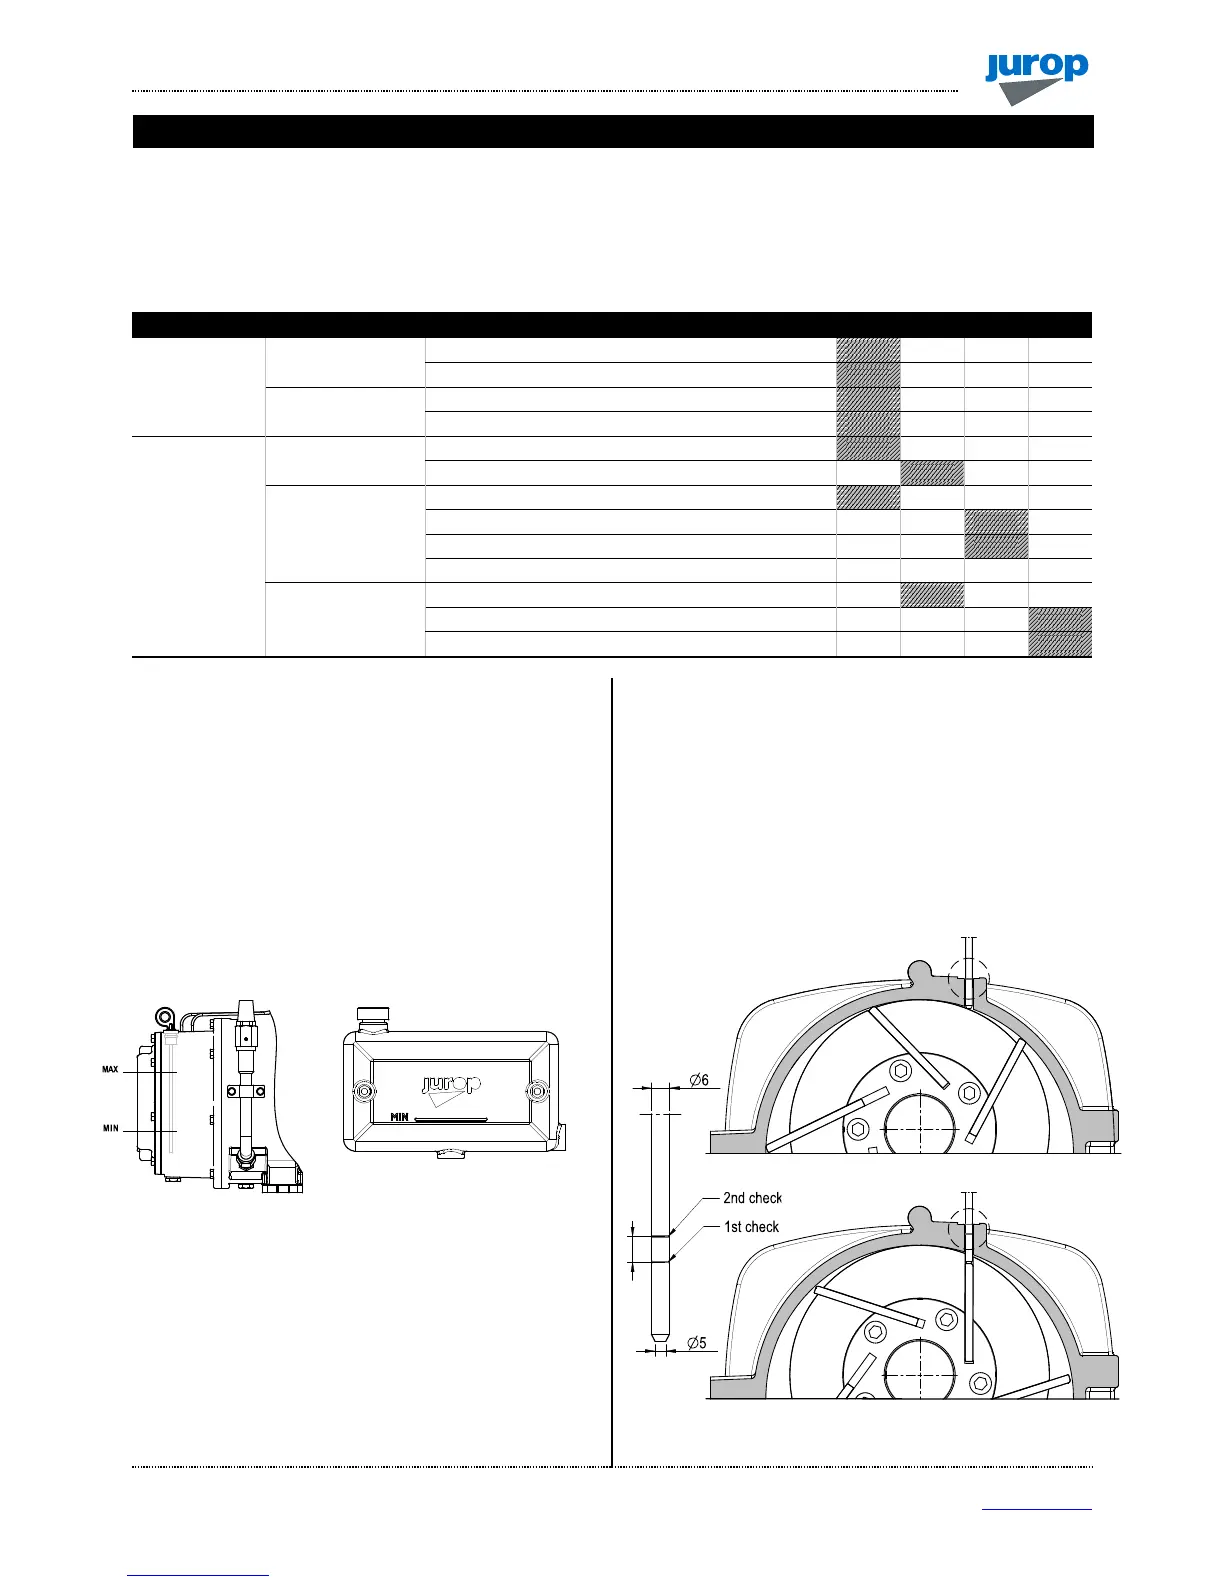
Checking the oil tank level
• Check the oil tank level.
• Do not run the pump with oil level under the minimum level: that
may lead to dry functioning and cause serious damages. (Fig. 6.1).
Pic. 6.1
• Rear mounted tank capacity: 2,3 l.
• Side mounted tank capacity: 4 l.
• Use pure and fresh oil. In order to choose the most suitable oil,
see paragraph 2.5.
Checking the vanes wear
• Unscrew the vanes wear check-plug on the rear flange. See Pic.
4.1.
• Turn the shaft by hand until vanes appearance.
• Vanes usually slip on seat bottom due to gravity. Check their right
entry in the seat.
• Insert a Ø 6 mm stick until it touches the rotor and then mark like
in Pic. 6.2.
• Turn the rotor slowly until the stick touches the vane in idle
position in its seat. The vanes slide to the bottom of the seat due to
gravity: check they really do and mark again on the stick.
• Repeat the same procedure for all the vanes. If wear exceeds 5
mm: replace the vanes as soon as possible.
Pic. 6.2
 Loading...