3
Basic Operation
26
Projecting Image
This section describes the basic operations to project input images on the screen.
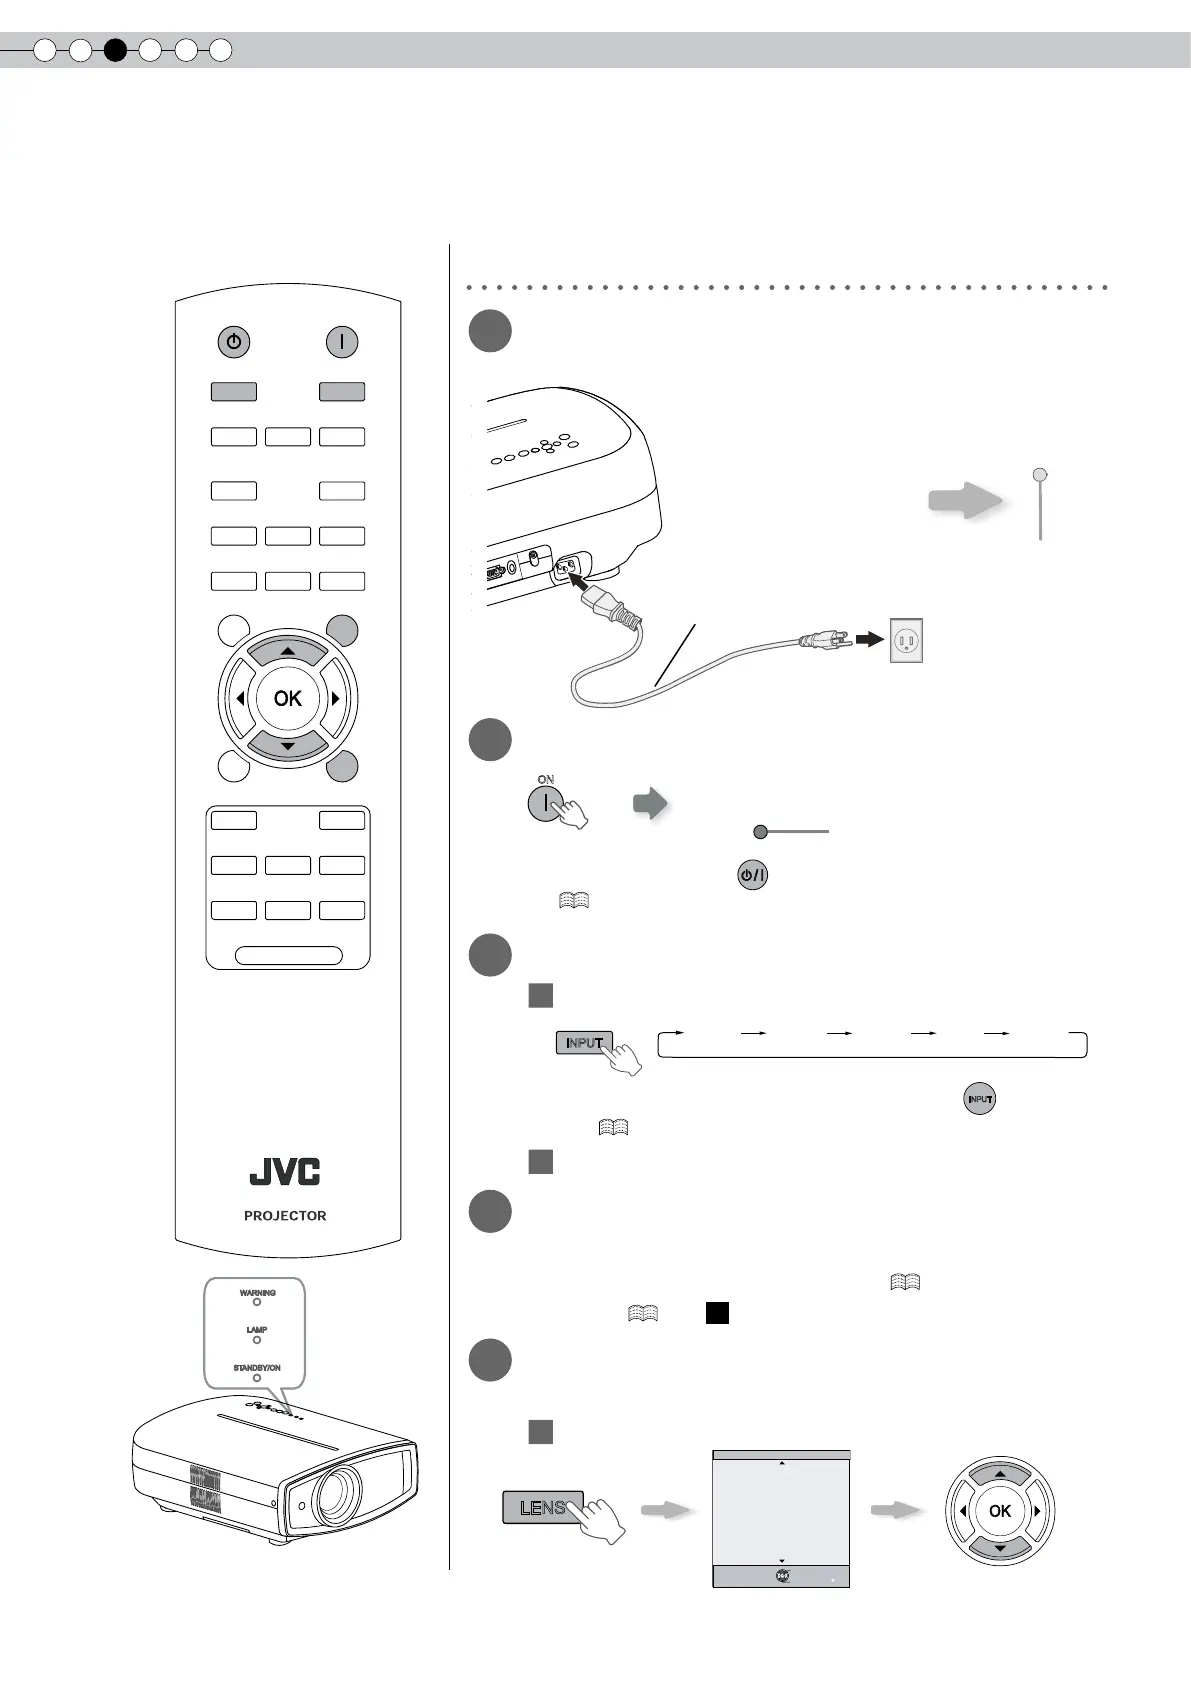
Preparation
1
Insert the power plug to the power
outlet
2
Turn on the power
● You can also press the button on the unit to turn on the power.
( P15)
● The lens cover will be opened.
3
Project the image
1
Select input mode
● You can also select the input mode by pressing the
button on the
unit. ( P15)
2
Play back the selected device
4
Adjust the position of the projection
screen
● See “Installing the Projector and Screen” ( P23) and “Lens
Control” ( P38 -
21
) for the adjustment method.
5
Adjust the image size (zoom) and the
focus
1
Adjust the focus
① Connect to this unit
② Connect to the power outlet
Light on (Green)
Adjust accordingly by pressing
the up/down buttons
Power Cord
(Supplied)
Light on (Red)
BACK
TEST
HIDE
BRIGHT
CONT
SHARP
COLOR
TINT
N.R
GAMMA
C.TEMP
INFO
LENS.AP
ASPECT
LENS
INPUT
STANDBY
ON
MENU
CINEMA1
CINEMA2
NATURAL
STAGE
DYNAMIC
USER1
USER2
USER3
LIGHT
RM-MH2GB
BACK
Back
Operate
Select
Exit
MENU
Focus
Lens Control
①
②
STANDBY/ON
STANDBY/ON
HDMI 1 HDMI 2 COMP. Video S-Video

 Loading...