7
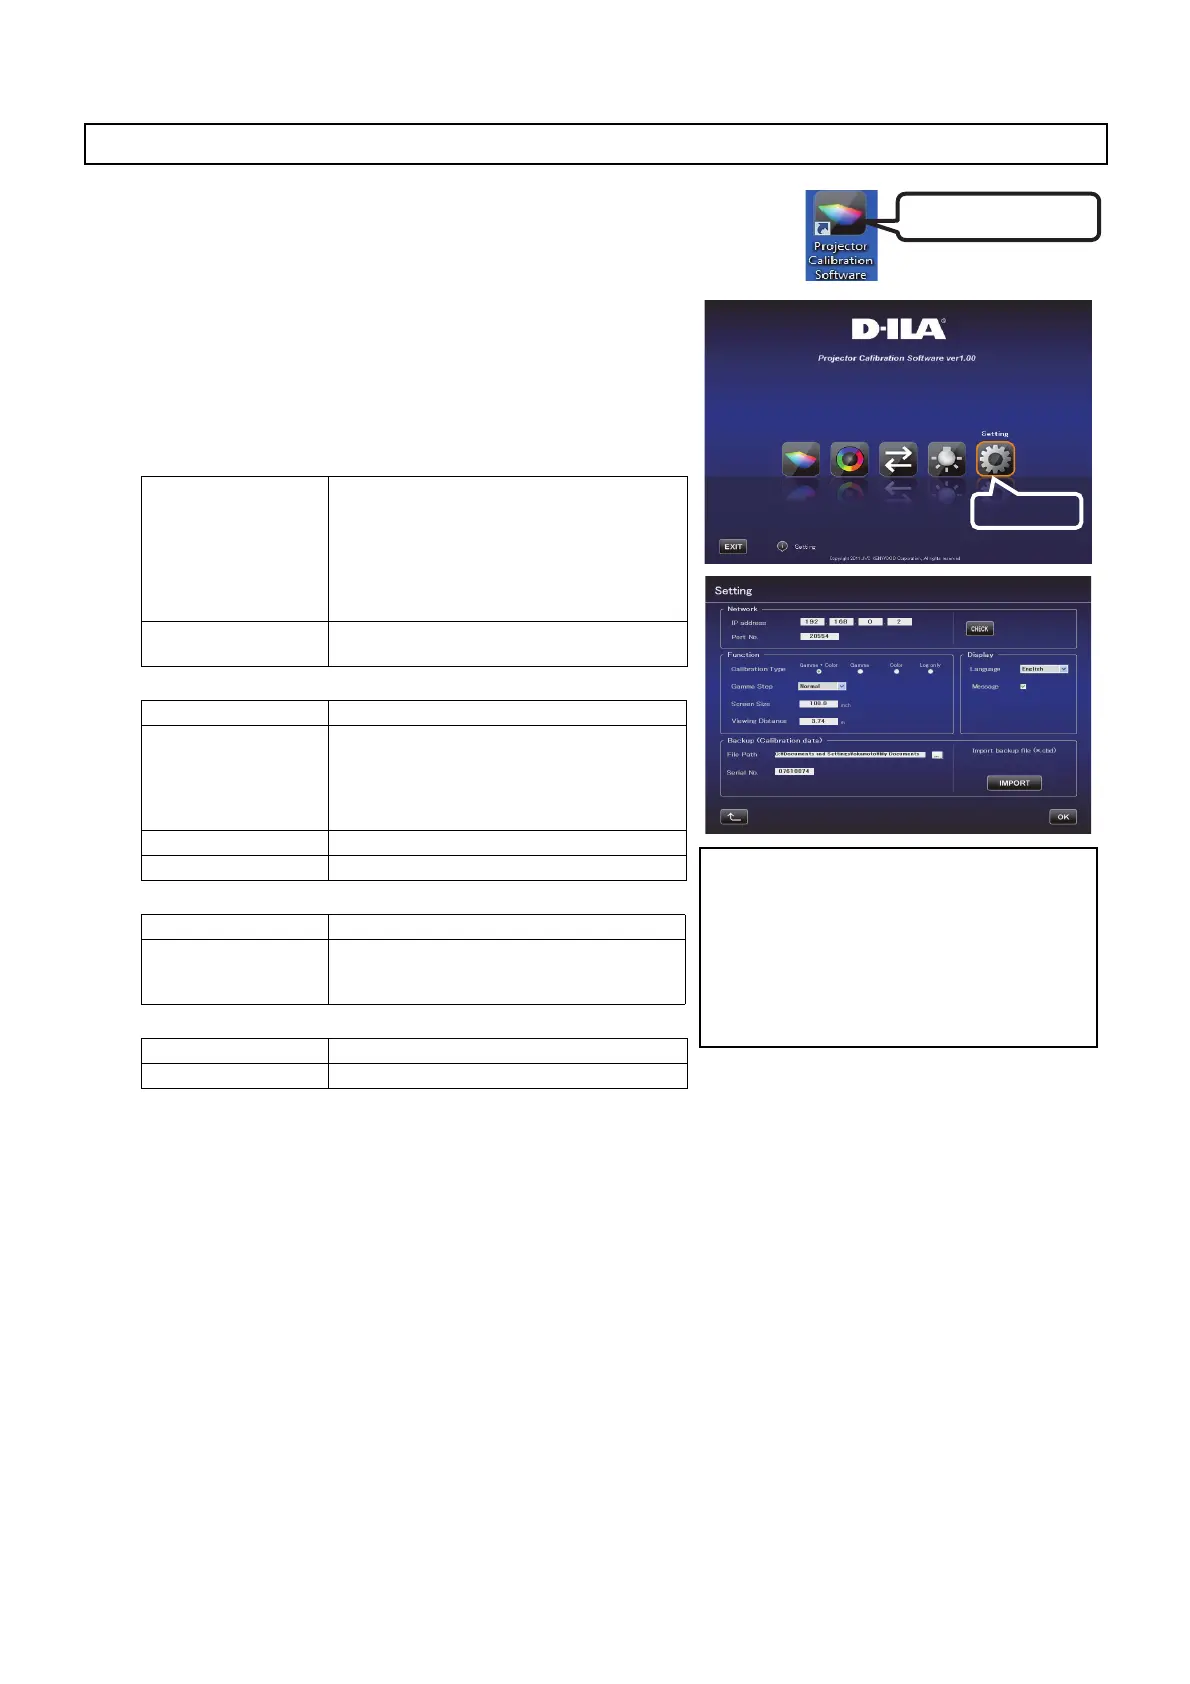
Double-click the “Projector Calibration software” icon on the Desktop.
Setting
Use this feature to specify the various settings.
1 Click the “Setting” button.
2 Specify the various settings.
Network
Function
Display
Backup
* Upon saving the data after performing calibration, a backup file will be saved automatically to the selected
folder.
File name “Serial No._Set Picture mode_Year-Month-Date-Time.cbd”
Note that the factory default data will be saved as “Serial No._init_Year-Month-Date-Time.cbd”. Be careful not to
delete this file.
Recovering Backup Data
1 Click the “IMPORT” button.
2 Select the backup data file from the folder, and click “Open”.
3 The backup data is imported to the projector.
Starting up the Software
IP Address: Enter the IP address for the projector on the
network.
To view the IP address of the projector, refer to the
“Projector and PC Setup” item.
After entering the IP address, click the [Check]
button to check the projector’s connection with
the PC.
Port No.: Leave the value unchanged unless you need to
alter it.
Calibration Type(*1): Select a type of calibration.
Gamma Step:
Quality
Normal
Speed
For setting the accuracy level of gamma
calibration.
33 steps
20 stels (default)
9 steps
Screen Size: Enter a screen size for viewing.
Viewing Distance: Enter a viewing distance.
Language: Select a language.
message: Deselect this checkbox if you do not want to
display descriptions on how to operate the
different features.
File Path: Select the location for storing the backup file.
Serial No.: Enter the projector’s serial no.
Double-Click
(*1) Calibration Type
- Gamma+Color
Calibrate gamma and color.
- Gamma
Calibrate gamma only.
- Color
Calibrate color only
- Log only
Log the current status.
Click
JVC_PCS_manual.fm 7 ページ 2014年7月29日 火曜日 午後6時50分
 Loading...