8
Corrects the image quality which changes depending on the
installation condition (such as installation position of the main unit,
lens shift/zooming position), and distortions (such as those in the
color balance), which are caused by the prolonged use of the
projector.
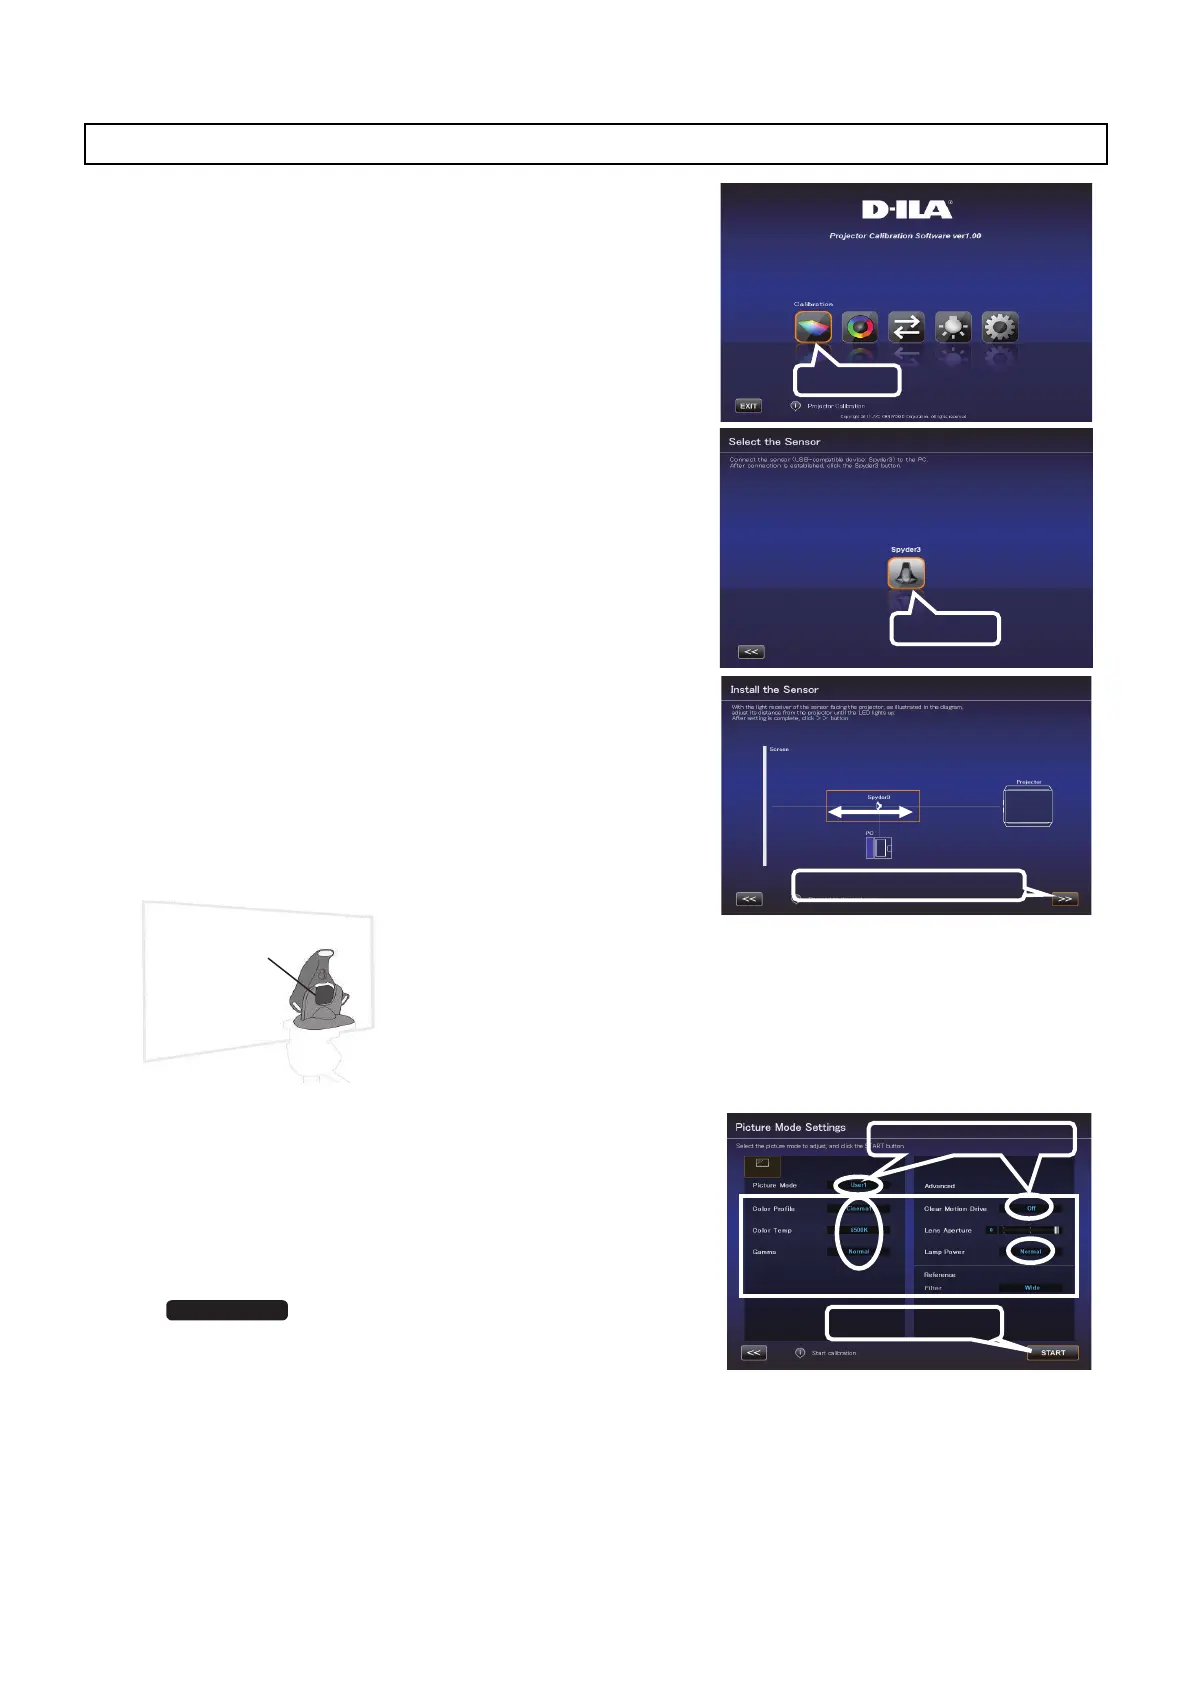
1 Click the “Calibration” button.
2 Connect the optical sensor to the PC.
After connection is established, click the “Spyder4” button.
3 With the light receiver of the optical sensor facing the projector,
install the optical sensor between the projector and the screen.
Install the optical sensor at a height according to the center of
the projected image. LED of the optical sensor lights up when its
distance from the projector falls within the detection range.
Prevent light of the PC monitor from reaching the optical sensor
directly.
After installation is complete, click the “>>” (Next) button.
4 Double-click the Picture Mode, and select a Picture Mode for
calibration from the pull-down menu.
Double-click an item such as Color Profile, Color Temp, or
Gamma, and select a mode for calibration from the pull-down
menu.
Slide Lens Aperture to make a selection.
After setting is complete, click “START”.
* When Custom1 to 5 is selected for Color
Profile, Color Temp and Gamma cannot be selected.
* The Profile Name being created and saved won’t be displayed
when Custom 1 to 5 is selected, but shown as Custom 1 to 5 instead.
* Click the “<<” button to go back to the previous screen if Picture Mode does not appear. Proceed to this
screen again.
* Filter is set automatically in accordance to the Picture Mode and the Color Profile.
* Set to the actual Picture Mode for image viewing before performing calibration. However, even if other Picture
Mode has been selected, the calibration result is applied when the respective setting for Clear Motion Drive,
Lens Aperture, Lamp Power and Filter is the same.
Calibration Procedure
Click
Click
Click after installing
Light Receiver of the
Optical Sensor
How to Install the Optical
Sensor
With the light receiver of the
optical sensor facing the
projector, as illustrated in the
diagram, adjust its distance
from the projector until the LED
of the optical sensor lights up.
Click after setting
Double-Click
X95R/X75R
JVC_PCS_manual.fm 8 ページ 2014年7月29日 火曜日 午後6時50分
 Loading...