EN59
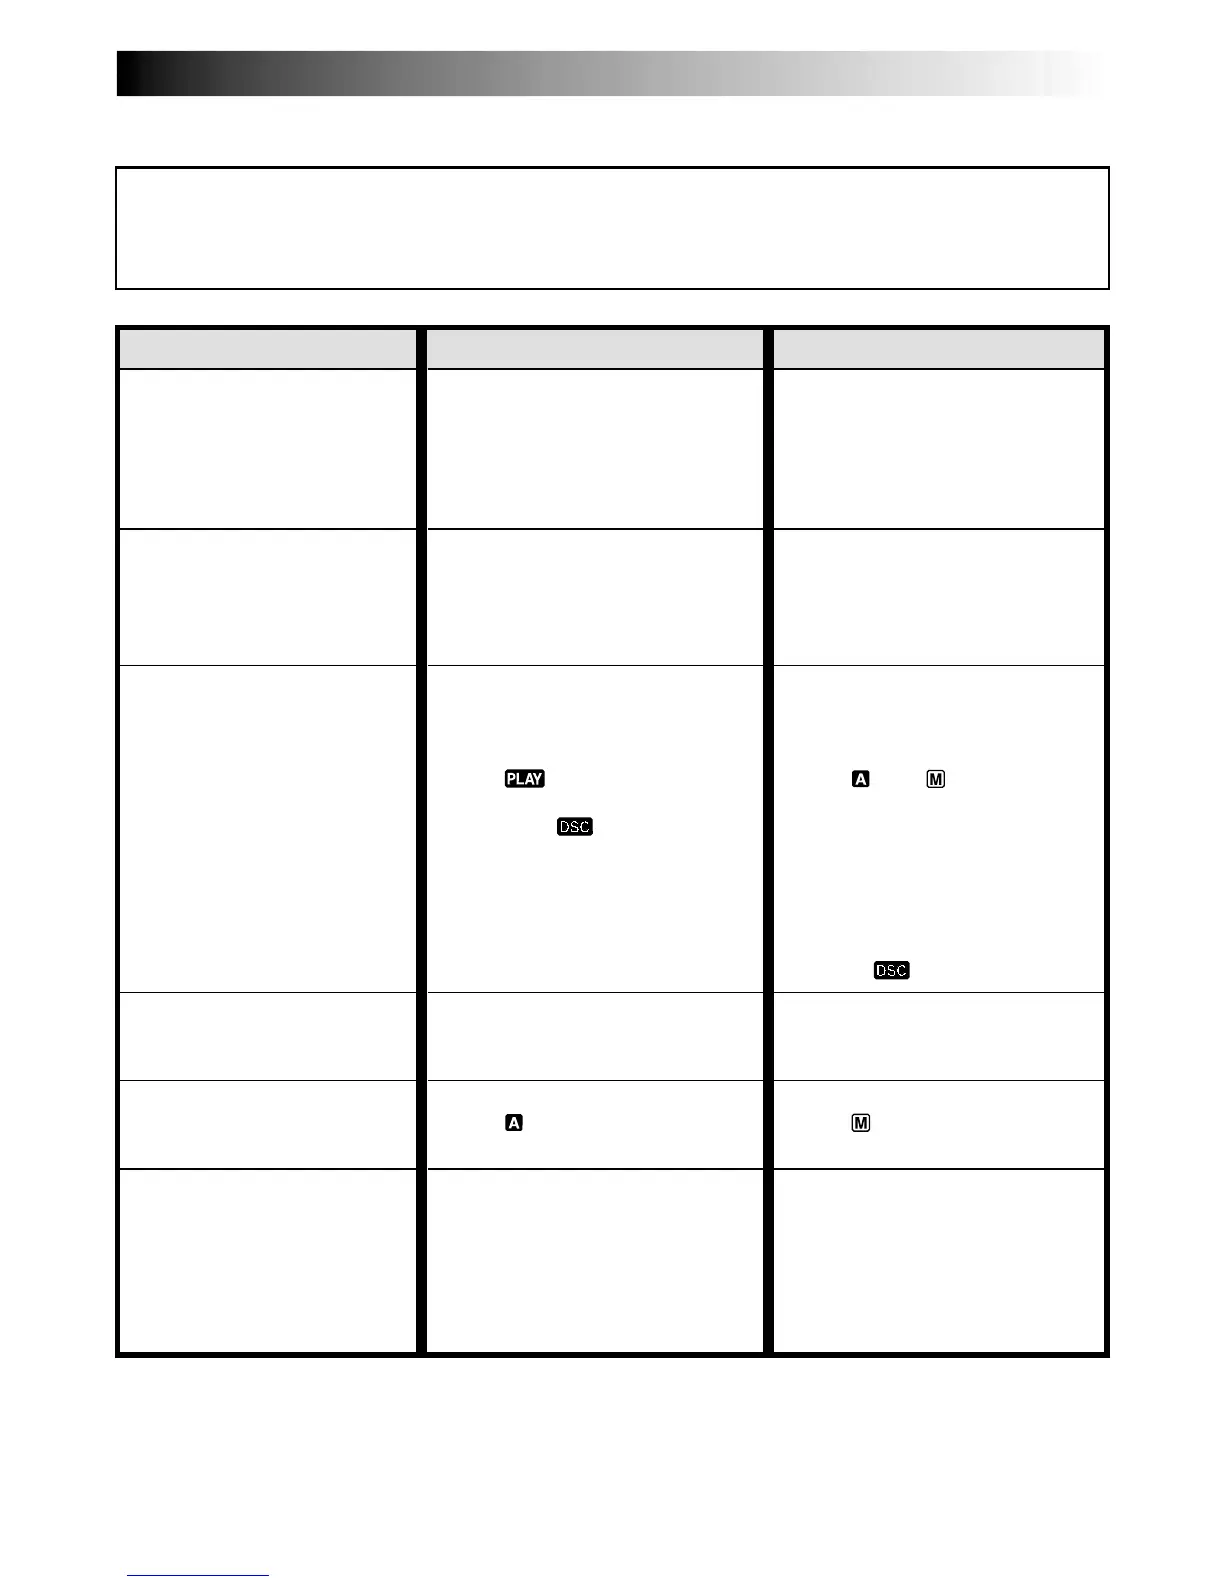
SYMPTOM POSSIBLE CAUSES CORRECTIVE ACTION
TROUBLESHOOTING
1.
No power is supplied.
2.
“SET DATE/TIME!”
appears.
3.
Recording cannot be
performed.
4.
There is no picture.
5.
Some functions are not
available using MENU/
BRIGHT.
6.
The focus does not adjust
automatically.
1.
•The power is not connected
properly.
•The battery is dead.
2.
•The date/time is not set.
•The built-in clock battery
has run out and the
previously set date/time has
been erased.
3.
— For Video Recording —
•The tape’s erase protection
tab is set to “SAVE”.
•The Power Switch is set to
“ ” or “OFF”.
•The VIDEO/DSC Switch is
set to “ ”.
•“TAPE END” appears.
•The cassette holder cover is
open.
— For D.S.C. Recording —
•The VIDEO/DSC Switch is
set to “VIDEO”.
4.
•The camcorder is not getting
power, or some other
malfunction exists.
5.
•The Power Switch is set to
“ ”.
6.
•Focus is set to the Manual
mode.
•The recording was done in a
dark place, or the contrast
was low.
•The lens is dirty or covered
with condensation.
1.
•Connect the AC Power
Adapter/Charger securely
( pg. 7).
•Replace the dead battery
with a fully charged one
( pg. 6, 7).
2.
•Set the date/time ( pg. 9).
•Consult your nearest JVC
dealer for replacement.
3.
•Set the tape’s erase
protection tab to “REC”
( pg. 10).
•Set the Power Switch to
“ ” or “ ” ( pg. 13).
•Set the VIDEO/DSC Switch
to “VIDEO”.
•Replace with new cassette
( pg. 10).
•Close the cassette holder
cover.
•Set the VIDEO/DSC Switch
to “ ”.
4.
•Turn the camcorder’s power
off and on again ( pg. 13).
5.
•Set the Power Switch to
“ ” ( pg. 13).
6.
•Set Focus to the Auto mode
( pg. 21).
•Clean the lens and check
the focus again ( pg. 65).
If, after following the steps in the chart below, the problem still exists, please consult your nearest JVC dealer.
The camcorder is a microcomputer-controlled device. External noise and interference (from a TV, a radio,
etc.) might prevent it from functioning properly. In such cases, first disconnect its power supply unit (battery
pack, AC Power Adapter/Battery Charger, etc.) and wait a few minutes; and then re-connect it and proceed
as usual from the beginning.
CONTINUED ON NEXT PAGE
 Loading...