EN 27
RECORDING
Advanced Features
1
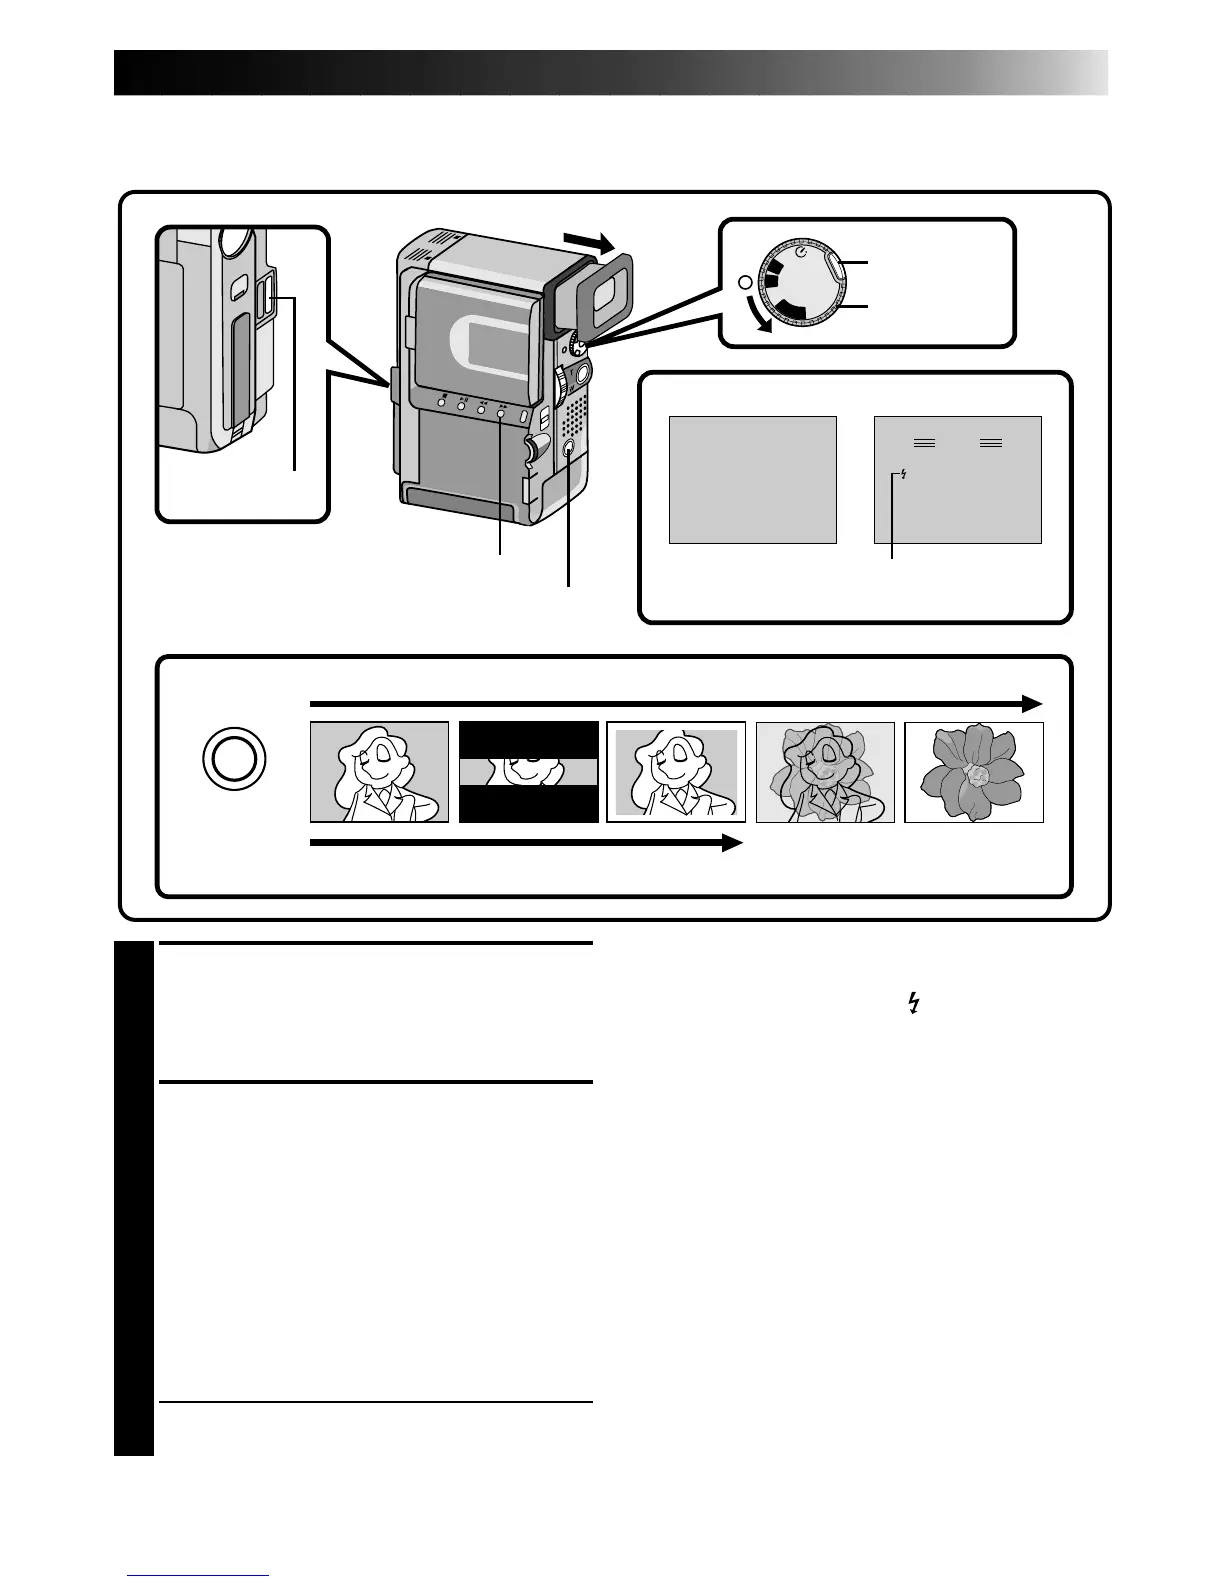
SELECT OPERATION MODE
First turn the Power Dial to any operation
mode except “PLAY” and “OFF”, make sure
the viewfinder is pulled out or the LCD
monitor is open fully.
2
TAKE SNAPSHOT
Press SNAPSHOT.
If you press during Record-Standby...
.... “PHOTO” appears and a still image will be
recorded for approx. 5 seconds, then the
camcorder re-enters the Record-Standby
mode.
If you press during Recording...
.... “PHOTO” appears and a still image will be
recorded for approx. 5 seconds. The next
image then gradually overlaps the
snapshot and normal recording resumes.
•The sound effect of a shutter closing is
recorded together with the image.
Snapshot Flash:
The flash automatically lights at the subject when
it's dark (flash ready indicator appears in the
viewfinder or the LCD monitor) when taking a
snapshot in Record-Standby (Z pg. 28)
Motor Drive mode:
Keeping SNAPSHOT pressed provides an effect
similar to serial photography. (The interval between
the still pictures: approx. 0.7 seconds.)
Changing the Snapshot Setting:
•Still image with no frame can also be recorded
(Z pg. 36).
•When you don't want to hear the shutter sound,
set BEEP/TALLY to “OFF” in the system menu
(Z pg. 36). Though the sound is not heard from
the speaker, it is recorded on the tape.
NOTE:
When the grip strap is fastened to both the strap
eyelet and the sub-strap eyelet, use the Sub
SNAPSHOT button to take a snapshot.
Snapshot
Use your camcorder like a regular camera and take a snapshot, or several of them in succession.
OFF
P
L
A
Y
A
M
5S
SNAPSHOT
PHOTO
PAUSE
Press SNAPSHOT during Record-Standby mode
Power Dial
Lock button
Display
During snapshot
Flash
Flash Ready Indicator
Press SNAPSHOT during recording (Snapshot dissolve)
Sub SNAPSHOT
SNAPSHOT