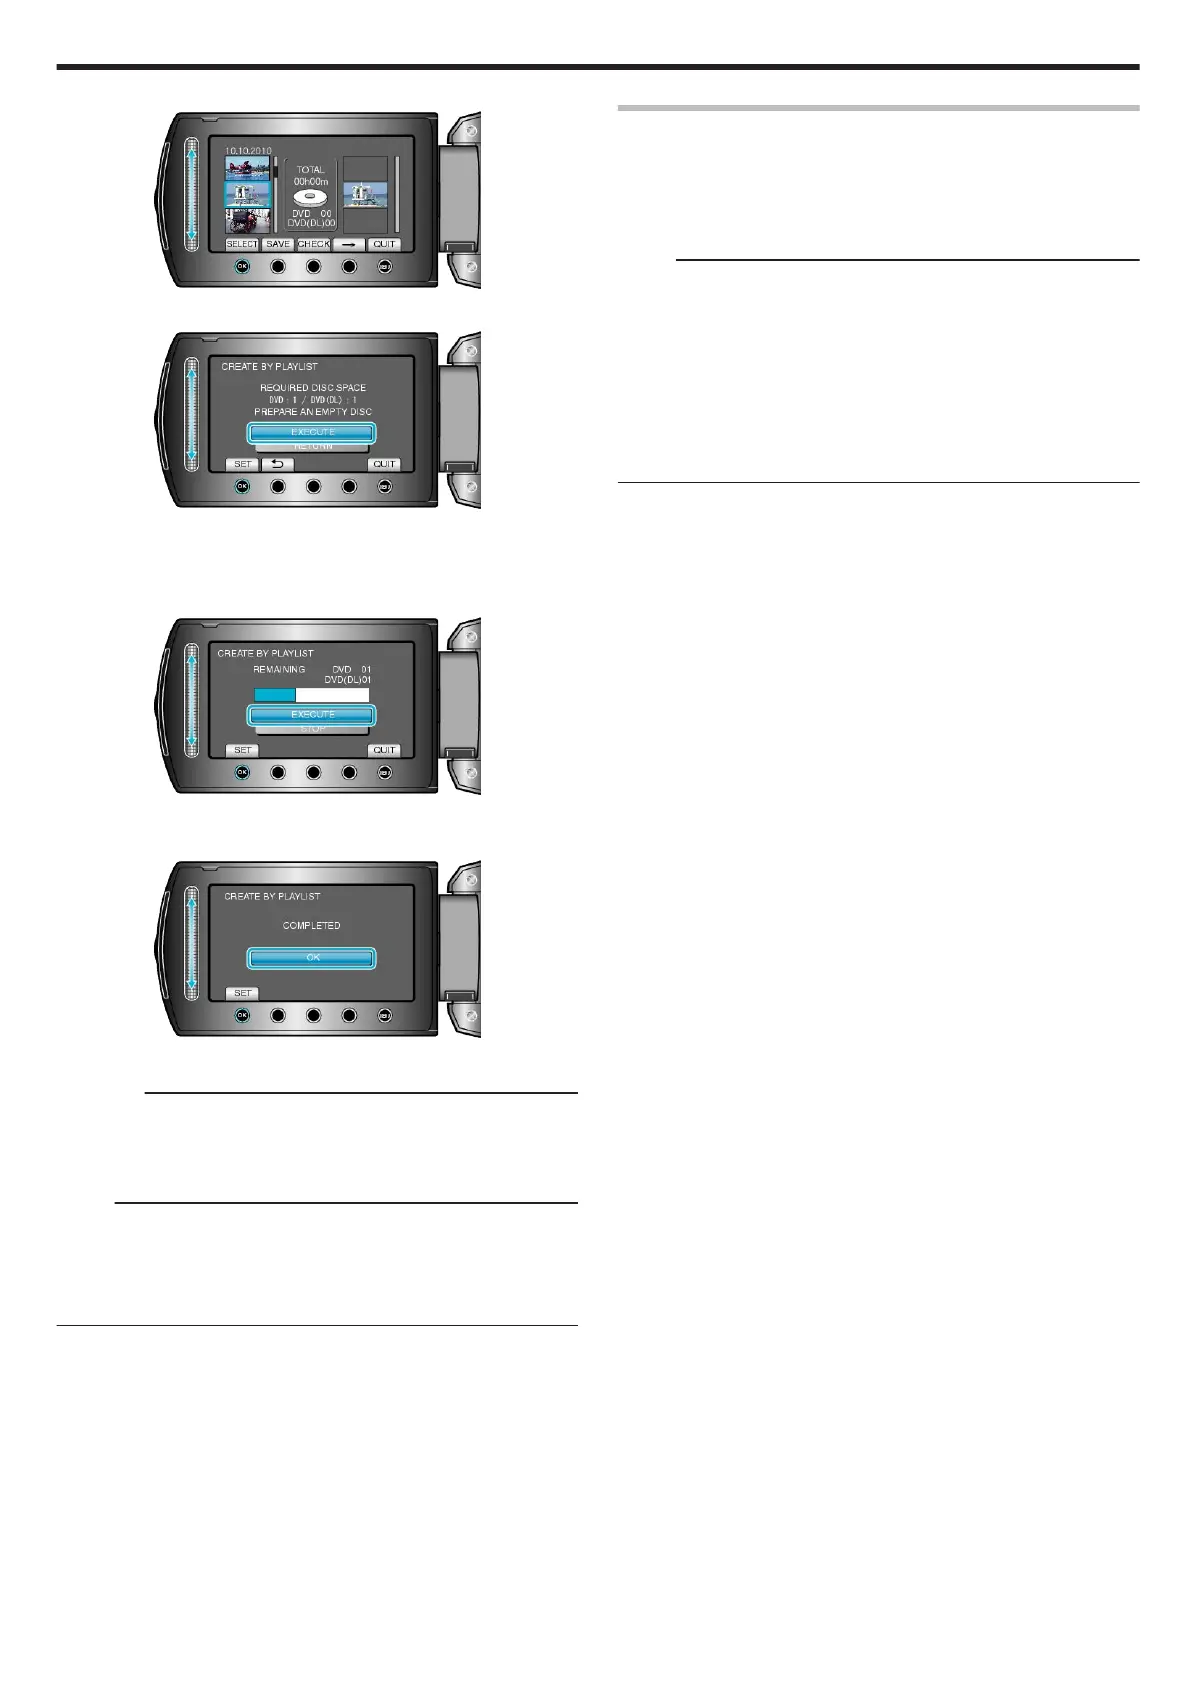
7
After arranging, touch “SAVE”.
.
8
Select “EXECUTE” and touch C.
.
●
The number of discs required to copy the files is displayed.
Prepare the discs accordingly.
●
Touch “CHECK” to check the file to copy.
9
Select “EXECUTE” and touch C.
.
●
When “INSERT NEXT DISC” appears, change the disc.
10
After copying, touch C.
.
11
Close the LCD monitor, then disconnect the USB cable.
CAUTION:
●
Do not turn off the power or remove the USB cable until copying is
complete.
●
Files that are not on the index screen during playback cannot be cop-
ied.
Memo:
●
A list of playlists is displayed on the top menu of the created DVD.
●
To check the created disc, select “PLAYBACK” in step 1.
●
To create a playlist
"Creating Playlists from the Recorded Videos" (A P.74)
"Creating a Playlist with Title" (A P.80)
When “DO YOU WANT TO FINALIZE?” appears
This appears when “AUTO FINALIZE” in the camera settings menu is set
to “OFF”.
"AUTO FINALIZE" (A P.129)
●
To play back on other devices, select “YES” and touch C.
●
To add more files to the DVD later, select “NO” and touch C.
Memo:
●
When two or more DVDs are created simultaneously, all the discs oth-
er than the last one will be finalized automatically even when “AUTO
FINALIZE” is set to “OFF”.
●
You can finalize a DVD even when “FINALIZE” is selected in the
“BACK-UP” menu.
"Finalizing Discs After Copying" (A P.93)
●
To play back a BD-R disc on other devices, select “FINALIZE” after
creating the disc.
(The “AUTO FINALIZE” function on the camera settings menu can only
be used for creating DVDs.)
Copying
91
 Loading...