Do you have a question about the JVC HR-A51U and is the answer not in the manual?
Warnings about electrical shock, not opening the cover, and proper plug insertion for safety.
Precautions regarding operating environment, ventilation, physical shocks, and moisture condensation.
Details on VHS SQPB HQ compatibility and Energy Star compliance for the VCR.
Rules for safe installation including grounding, power, ventilation, and mounting.
Safety guidelines for antenna installation, grounding, and lightning protection.
Guidelines for safe product use, including accessories, water, object entry, cleaning, and heat.
Instructions for servicing, handling damage, replacement parts, and safety checks.
Advice on how to effectively use the instruction manual for information retrieval.
Illustrates the basic connections for antenna, AC power, and TV.
Steps for connecting the VCR to a TV (RF/AV) and power source.
Steps for powering on the VCR and preparing for playback or recording.
Guides through the Plug & Play setup for automatic clock and tuner channel setting.
Advice on what to do if the Plug & Play function fails or displays incorrect information.
Explains how the auto clock and auto channel set functions work and their default settings.
Provides solutions for issues like incorrect time display or failure of the Plug & Play function.
Step-by-step guide to select the on-screen message language.
Steps to prepare for clock setting, including turning on the VCR and accessing menus.
Navigating the menu system to reach the Clock Set screen.
Configuring the VCR to automatically set the clock using a host channel.
Options for managing Daylight Saving Time adjustments for the VCR clock.
Setting the VCR's time zone and Daylight Saving Time mode.
Manually entering the current time, date, and year for accurate clock setting.
Instructions on how to make corrections to previously set clock information.
Steps to automatically scan and set receivable TV channels.
Information on how the VCR automatically detects TV or CATV bands.
Procedure to manually add or skip specific TV channels.
Steps to load a VHS cassette and start playback.
How to locate program start points and stop playback.
Information on SQPB feature and compatible VHS cassette types.
Steps for loading a cassette, selecting a channel, setting speed, and starting recording.
How to pause, resume, and stop the recording process.
Tips on how to prevent accidental erasure of recorded content.
How to achieve still images and frame-by-frame playback.
Instructions for playing back tapes in slow motion, forward and reverse.
Using variable speed search and reverse motion playback.
How to quickly search for specific parts of a tape using high-speed or index search.
Adjusting tracking manually for clearer playback, especially with noisy signals.
How to set the Auto Picture feature to ON or OFF for optimal playback quality.
Using Picture Control modes like EDIT, SOFT, or SHARP to adjust image quality.
How to use the Video Stabilizer to correct vertical vibrations in playback.
How to set up repeat playback and reset the tape counter.
Using the tape position indicator and next-function memory features.
How to turn the Superimpose function ON or OFF to control operational indicators.
How to select different audio monitor modes for playback, including stereo and normal.
Steps to watch another program on TV while recording.
How to view the elapsed recording time during a recording session.
Instructions on how to record programs with Second Audio Program (SAP) audio.
How to set the desired start time for a timer recording.
Configuring the stop time, date, and channel for timer recordings.
Important notes on timer recording, including handling program conflicts and tape availability.
How to check, cancel, or revise previously set timer programs.
Using Auto SP→EP Timer to ensure full program recording on limited tape length.
How the Auto Timer engages and disengages automatically.
Steps to start an instant timer recording and set its duration.
How to connect your VCR and another VCR for dubbing tapes.
Steps for loading cassettes, setting input modes, and starting the editing process.
How to connect a camcorder or another VCR as a player to your VCR.
Configuring the recorder's input mode and starting the player.
Solutions for power-related issues and tape transport problems.
Troubleshooting tips for playback and recording problems, including video/audio quality.
Solutions for issues related to timer recording setup and operation.
Troubleshooting for channel scanning, channel changes, and clock setting inaccuracies.
Answers to common questions about playback, recording, and timer recording.
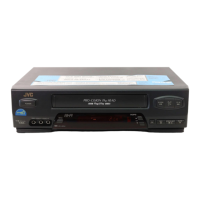
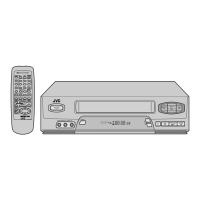
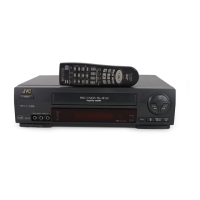
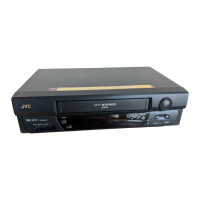
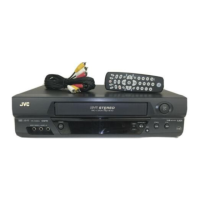
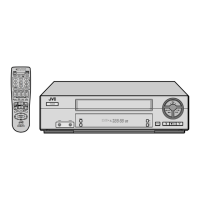
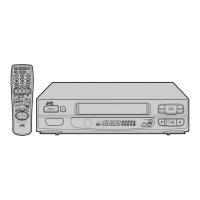
Identifies and explains the buttons and connectors on the VCR's front panel.
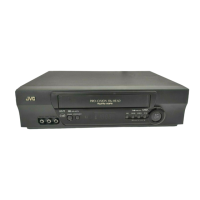
Details the connectors and switches located on the rear of the VCR.
Explains the various indicators and displays on the VCR's front panel.
Lists and explains the functions of each button on the remote control.
Instructions on how to use the remote to control basic JVC TV functions.
Details on power, dimensions, format, signal system, and audio specifications.
Technical specifications for the VCR's tuner and RF output.
How to find an authorized JVC service center and contact information.
Guidelines for shipping products for repair and warnings against self-servicing.
Explains what the limited warranty covers, exclusions, and duration.
Steps for obtaining warranty service and customer contact information.