41
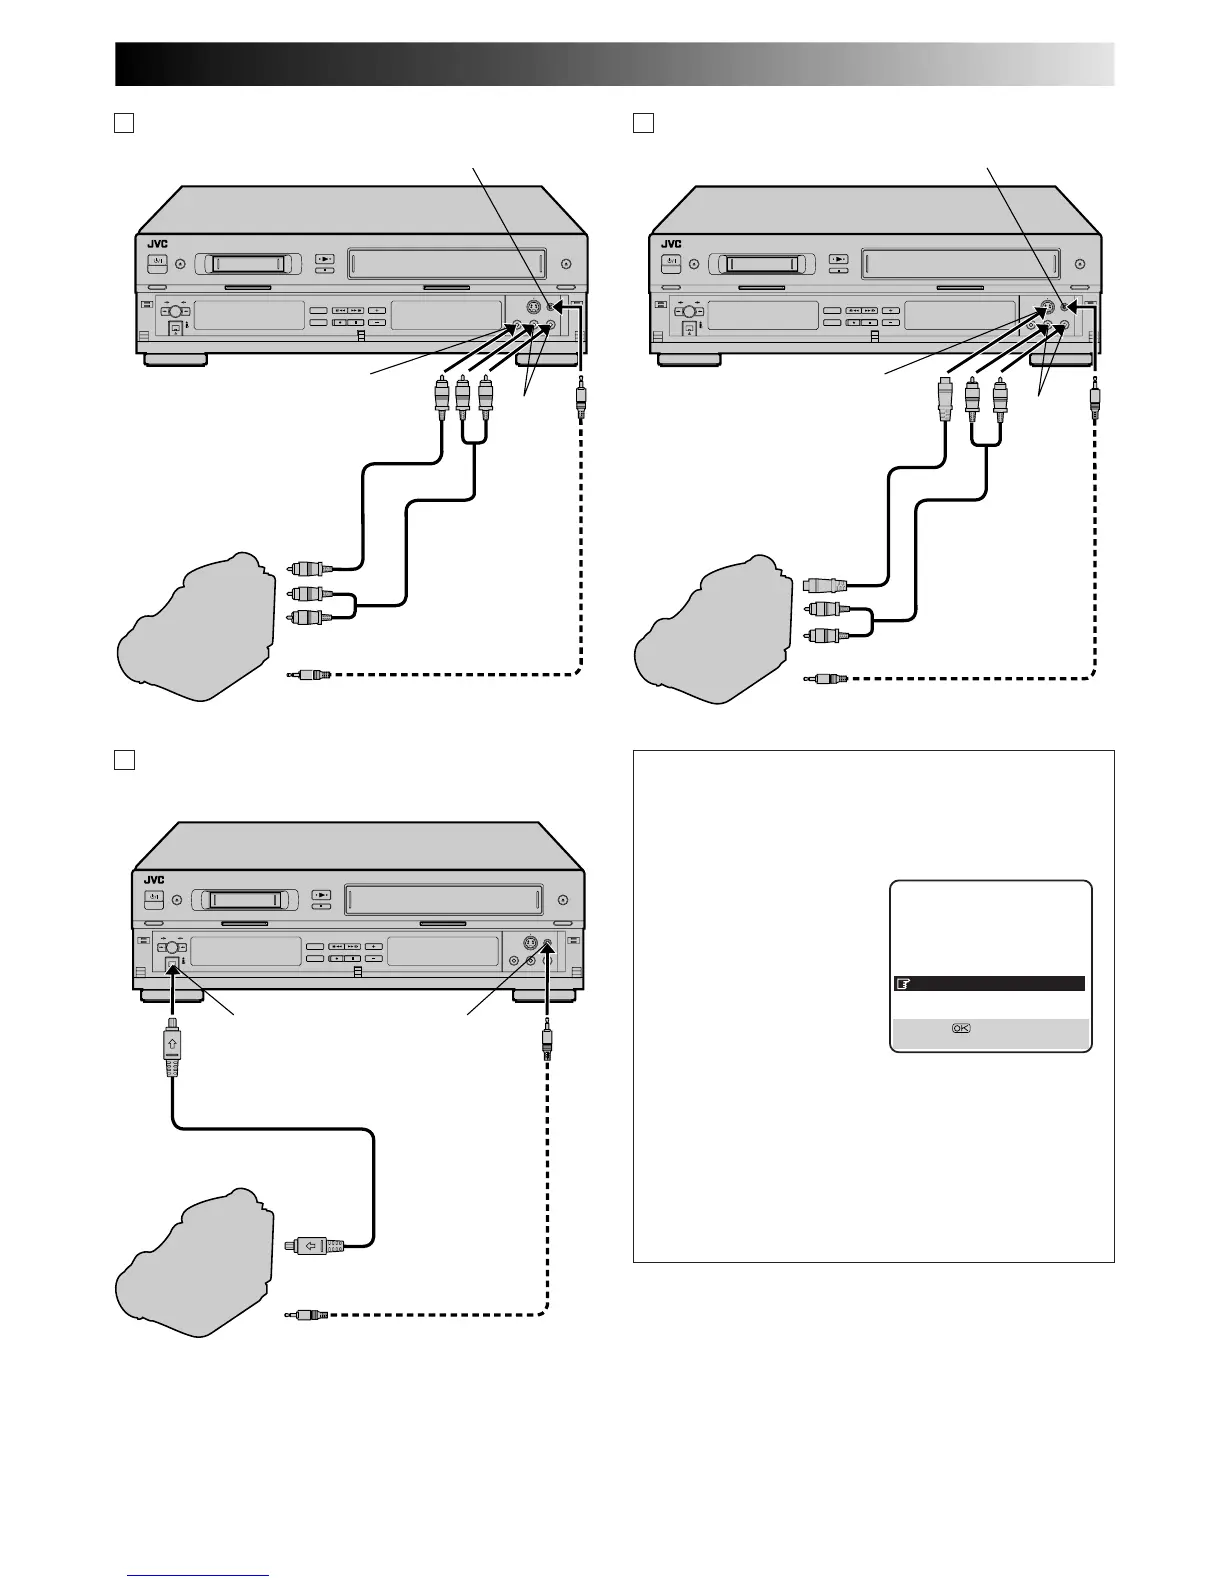
Mini-Plug Cable
(not provided)
(JVC camcorder only)
VIDEO
OUT
EDIT
Camcorder
VIDEO input
Recorder
PAUSE connector
AUDIO OUT
Video Cable
(not provided)
Player
AUDIO
input
A If the camcorder has no S-VIDEO output connector...
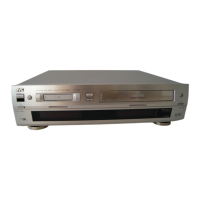
Mini-Plug Cable
(not provided)
(JVC camcorder only)
S-VIDEO
OUT
EDIT
Camcorder
S-VIDEO input
Recorder
PAUSE connector
AUDIO OUT
Audio Cable
(not provided)
Player
B If the camcorder has an S-VIDEO output connector...
AUDIO
input
S-Video Cable
(not provided)
Audio Cable
(not provided)
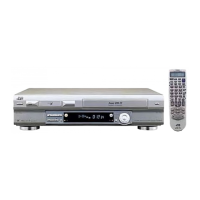
Mini-Plug Cable
(not provided)
(JVC camcorder only)
EDIT
DV Camcorder
Recorder
PAUSE connector
DV OUT/IN
DV Cable (not provided)
Player
C If the camcorder has a DV OUT/IN connector...
DV IN/OUT
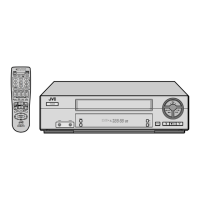
L-3 AV Setting
Set "L-3 AV" to the appropriate mode depending on the
connector (VIDEO or S-VIDEO input connector) being
used on the front panel.
1 Press MENU to access the Main Menu screen.
2 Press %fi to move the
highlight bar (pointer) to
"VHS MODE SET", then
press OK or
#
.
3 Press %fi to move the
highlight bar (pointer) to
"L-3 AV".
4 Press OK or
#
to select
"VIDEO" or "S-VIDEO".
a–VIDEO : If a connected device's output is
compatible only with regular video
signals, set "L-3 AV" to "VIDEO".
b–S-VIDEO : If a connected device's output is
compatible with Y/C signals, set
"L-3 AV" to "S-VIDEO". This setting will
let you take advantage of higher-quality
S-VHS pictures.
5 Press MENU to return to normal screen.
VHS MODE SET
B. E. S. T. ON
PICTURE CONTROL AUTO
AUTO SP=LP TIMER OFF
DIGITAL 3R ON
S-VHS AUTO
DIGITAL TBC/NR ON
L-3 AV VIDEO
[5∞] =
[MENU] : EXIT
NOTE:
The signals through the DV IN/OUT connector cannot be
recorded on the VHS deck, even though
→
beside the DUB
button is pressed.