EasyManua.ls Logo

JVC LT-27CM69B - User Manual

JVC LT-27CM69B
24 pages
Print Icon
To Next Page IconTo Next Page
Loading...
Instruction Manual
27" FULL HD LED MONITOR
WITH BUILT-IN SPEAKERS
LT-27CM69B
Question and Answer IconNeed help?

Do you have a question about the JVC LT-27CM69B and is the answer not in the manual?

Summary

Safety Warnings and Precautions

Handling and Environmental Safety

Inspect for damage, proper placement on stable surfaces, avoid extreme temperatures, moisture, and ensure ventilation.

Wall Mounting and Electrical Safety

Guidelines for wall mounting and general electrical safety measures including cable handling.

Interference and Viewing Advice

Advise on avoiding interference, optimal viewing, LCD characteristics, screen burn, and standby.

Supervision and Earthing Considerations

Child supervision, avoiding object insertion, and electrical earthing implications.

Service and Maintenance Guidelines

Service Procedures

Instructions regarding user-serviceable parts and qualified personnel for repairs.

Cleaning and Care

Safe methods for cleaning the monitor screen and surfaces.

Unpacking and Installation

Unpacking and Included Items

Lists all items included in the monitor packaging and initial unpacking steps.

Assembling the Base Stand

Step-by-step guide for assembling the monitor's base stand.

Detaching the Base Stand

Instructions for safely removing the monitor's base stand.

Monitor Wall Mounting

Guidance for wall-mounting the monitor using a separate kit.

Product Overview and Connectivity

Main Unit Features

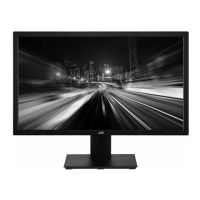
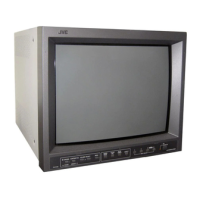
Details of the front and rear components of the monitor.

Signal Input and Output

How to connect video sources like HDMI/VGA and audio outputs.

Powering On the Monitor

Procedure for powering on the monitor and its LED indicator.

Operation and Settings Adjustment

Adjusting Screen Angle

How to tilt the monitor for optimal viewing comfort.

Monitor Controls and OSD Navigation

Explanation of the monitor's buttons and OSD menu navigation.

Image and Eco Settings Adjustment

Adjusting image parameters, auto-adjust, eco settings, and customization.

Maintenance and Troubleshooting

Cleaning the Unit

Safe methods for cleaning the monitor screen and surfaces.

Troubleshooting Common Issues

Solutions for problems like no image, focus, color issues, and screen rolling.

Audio and Screen Performance

Resolving audio problems and improving screen performance.

Product Specifications and Information

Product Fiche and Specifications

Detailed technical specifications of the monitor.

Energy Efficiency Details

Information on the monitor's energy rating and consumption.

Support, Recycling, and Licensing

Information on customer support, recycling, and trademarks.

Overview

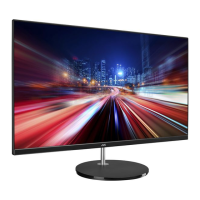
This document describes the JVC 27" Full HD LED Monitor with Built-In Speakers, model LT-27CM69B, providing instructions for its setup, operation, and maintenance. The monitor is designed for indoor, domestic use, offering a Full HD (1080p) display with built-in speakers for a complete multimedia experience.

Function Description

The JVC LT-27CM69B is a 27-inch Full HD LED monitor designed to provide clear and vibrant visuals for various computing and entertainment needs. It features built-in speakers, eliminating the need for external audio devices in many setups. The monitor supports both HDMI and VGA input signals, making it compatible with a wide range of devices, including PCs, laptops, and other multimedia sources. An ECO-Power/Standby mode is integrated to promote energy efficiency, automatically switching the monitor to standby when no input signal is detected. The monitor also includes an "Eye Saver" function, optimized to reduce blue light emissions for enhanced viewing comfort during prolonged use.

Usage Features

The monitor offers straightforward assembly and connection. For setup, the base stand is attached by sliding the stand stem into the back of the monitor and securing it with screws, followed by snapping on plastic covers and rotating the stand base clockwise until it clicks. For wall mounting, the base stand must first be detached. The monitor is designed to be wall-mounted with a standard mounting kit (sold separately), and it's recommended to make all connections before mounting due to space restrictions.

Connecting the monitor involves inserting the desired signal cable (HDMI or VGA) into the corresponding connector on your computer. An HDMI cable is included, while a VGA cable is not. For VGA connections, it's important to tighten the screws clockwise to secure the cable firmly. If using an Apple® computer, an Apple® adapter may be required. For audio output, an audio cable (not supplied) can be used to connect external speakers or a stereo amplifier. It's noted that speaker output only supports HDMI sources; if VGA is used as an input, the built-in speakers will not produce sound.

To turn on the monitor, connect the power cord from the monitor's DC IN supply to a mains socket, then press the power button. The LED light at the bottom will illuminate. If no signal is received after a few seconds, a pop-up message will appear, the LED will flash, and the monitor will enter Standby mode.

The monitor's angle can be adjusted from -5° to 15° for comfortable viewing. Users are cautioned not to hold the bottom frame or press the screen area when adjusting the angle to prevent injury or damage.

Basic operation is managed via buttons located at the rear of the monitor. The 'M' button displays the OSD (On-Screen Display) menu bar and accesses the main OSD menu. The 'E' button returns to the upper menu or exits the OSD and can also execute the "Image Auto Adjust" function for VGA signals when not in the OSD menu. Up and down arrow buttons are used to navigate menus and adjust values.

The "Auto Adjust Image" function (for VGA signals) automatically optimizes display settings when the monitor is first connected or when issues like blurry screens, flickering, or tilted images occur after changing screen resolution. Pressing the 'E' button can improve resolution in such cases.

The OSD menu provides extensive customization options:

  • Brightness & Contrast: Adjusts the white levels and the difference between light and dark levels in the picture.
  • ECO Mode: Selects among various picture modes like STANDARD, TEXT, GAME, MOVIE, FPS (First-person shooter game), and RTS (Real-time strategy game).
  • DCR (Dynamic Contrast Ratio): Enables or disables dynamic contrast, which enhances color depth and detail in shadows and highlights. When DCR is ON, brightness, contrast, hue, and saturation settings are disabled.
  • Hue & Saturation: Adjusts the tone and intensity of screen colors.
  • H. Position & V. Position: Adjusts the horizontal and vertical position of the screen (VGA signal only).
  • Clock & Phase: Optimizes the input signal width and screen performance (VGA signal only).
  • Aspect: Allows selection of picture formats: WIDE, 4:3, or AUTO.
  • Colour Temp.: Selects between Cool, Warm, or User color temperatures, allowing independent adjustment of red, green, and blue components in User mode.
  • OSD Settings: Configures OSD language, horizontal/vertical position, display time, and transparency.
  • Image Auto Adjust & Color Auto Adjust: Automatically adjusts image position, focus, clock, and white balance (VGA signal only).
  • Reset: Restores factory settings.
  • Signal Source: Manually selects the input source (VGA / HDMI).
  • Eye Saver: Reduces blue light emissions for viewing comfort.
  • Mute & Volume: Controls monitor sound (HDMI signal only).

Maintenance Features

Proper maintenance ensures the longevity and optimal performance of the monitor. Before cleaning, always unplug the unit from the mains socket.

  • Cleaning the Unit: Use a soft, dry cloth to wipe dust from the screen and surfaces. For extremely dirty surfaces, a cloth slightly dampened with soapy water can be used, ensuring it's wrung out until almost dry. Avoid excess water on the screen and allow any dampness to evaporate before switching the monitor on.
  • Prohibited Cleaning Agents: Never use alcohol, benzine, paint-thinner, cleaning fluid, or other chemicals, as these can damage the unit's surface. Do not use compressed air to remove dust.
  • General Safety: The unit does not contain user-serviceable parts; all maintenance work should be performed by qualified personnel. Fixed covers should not be opened to avoid exposure to dangerous voltages.
  • Power Management: To prevent unnecessary energy consumption and ensure safety, never leave the unit switched on unattended for long periods. Disconnect the mains plug from the mains socket when not in use for extended periods (e.g., overnight, holidays). The power button only switches the monitor to standby; to completely disconnect power, remove the mains plug.
  • Cable Care: Ensure the unit or stand does not rest on the mains cable, as this can cause damage. Handle the power cord by the plug, and never pull the cord to unplug the monitor. Avoid touching the power cord/plug with wet hands. Do not knot the power cord or tie it with other cords. A damaged mains cable must be replaced by the manufacturer, service agent, or similarly qualified persons.
  • Screen Burn Prevention: As with other display technologies, displaying the same image for a long time can cause a permanent after-image (screen burn). To prevent this, especially when viewing static images for extended periods, reduce contrast and brightness. Screen burn is irreversible once it occurs.
  • Ventilation: Maintain a minimum distance of 5 cm around the unit for sufficient ventilation to prevent overheating. Do not obstruct ventilation vents with curtains or other materials. Avoid installing the unit in confined spaces like bookcases or built-in cabinets.
  • Environmental Conditions: The monitor should be placed on a flat, stable surface, away from vibrations, extreme temperatures (hot or cold), direct sunlight, and heat sources. It is designed for use at altitudes less than 2000 meters in dry locations with moderate or tropical climates.
  • Liquid Exposure: To reduce the risk of fire, electric shock, or product damage, do not expose the unit to rain, moisture, dripping, or splashing. No objects filled with liquids should be placed on the unit. If liquid spills into the unit, switch it off immediately, withdraw the mains plug, and consult your dealer.
  • Lightning Storms: Unplug the unit from the mains socket during lightning storms.

JVC LT-27CM69B Specifications

General IconGeneral
Screen Size27 inches
Aspect Ratio16:9
Response Time8 ms
Viewing Angle178° (H) / 178° (V)
Display TypeLCD
Contrast Ratio1000:1 (Typical)
ConnectivityHDMI, VGA
Input PortsHDMI, VGA

Related product manuals