Do you have a question about the JVC RX-307TN and is the answer not in the manual?
Find a suitable place for the receiver, considering temperature, ventilation, and interference.
Instructions for safely connecting the power cord to the receiver and outlet.
Important precautions for handling the receiver to avoid damage or hazards.
Control equipment without a remote sensor using the receiver's remote sensor.
Automatic switching of source equipment to PLAY mode when activated.
Start tape recording automatically with CD player or turntable.
Control CD auto-changer power with the receiver via COMPU LINK-3.
Connect turntable audio outputs to the PHONO jacks on the receiver.
Connect CD player audio outputs to the CD jacks on the receiver.
Connect tape deck audio IN/OUT to TAPE 1 jacks for recording and playback.
Connect second tape deck or VCR/TV audio IN/OUT to TAPE 2/VIDEO SOUND jacks.
How to correctly connect speaker wires to the receiver's terminals.
Connect the first pair of speakers to the receiver's Speaker 1 terminals.
Connect the second pair of speakers to the receiver's Speaker 2 terminals.
Instructions for setting up and connecting the included AM loop antenna.
Connecting an optional AM outdoor antenna for improved reception.
Guide for connecting an FM antenna using a 75-ohm coaxial cable.
Guide for connecting an FM antenna using a 300-ohm flat cable.
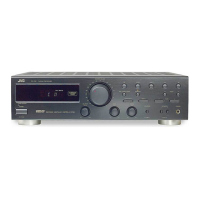
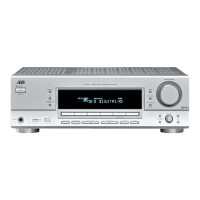
Turns the receiver on/off or sets it to standby mode.
Selects which speaker pair(s) are active: Speakers 1 and/or Speakers 2.
Port for private listening with stereo headphones.
Choose the audio source to listen to (PHONO, CD, FM, AM, TAPE 1, TAPE 2).
Lights indicate which audio source is currently selected and active.
Indicates when the surround sound effect is turned on.
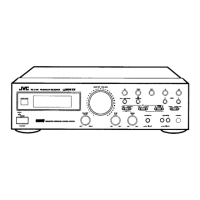
Shows tuning information, station presets, and status.
Indicates received signals for remote control and standby status.
Receives signals from the remote control unit.
Adjusts the low-frequency (bass) sound response.
Adjusts the high-frequency (treble) sound response.
Adjusts the volume balance between left and right speakers.
Adjusts the overall listening volume and indicates volume level.
Buttons used to tune AM/FM stations and set presets.
Engages or disengages the surround sound effect.
Steps to turn on the receiver and select speaker outputs.
How to choose and listen to different audio sources.
Using volume, balance, and treble/bass controls for sound adjustment.
Manual tuning and auto-tuning methods for AM and FM stations.
Storing up to 40 AM/FM stations for quick recall using channel numbers.
Automatically scans and presets stations into memory.
Using numeric keys to select and play preset radio stations.
Instructions for recording audio from various sources onto tape.
Using a three-head tape deck to monitor recordings in progress.
Enabling surround sound effects for a more immersive audio experience.
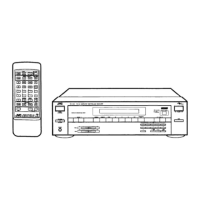
Aiming the remote, key functions, and operational notes for VCR/TV.
Adjusting volume levels and using the fade mute function.
Using source select and function keys for AM/FM tuning and presets.
Using source select and function keys for turntable playback and stop.
Operating CD players and auto-changers using source/control keys.
Using source select and function keys for TAPE 1 playback, recording, and rewinding.
Operating the VCR using control section keys for playback and recording.
Instructions for replacing batteries in the remote control unit.
Solutions for common problems like no sound, one speaker, or reception hiss.