1-14 (No.MB393)
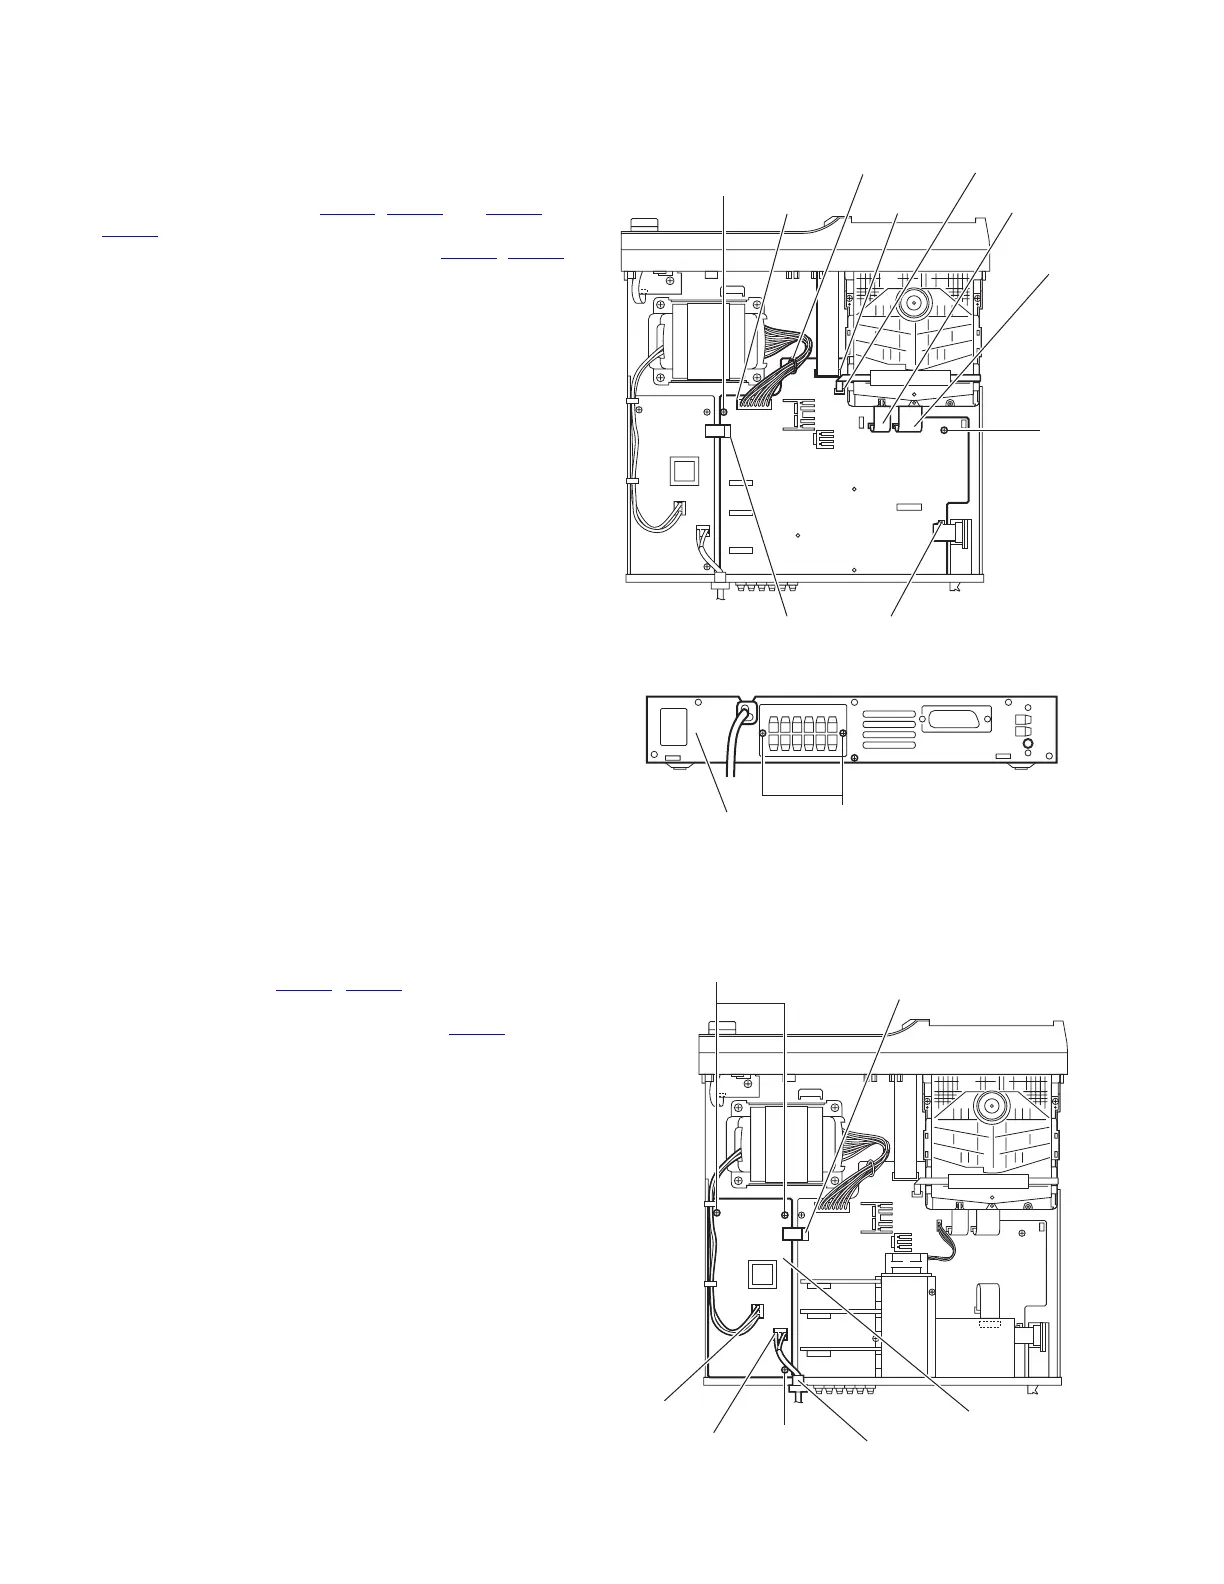
3.1.9 Removing the main board
(See Figs.14 and 15)
• Remove the metal cover, scart terminal board and heat sink
with power amp. boards.
(1) From the top side of the main body, disconnect the card
wires from the connectors CN400
, CN401 and CN403 to
CN405
, on the main board. (See Fig.14.)
(2) Disconnect the wires from the connectors CN102, CN950
on the main board. (See Fig.14.)
Reference:
After connecting the wires, fix the wires with the wire
clamp.
(3) Remove the two screws P attaching the main board to the
chassis base. (See Fig.14.)
(4) From the back side of the main body, remove the two
screws Q attaching the main board to the rear panel. (See
Fig.15.)
(5) Take out the main board from the main body.
Fig.14
Fig.15
3.1.10 Removing the transformer board
(See Fig.16)
• Remove the metal cover.
(1) From the top side of the main body, disconnect the wires
from the connectors CN950
, CN952 on the transformer
board.
(2) Disconnect the wires from the connectors CN101
on the
main board.
(3) Remove the three screws R attaching the transformer
board.
(4) Take out the transformer board from the main body.
Fig.16
CN950 CN401
CN102 CN400
CN405
CN403
CN404
Wire clamp
P
P
Rear panel
Q
Power cord
Transformer board
CN950
CN952
CN101
R
R
 Loading...