1-24 (No.MB260)
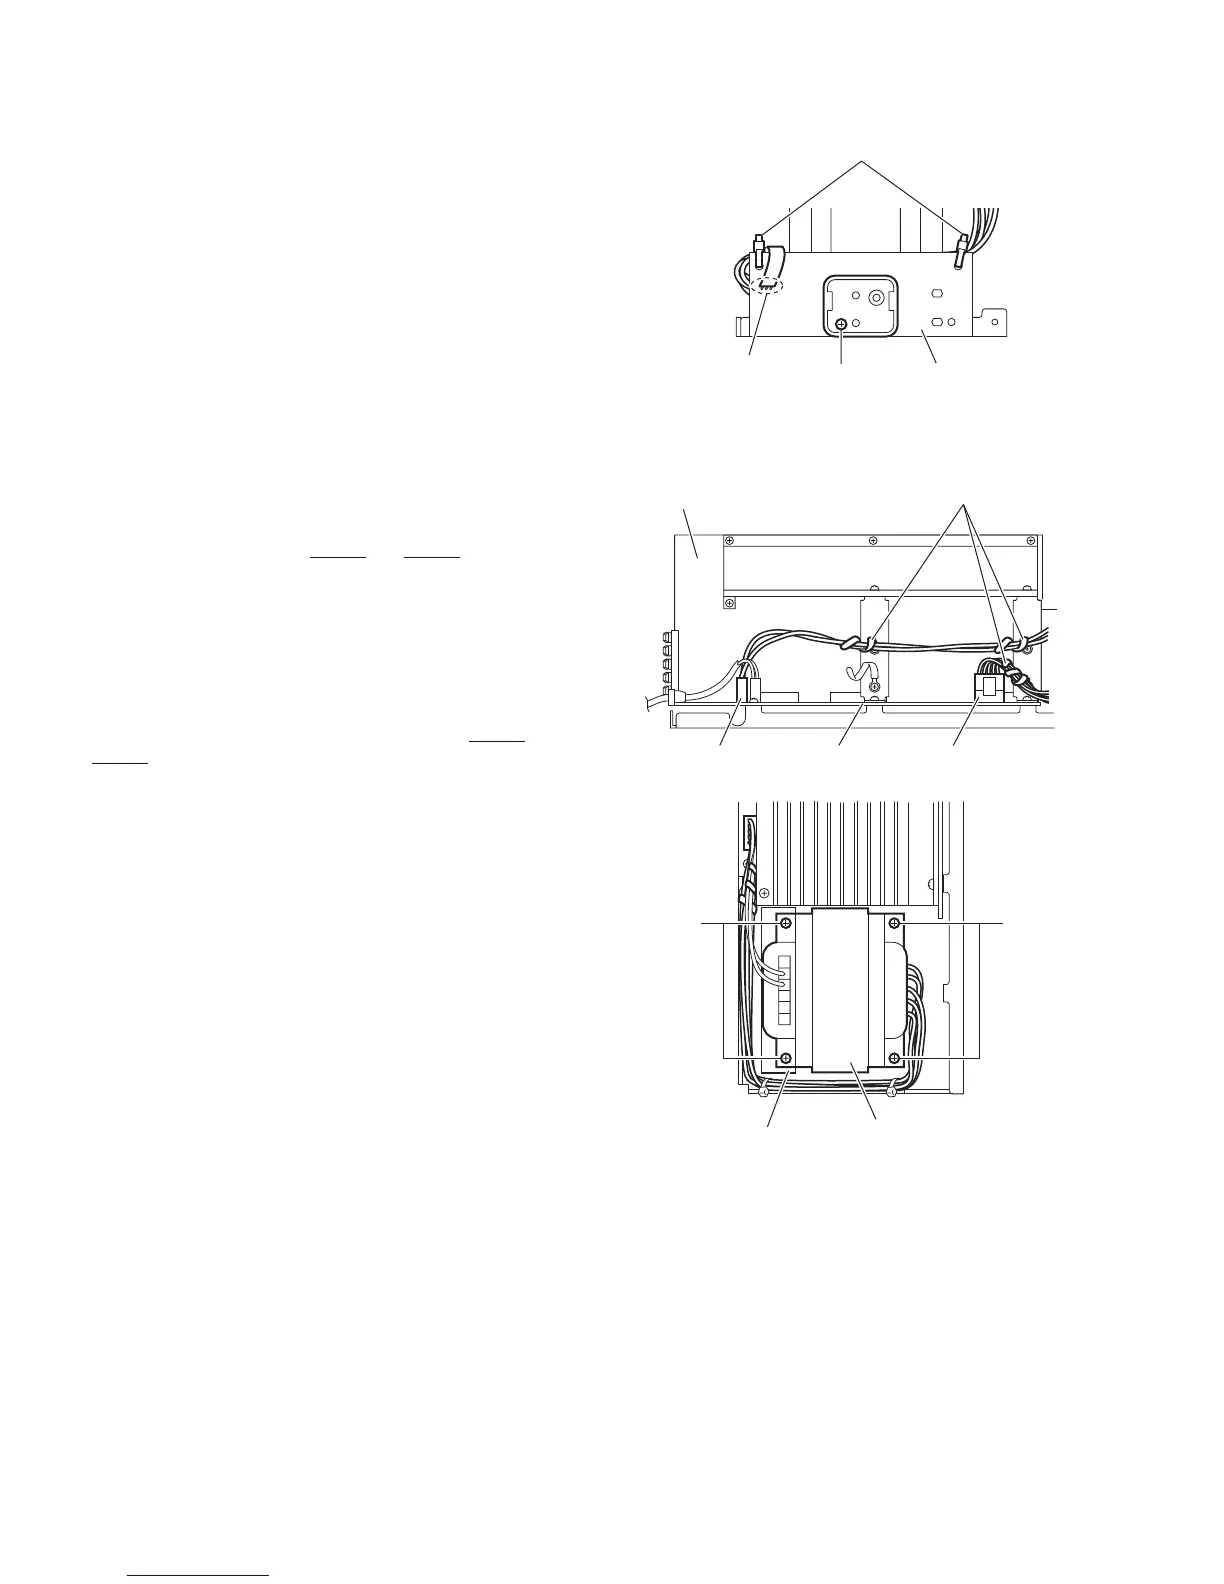
3.4.9 Removing the LED board
(See Fig.13)
• Prior to performing the following procedures, remove the am-
plifier assembly and rear panel.
(1) From the front side of the amplifier assembly, cut off the tie
bands.
(2) Remove the screw N attaching the LED board.
(3) From the reverse side of the LED board, remove the solder
from the solder point b on the LED board.
Fig.13
3.4.10 Removing the power transformer
(See Figs.14 and 15)
• Prior to performing the following procedures, remove the am-
plifier assembly and rear panel.
(1) From the top side of the amplifier assembly, disconnect the
wires from the connectors CN102
and CN151 on the moth-
er board. (See Fig.14)
(2) Remove the four screws P attaching the power transform-
er, and take out the power transformer from the amplifier
assembly. (See Fig.15)
Reference:
• When attaching the power transformer, attach the screws P
with the barrier. (See Fig.15)
• After connect the wires from the connectors CN102
and
CN151
, bundle the wire by the wire clamp. (See Fig.14)
Fig.14
Fig.15
Tie bands
LED board
Solder point b
N
CN151
CN102 Mother board
Wire clamp
Amplifier assembly
Power transformer
Barrier
P
P
 Loading...