EasyManua.ls Logo

JVC videomovie GR-65 - INSERT EDITING; Locating and Performing Insert Edits; AUDIO DUBBING AND RECORDER USE; Audio Dubbing Procedure

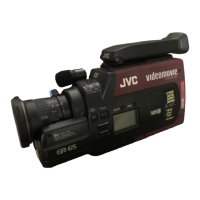
JVC videomovie GR-65
18 pages
To Next Page IconTo Next Page
To Previous Page IconTo Previous Page
Loading...
ENGLISH
a
INSERT
EDITING
Insert
editing
means
recording
a
new
scene
into
a
section
of
prerecorded
tape
so
that
a
part
of
the
original
record-
ing
can
be
replaced
with
a
new
sequence
without
excessive
picture
distortion
at
the
edit-in
and
edit-out
points.
In
the
insert
Edit
mode,
the
original
audio
on
the
normal
audio
track
remains
unchanged.
1
Locate
the
desired
edit-out
point
on
the
Video-
Movie's
tape
and
press
PAUSE/STILL.
2
Press
RESET
to
obtain
a
"0"
reading,
then.
press
MEMORY
to
obtain
an
'’M”
indication
on
the
LCD.
3
Press
REW/SHUTTLE
SEARCH
to
rewind
the
tape
a
little
beyond
the
beginning
of
the
scene
your
wish
to
insert.
Press
PAUSE/STILL
exactly
at
the
beginning
of
the
scene
you
wish
to
insert.
Notes:
While
holding
INSERT/MONI!TOR
pressed,
press
PAUSE/STILL.
The
INSERT
indicator
lights
and
the
VideoMovie
enters
the
Insert
Edit
mode
with
the
scene
at
which
the
VideoMovie
is
aimed
ap-
pearing
on
the
screen
for
monitoring.
Press
Recording
start/stop
to
insert
the
new
sequence.
When
the
counter
reading
of
‘0’
is
reached,
in-
sert
editing
stops
automatically
and
the
Video-
Movie
enters
the
Playback
mode.
@When
the
tape
reaches
the
preset
edit-out
point
during
the
editing
operation,
it
may
stop
slightly
before
or
after
the
designated
point
on
the
tape.
@Only
video
signals
are
recorded
in
the
Insert
Editing
mode.
When
the
sound
is
to
be
recorded,
press
the
AUDIO
DUB
and
PAUSE/STILL
buttons
simultaneously
in
the
Insert
Pause
mode.
When
INSERT/MONITOR
and
PAUSE/STILL
buttons
are
pressed
simultaneously
again,
the
unit
reenters
the
video-signal-only
recording
mode.
AUDIO
DUBBING
Audio
dubbing
means
recording
a
new
soundtrack
on
a
pre-recorded
tape,
i.e.,
replacing
the
original
sound
with
new
audio
material.
Locate
the
desired
edit-out
point
on
the
Video-
Movie's
tape
and
press
PAUSE/STILL.
Press
RESET
to
obtain
a
'’0"'
reading,
then
press
MEMORY
to
obtain
an
''M"
indication
on
the
LCD.
Press
REW/SHUTTLE
SEARCH
to
locate
more
quickly
the
place
on
the
tape
you
want
audio
dubbing
to
begin.
Precautions
@Tapes
with
their
safety
tabs
removed
cannot
be
audio
dubbed.
Reseal
the
safety
tab
slot
to
perform
,
the
dubbing.
@lf
whistling
or
howling
is
heard
during
audio
dub-
bing,
reduce
the
TV
volume
or
move
the
mike
farther
away
from
the
TV.
@When
dubbing
from
a
microphone
Connect
the
microphone
to
the
VideoMovie
as
shown
on
the
left.
4
Press
PAUSE/STILL
at
the
exact
beginning
point
for
audio
dubbing.
While
pressing
AUDIO
DUB,
press
PAUSE/
STILL
to
enter
the
Audio
Dub
Standby
mode.
press
PLAY
to
begin
audio
dubbing.
When
the
counter
reading
of
‘’0"’
is
reached,
audio
dubbing
stops
automatically
and
the
Video-
Movie
enters
the
playback
mode.
6
When
you
are
ready
with
the
new
audio
material,
USING
WITH
ANOTHER
RECORDER
For
continuous
documentation
of
longer
events,
the
GR-65E
can
be
used
as
an
independent
video
camera
in
com-
bination
with
either
a
deck-type
or
portable
video
recorder.
Using
a
recorder
not
equipped
with
a
remote
pause
terminal
®Connect
the
AV
OUT
connector
of
the
GR-65E
to
the
A/V
IN
connector
of
the
video
recorder
using
the
pro-
vided
AV
output
cable
VC-V8961SE.
Operation
1,
Press
the
INSERT/MONITOR
button.
The
camera
output
signal
is
now
available
via
the
AV
output
cable.
2.
Put
the
connected
recorder
in
Keep
the
remote
pause
To
A/V
IN
the
Record
mode.
Recording
jug't
6
Pa
Plug
inserted
-
connector
will
start.
Tape
start/stop
should
VC-VBD6ISE
be
controlled
with
the
recorder’s
SennactOr
AV
output
cable
(provided)
buttons.
Note:
®in
this
configuration,
it is
possible
to
obtain
a
continuous
recording
and
an
edited-out
recording
of
the
same
event
simultaneously,
because
the
GR-65E’s
start/stop
button
only
controls
the
tape
inside
itself
while
another
tape
loaded
in
the
connected
recorder
continues
running.
To
record
on
the
GR-65E’s
tape,
follow
the
same
recording
procedure
as
described
before:
press
REC
Standby
and
then
the
start/stop
button.
Using
a
recorder
equipped
with
a
remote
pause
terminal
or
with
a
10-pin
camera
connector
For
a
recorder
with
a
remote
pause
terminal
®@Connect
the
AV
OUT
connector
of
the
GR-65E
to
the
A/V
IN
connector
and
remote
pause
terminal
of
the
video
recorder
using
the
provided
AV
output
cable
VC-V8961SE.
For
a
recorder
with
a
10-pin
camera
connector
®@Connect
the
AV
OUT
connector
of
the
GR-65E
to
the
10-pin
camera
connector
of
the
second
recorder
using
the
optional
VC-V810U
conversion
cable.
Operation
1.
Press
the
INSERT/MONITOR
button.
2.
Set
the
connected
recorder
in
the
Recording
Standby
(Record-
10-pin
camera
@
Pause)
mode.
connector
3.
Press
the
start/stop
button
of
the
GR-65E
to
start
recording.
®
REMOTE
PAUSE
{
terminal
VC-V810U
Conversion
cable
connector
.
(optional)
VC-V8961SE
AV
output
cable
{provided)
To
AV
OUT
connector
To
AV
OUT
connector
Note
®@To
record
on
the
GR-65E’s
tape
as
well,
press
the
REC
standby
button
and
then
the
start/stop
button.
Precautions
®@Power
is
not
supplied
to
the
GR-G5E
from
the
connected
VCR.
Independent
power
supply
is
required
for
both
the
GR-65E
and
the
VCR.
if
you
stop
recording
by
pressing
the
GR-65E's
start/stop
button,
the
connected
VCR
also
stops
in
the
Pause
mode.
However,
the
pause
command
signal
is
not
delivered
to
the
connected
VCR
in
the
following
cases
and,
therefore,
the
VCR
will
start
automatically:
{1}
when
the
GR-65E
is
switched
off
or
its
battery
becomes
discharged.
(2)
when
the
VC-V810U
cable
is
disconnected.
Therefore,
before
replacing
the
battery
or
tape
for
the
GR-65E
put
the
connected
VCR
either
in
the
STOP
or
REC.
LOCK
mode.
=
wn
a
o
=
Ww
26

Related product manuals