EasyManua.ls Logo

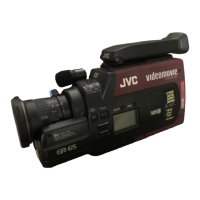
JVC videomovie GR-65 - ACCESSORIES AND SPECIAL MODES; Battery Charging and Remote Control; Animation Functionality

JVC videomovie GR-65
18 pages
To Next Page IconTo Next Page
To Previous Page IconTo Previous Page
Loading...
CHARGING
THE
BATTERY
PACK
To
charge
the
battery
pack,
use
the
exclusive
AC
power
adapter/battery
charger
AA-V6EG
(provided/optional)
or
car
battery
charger
BH-V5E
(optional),
Note:
The
AA-V6EG
AC
power
adapter/battery
charger
will
accept
110
V
to
240
V
power
supplies.
Selection
is
auto-
matic
and
no
adjustment
is
required.
A
WORD
ON
THE
EXCLUSIVE
BN-VSGU/V6GU/V7GU
BATTERY
PACKS
ENGLISH
The
BN-V5GU/V6GU/V7GU
are
nickel-cadmium
batteries.
Give
attention
to
the
following
to
make
the
most
of
their
characteristics.
Temperature
ranges-
The
recharging
time
is
based
on
room
temperature
of
20°C.
The
lower
the
temperature,
the
longer
the
recharging
time.
Do
not
Forcharging:
10°C
to
35
°C
short-circuit
For
operating:
0°C
to
40°C
For
storing:
-10°C
to
30°C
‘Terminals
The
battery
pack
has
been
kept
in
the
uncharged
state
for
shipment.
Therefore,
before
use,
charge
it.
BE
SURE
TO
CAREFULLY
READ
THE
CAUTION
ATTACHED
TO
THE
BATTERY
PACK.
Charging
procedure
Charging
time
PRECAUTIONS
elf
used
near
a
radio,
the
provided
AA-V6EG
AC
Power
adapter/battery
charger
may
interfere
with
reception.
@Prevent
inflammables,
water
and
metallic
objects
from
entering
the
unit.
®Do
not
disassemble
or
modify
the
unit.
®Do
not
apply
shocks
to
the
unit.
®Do
not
subject
the
unit
to
direct
sunlight.
®Avoid
using
the
unit
in
extremely
hot
or
humid
places,
@
Avoid
using
the
unit
in
places
subject
to
vibrations.
BN-V6GU
70
min.
®@The
charging
time
differs
depending
on
the
ambient
temperature
and
the
condition
of
the
battery
pack.
Note:
The
optional
BH-VSE
Car
Battery
Charger
can
charge
the
batteries
from
a
car
battery.
For
details
refer
to
the
instructions
of
the
BH-V5E.
Connect
the
AC
power
cord
to
a
wall
outlet
(The
POWER
indicator
wil!
light.)
Recording
time
for
the
GR-65E
BN-V5GU
25
min.
BN-V6GU
60
min.
y
Align
the
marks
on
the
battery
pack
and
adapter.
BN-V7GU
80
min.
ce]
Slide
the
battery
pack
in
the
direction
of
the
GIT
ONE
TV
CLOCKS
(1
PLACE,
~The
recording
ume
per
charge
Is
influenced
by
the
duration
of
recording
standby,
frequency
of
zoom-
When
charging
is
completed,
the
CHARGE
indi-
ing,
etc.
It
is
safer
to
have
spare
battery
packs.
cator
that
is
red
turns
green.
rz]
USING
THE
REMOTE
CONTROL
UNIT
(optional)
The
remote
contro!
unit
RM-V15U
(optional)
permits
VCR
functions
to
be
controlled
from
a
distance.
AUDIO
DUB
button
@EDIT
button
INSERT
REC
button
e@POWER
button
@REW
button
®@PLAY
button
Press
for
playback.
To
enter
Rec
mode,
Press
together
with
REC
button.
@FF
button
@ANIM
button
Press
for
the
animation
function
@START/STOP
button
Animation
function
The
Rehearsal
mode
cannot
be
engaged
using
this
unit.
@Plug
the
remote
control
cable
of
the
remote
control
unit
into
the
remote
connector
on
the
VideoMovie,
Unless
otherwise
specified,
the
controls
on
the
remote
control
unit
function
exactly
as
those
on
the
Video-
Movie.
VISS
button
This
button
does
not
function
with
this
VideoMovie.
REC
button
Press
together
with
PAUSE/STILL
button
to
enter
Rec
Standby
mode,
then
press
PLAY
to
begin
recording.
PAUSE/STILL
button
Press
together
with
the
INSERT
REC
button
for
insert
re-
cording.
Press
this
button
to
pause
during
recording
and
playback
as
well,
STOP
button
Animation
produces
the
illusion
of
movement
in
otherwise
stationary
scenes
or
objects.
This
technique
is
ac-
complished
by
shooting
a
series
of
slightly
different
pictures
of
the
same
scene
or
slightly
different
poses
of
the
same
object
for
a
brief
period
of
about
1/2
second.
Operation
1.
With
the
VideoMovie
in
the
Record-Pause
mode.
2.
Press
the
ANIM
button
of
the
remote
control
unit
RM-V
15U.
@Recording
mode
indicator
and
Pause
mode
in-
dicator
blinks
alternately
on
the
VideoMovie's
LCD.
3.
Press
the
Recording
Start/Stop
button
or
Play
but-
ton
after
focusing
the
camera
on
a
subject.
4.
Recording
stops
automatically
in
the
Record-Pause
mode
after
about
1/2
second,
5.
Repeat
step
3
for
the
required
number
of
shots.
6.
Playback
the
recorded
series
to
check
if
results
were
satisfactory.
Notes:
@The
Animation
mode
can
only
be
engaged
from
the
Record-Pause
mode.
®@Before
recording
in
the
Animation
mode
at
the
very
beginning
of
a
tape,
set
the
VideoMovie
to
the
Record
mode
for
about
5
seconds,
in
order
that
the
tape
runs
smoothly.
Using
the
Fadein
function
at
this
point
is
a
good
way
to
begin
an
animated
pro-
gramme.
®During
an
Animation
sequence,
fading
cannot
be
engaged.
@Release
the
Animation
mode
by
pressing
the
ANIM
button
or
the
STOP
button.
@if
recorded
background
sound
is
undesirable,
use
the
Audio
Dubbing
function
to
erase
or
replace
it.
@When
playing
back
an
animated
recording,
the
colour
may
be
unstable
with
same
TVs.
ENGLISH
28

Related product manuals