EasyManua.ls Logo

Kaba Saflok MT RFID User Manual

Kaba Saflok MT RFID
8 pages
To Next Page IconTo Next Page
Page #1 background imageLoading...
Page #1 background image
MT
RFID Installation Instructions
All parts needed to install the MT™ RFID lock are included with each unit. Please check to make
sure all parts are accounted for before beginning installation. Do not substitute any of the parts.
The use of substitute parts will result in poor performance of the lock.
All information contained herein, including but not limited to product pricing and other intellectual property, is confidential and
intended for the sole use of the addressee(s) so named. Any misuse of this confidential information contained herein may result in
legal action by Computerized Security Systems dba SAFLOK and its parent company.
Optional
Communication
Modules
I/S Chassis Assembly
I/S Escutcheon
30320-H-Color — Assy, Strike, Buttons
A29030-Color — Screw Pack,
MT Universal 1-3/4 — 2-1/4
Mortise (see Mortise Options table)
51190-Color — Outside Front
A23390
(optional gasket for exterior use)
A21290-X-X-Color — O/S Housing Assy, MT RFID w/USB
A70000-Handing
Mortise, 1-3/4
A70020-Handing
Mortsie, 1-3/4
ADB
A70080-Handing
Mortise, 1-3/4
ADB, DAJ2
A70060-Handing
Mortise, 1-3/4
STD, DAJ2
Mortise Options
Question and Answer IconNeed help?

Do you have a question about the Kaba Saflok MT RFID and is the answer not in the manual?

Kaba Saflok MT RFID Specifications

General IconGeneral
TypeElectronic Door Lock
TechnologyRFID
Power SupplyBattery
Access MethodRFID card/key fob
MaterialZinc Alloy
DimensionsVaries by model. Specific dimensions should be checked for each specific lock model
Security LevelHigh
CompatibilityKaba Saflok system
Operating Temperature-20°C to 60°C
FinishSatin Chrome

Summary

Preparing the door and door frame

Door Preparation using Template or Drill Fixture

Instructions for door preparation using templates or drill fixtures.

Door Frame Preparation and Strike Plate Installation

Steps for preparing the door frame and installing the strike plate.

Installing the lock trim

Position Outside Trim and Route Cables

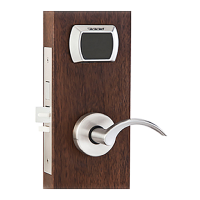
Place outside trim and route reader ribbon and power wires.

Route Inside Trim Wiring and Position

Route wires through inside trim and position it.

Secure Inside Trim and Check Levers

Secure inside trim, check lever operation, and tighten screws.

Battery Pack Installation and Wire Connection

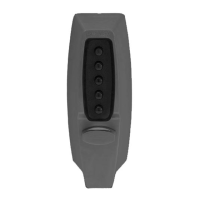
Place battery pack and connect necessary wires to PCB.

Testing Lock Functionality

Construction Key Functionality Test

Test functionality with a construction key and observe LED indicators.

Interpreting LED Flash Codes for Troubleshooting

Understand LED flash patterns for troubleshooting electronic functions.

SAFLOK Door Unit Inspection Criteria

Appearance and Finish Inspection

Check for blemishes, straight mounting, and flush edges.

Lock Mechanism Functionality Check

Verify proper rotation, dead bolt operation, and latch engagement.

Electronic and Keycard System Verification

Test LED indicators and keycard recognition.

Door and Jamb Fitment Assessment

Ensure smooth door closing, dead bolt extension, and minimal jamb spacing.

Related product manuals