710-II/740 SERIES INSTALLATION GUIDE • PK2710/08/02
Page 10
VII TEST THE OPERATION OF THE LOCK
Turn the inside lever downward. The latch bolt retracts fully.
If the latch does not retract, check that the handle, spindle and
latch hub are properly engaged.
If the lever does not rotate, the override cam has not been prop-
erly set for the handing of the lock (see section VI, step 1).
If the lever feels tight (hard to turn, or does not return easily to its
horizontal rest position), check the alignment of the lock assemblies.
Loosen the mounting screws and shift the inside housing slightly until the
friction is eliminated. If the problem persists, check the position of the
holes on the door (compared to the mortise).
Turn the thumbturn back and forth to extend and then retract the deadbolt.
The deadbolt extends fully and retracts without undue friction. If the
thumbturn does not operate the deadbolt, the spindle may not
have been properly aligned before installing the inside housing on the door
(see section VI, step 2).
Turn the thumbturn to extend the deadbolt again, then turn the inside lever
to retract the deadbolt. The deadbolt and the latch bolt retract simultane-
ously and fully without undue friction.
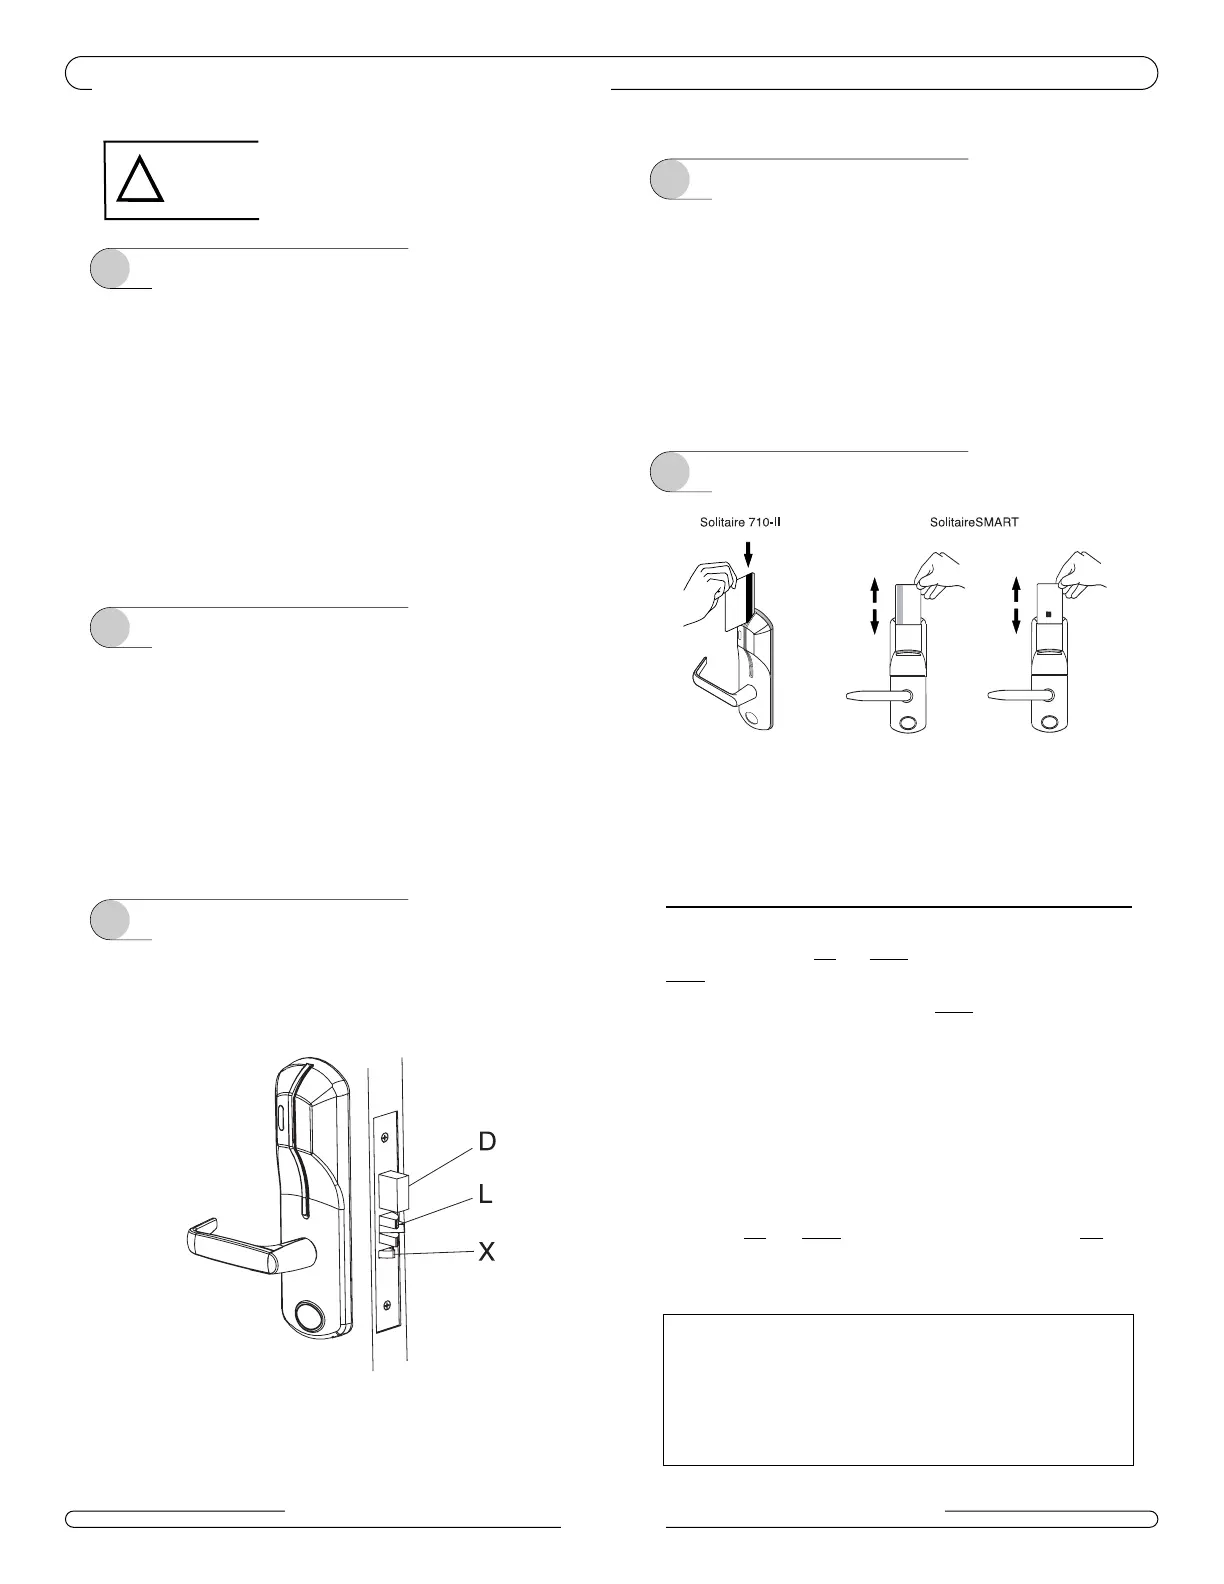
Press and hold the auxiliary bolt (X). The deadbolt (D) will extend auto-
matically. Keep the auxiliary bolt depressed, and turn the inside lever all
the way down and hold it there. The latch (L) and deadbolt will retract
together.
Release the auxiliary bolt, then let the inside lever return to a horizontal
position. The deadbolt will remain retracted, while the latch will extend.
1 Inside Lever
2 a Standard Deadbolt Mortise
2 b Autodeadbolt Mortise
3 Outside Lever
Turn the outside lever downward. The latch bolt does not retract.
If the latch bolt retracts, verify that the batteries are properly
installed and that the mortise handing corresponds to the lock handing.
If the lever feels tight (hard to turn, or does not return easily to its
horizontal rest position), check the alignment of the lock assemblies.
Loosen the mounting screws and shift the outside housing slightly until the
friction is eliminated. If the problem persists, check the position of the
holes on the door (compared to the mortise).
Test the lock’s response to keycards: a Test keycard, a Grand Master key-
card, and an Emergency keycard.
Insert keycards as shown above. For SolitaireSMART 740 series locks,
perform tests with both SMARTKeycards and magnetic stripe keycards.
A Test the Lock Before Programming
Normal Entry:
Verify that the deadbolt is retracted. Use the Test key-
card in the reader. The red and green LEDs each flash once and then the
green LED flashes for six seconds or until the outside lever is turned.
Turn the outside lever downward while the green LED is flashing. The latch
retracts fully. Release the lever, then turn it again. The latch must not
retract after the LED stops flashing without first inserting
the keycard.
If the lock does not respond to the keycard, verify that the
override cam has been properly set for the lock handing.
Privacy Switch:
Extend the deadbolt by turning the thumbturn
(standard mortise) or press the auxiliary latch then turn the thumbturn to
the horizontal position (autodeadbolt mortise). Use the Test keycard in the
reader. The red and green LEDs each flash once and then the red LED
flashes for six seconds. If the green LED flashes for six seconds
(when thumbturn is horizontal), the privacy switch is defective.
4 Electronics and Card Reader
Caution! Perform the following procedures in order,
with the door OPEN unless otherwise indicated.
!
If privacy is required when inside the room, with any mortise,
turn the thumbturn to the horizontal position. The deadbolt will
be extended and all management access except the Emergency
keycard or the emergency override mechanism will be locked
out. Turning the inside lever will retract the deadbolt and the
latch, and return the thumbturn to the vertical position.

 Loading...